FA: Back to Basics
While making the revisions to Crossroads in response to the play testing, I started making a bin list of things I just wasn’t quite happy with yet, but wasn’t sure how to address. They hadn’t been called out by anyone, but I knew they weren’t up to snuff, and since I wanted to submit the map to the Forgetacular contest, they’d need to be cleaned up.
I find that often just sitting on a problem for a while and letting it stew is more productive than tooling around in Forge trying to fix it, because I tend to think about logistical problems constantly. And that often leads to epiphanies (usually at work) about possible solutions. And so it was with a list of interrelated areas on the map: the bases, the corners the bases occupied, and the level below them. Each had problems, but as I revised the map after each play test, I was still unsure what to do about it. And so I let them stew a bit longer, until done. Fortunately, that wasn’t very long.
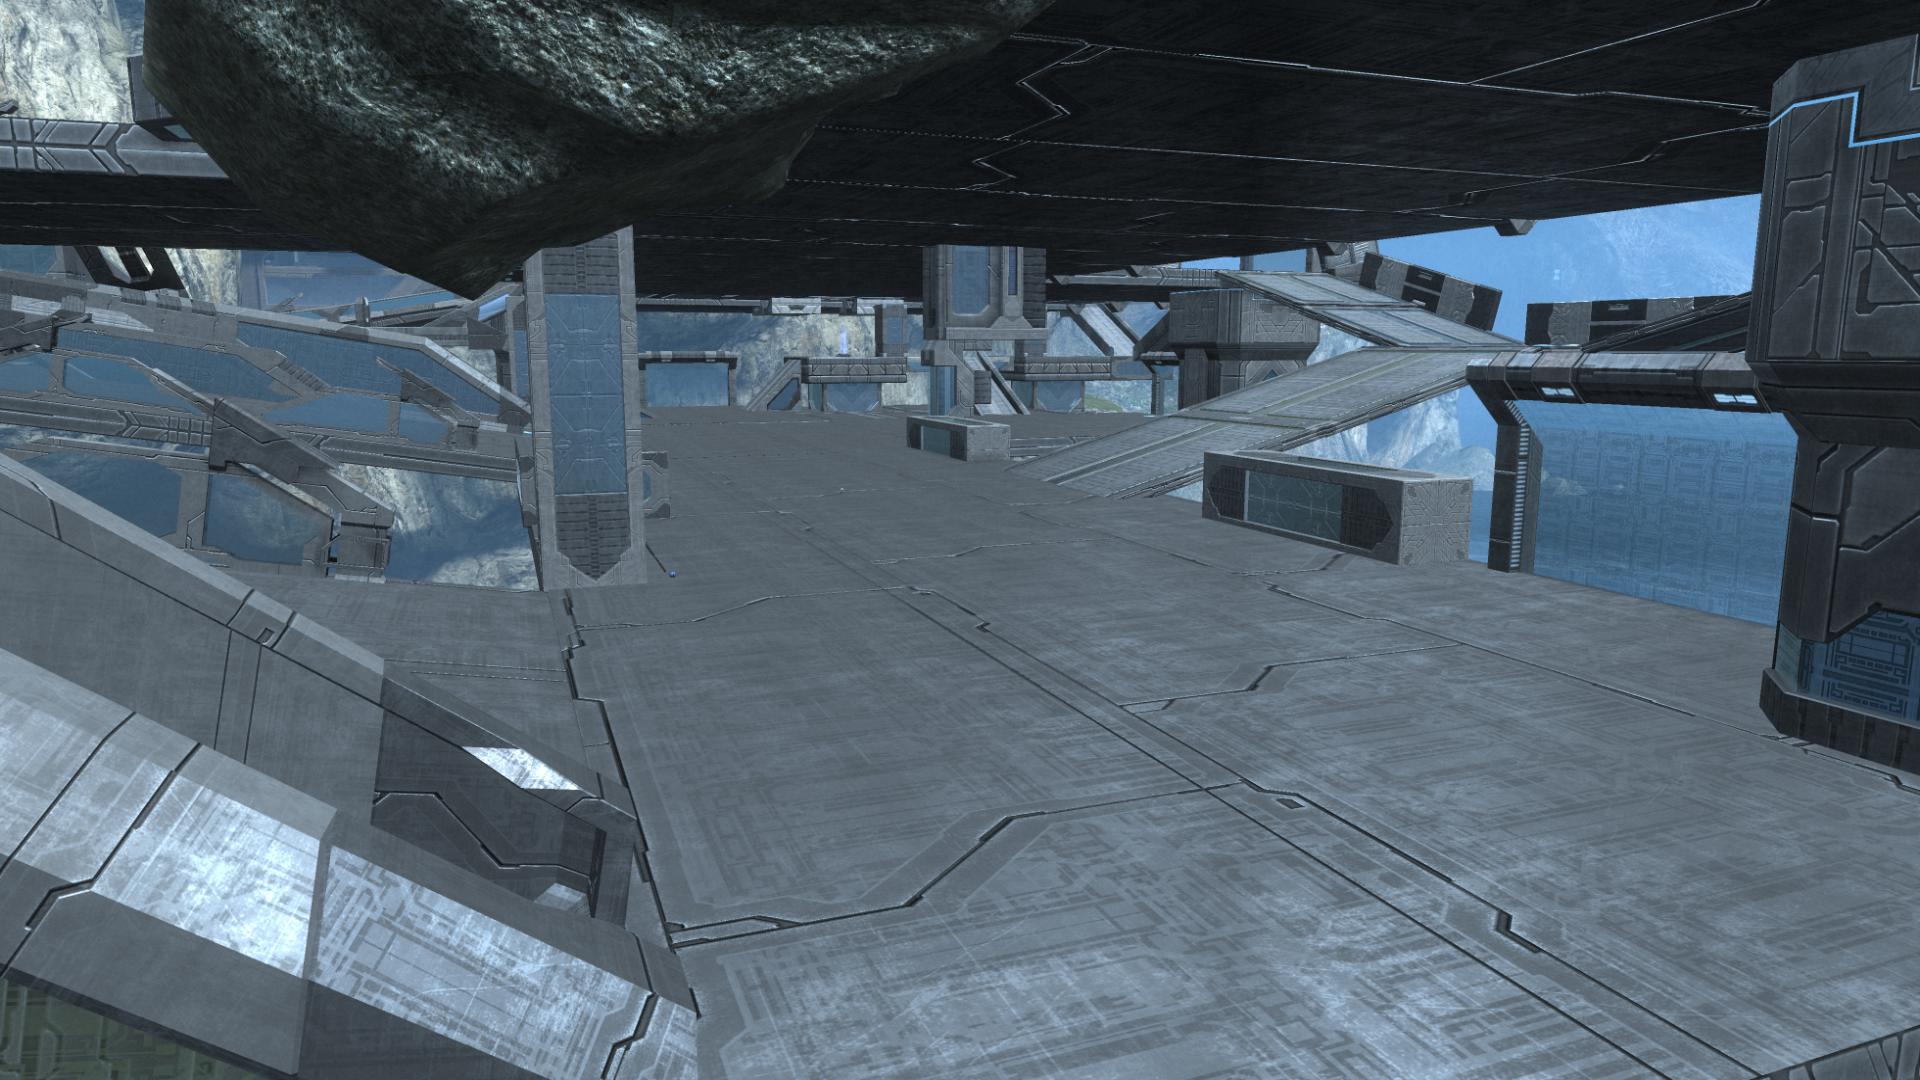
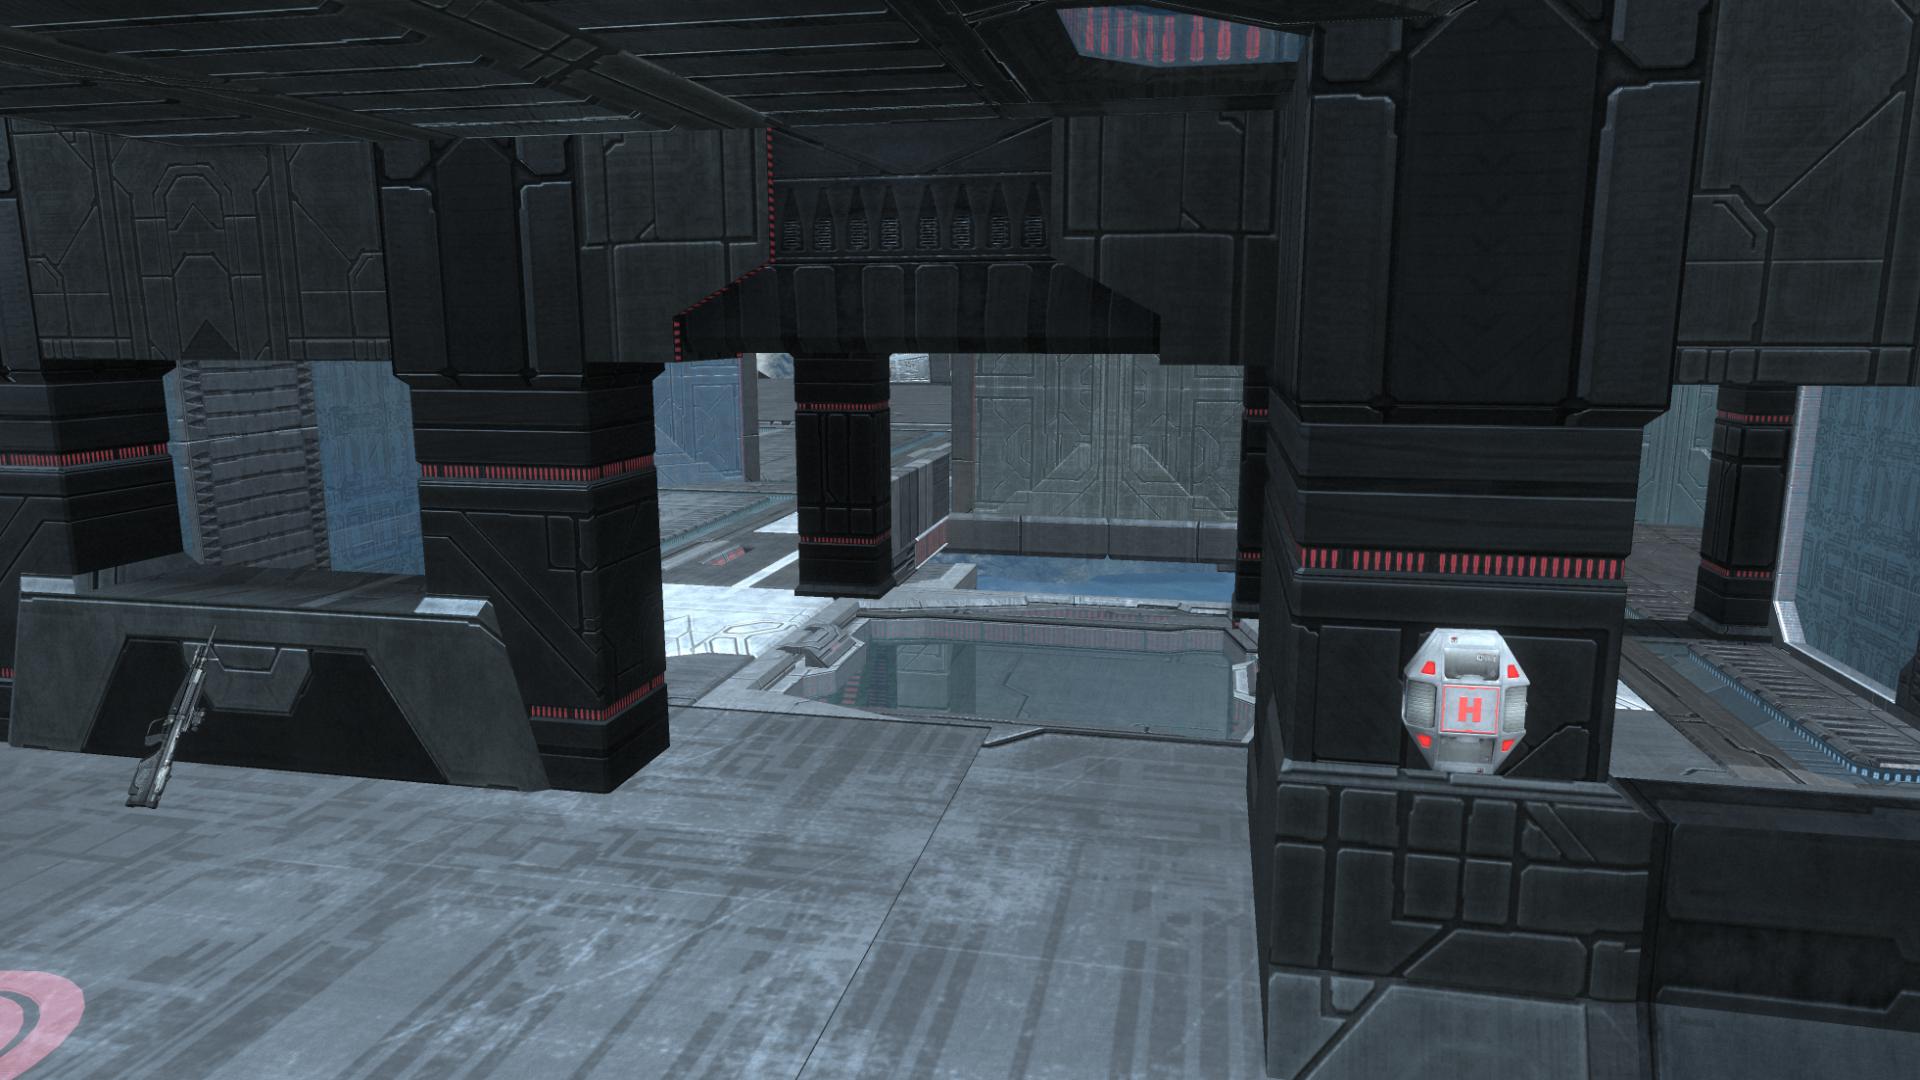
The bottom of the bases weren’t intended to be as they were. They were the vehicle garages I had wanted to use when I had the two-part base design, and when I merged the two parts together, I just put the garages under the main floor. But I ended up pulling the two main vehicles out of the garages, because it was too awkward for players to climb into them down there. (Well, that and I discovered that if you spawn a vehicle facing a cliff, people will get into the vehicle drive it straight over said cliff.) So they weren’t quite garages and weren’t quite rooms, and the result was a formless bottom level, consisting of bunch of pillars and open windows.
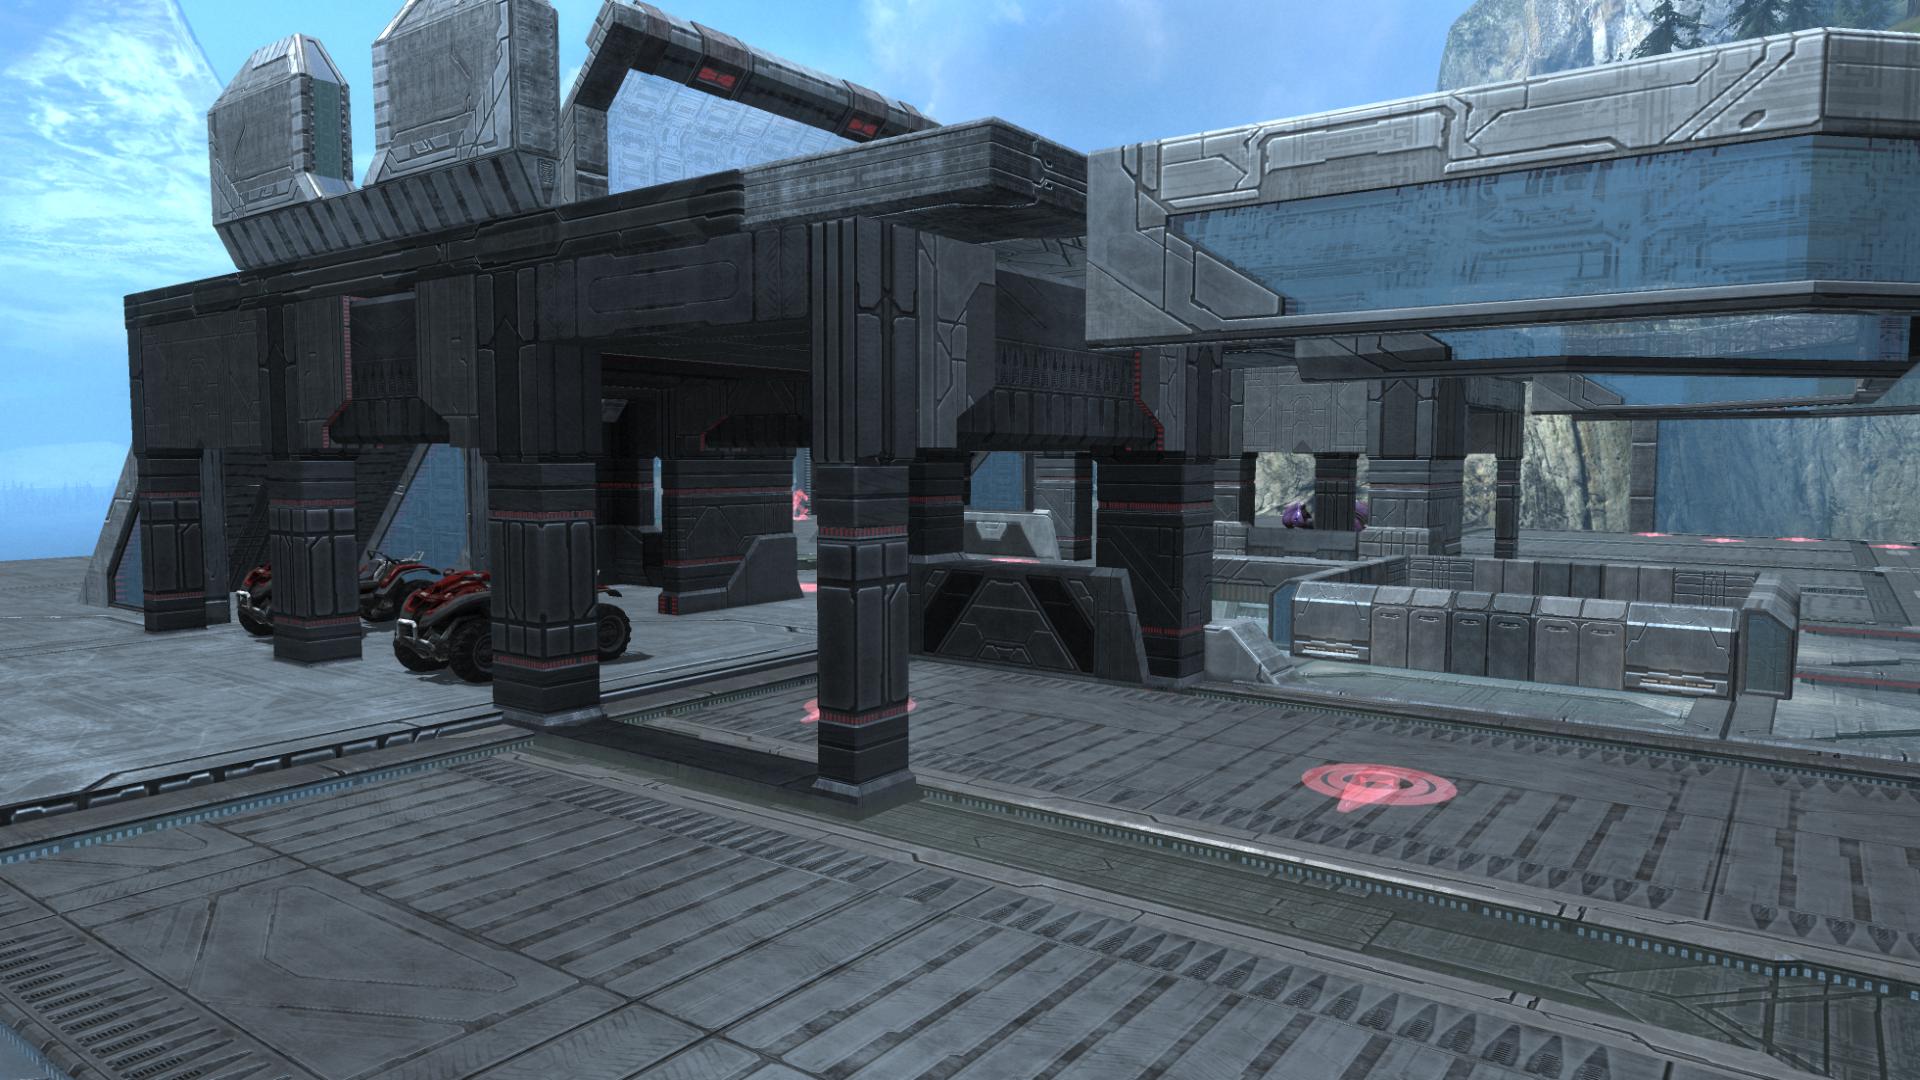
There was no form or shape to the lower level. Ideally, there should be a few specific ways in and out to control player movement and shape the encounters that take place there.
Just as problematic were the ridges on the window portion of the floor. I had used the window from the Decoration category because I used up all the actual Window and Door objects with the Coliseum pieces. But that meant the lower level had these chunks sticking up in the middle, which interfered with players as they moved through the center.

I had thought the back wall of the base area was sealed up tightly enough that vehicles wouldn’t spill over it. But on the last play test, I came around the corner in a Warthog and fishtailed right over the side. I keep telling myself, if the creator is driving off the map, that’s kind of a red flag, you know? So I needed a better way to seal up the back area more tightly.
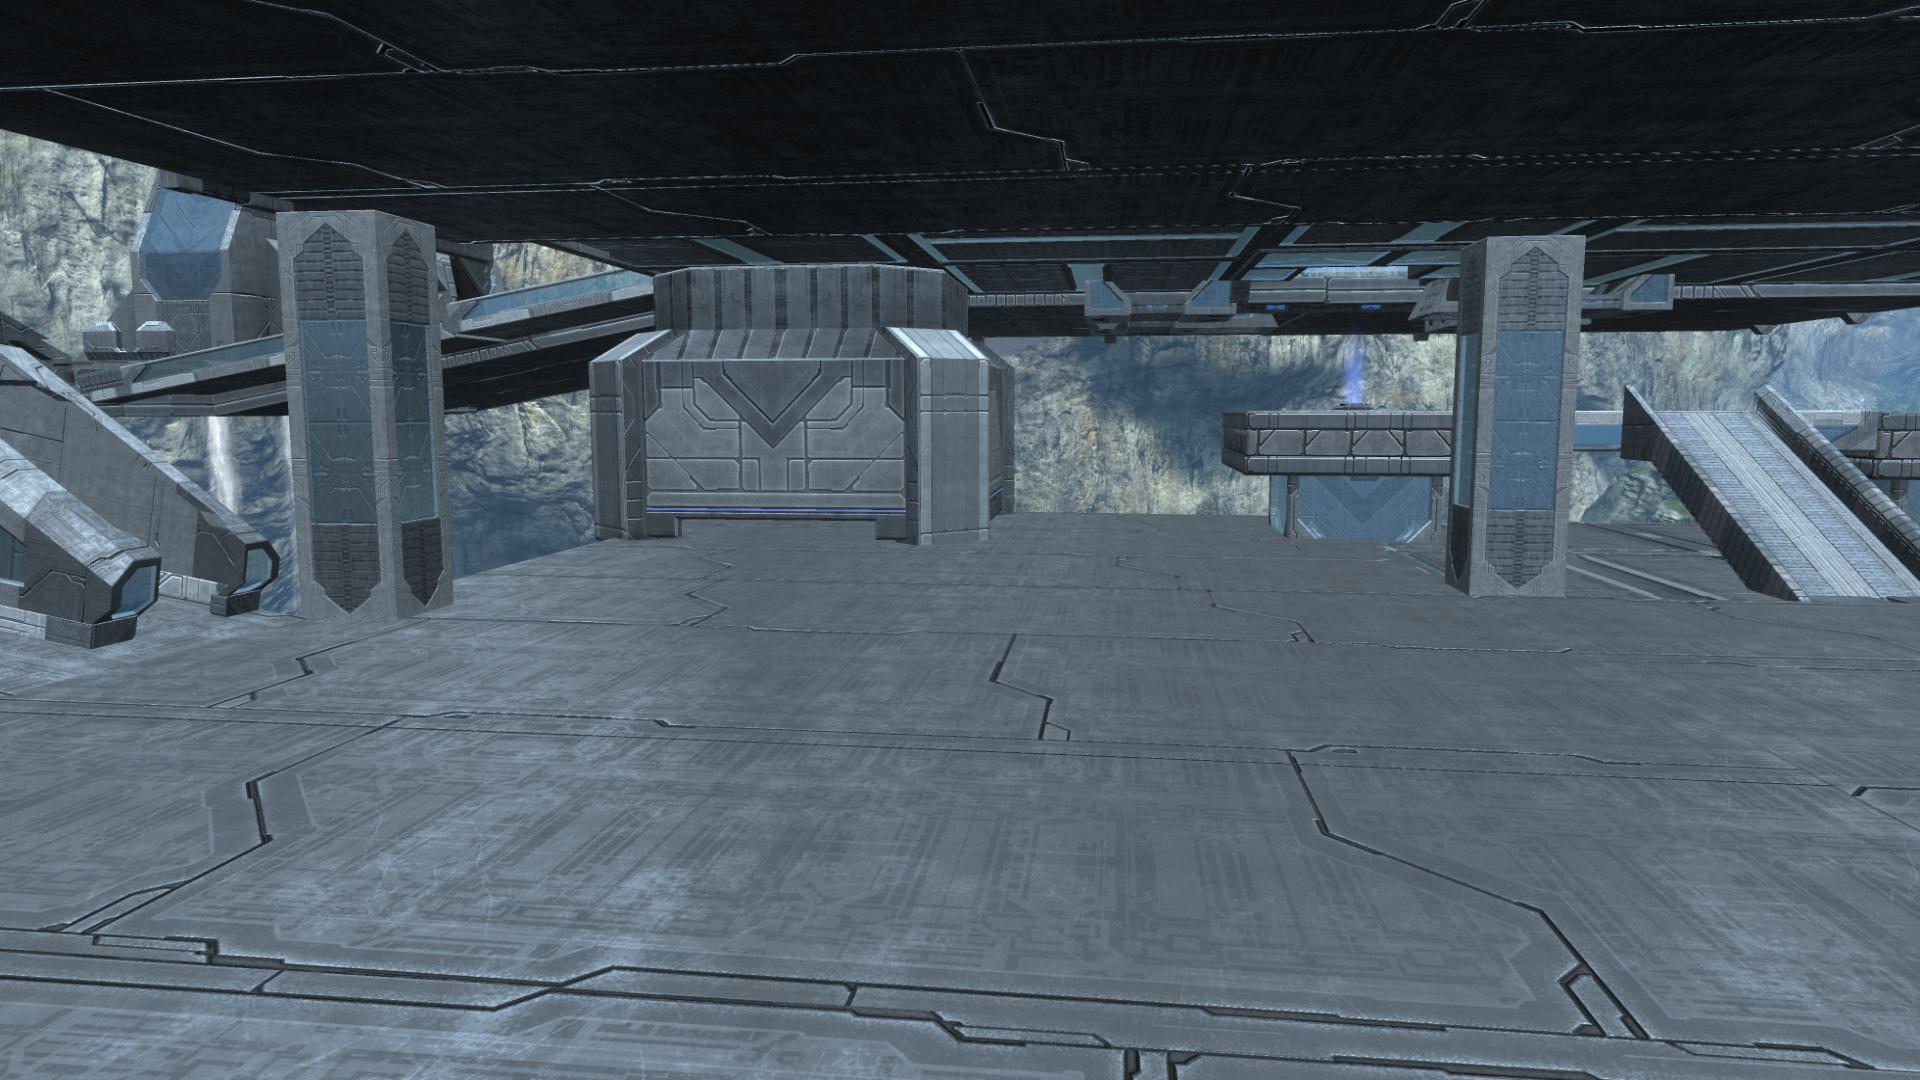
Below the base was the largest are of “dead space” on the map: a lot of space that I didn’t have a use for and so was just sort of there. I filled in a chunk of it with the large platform, but it still left a lot of open air and too much space between important features. It needed some cover and some purpose, but I didn’t know what yet.
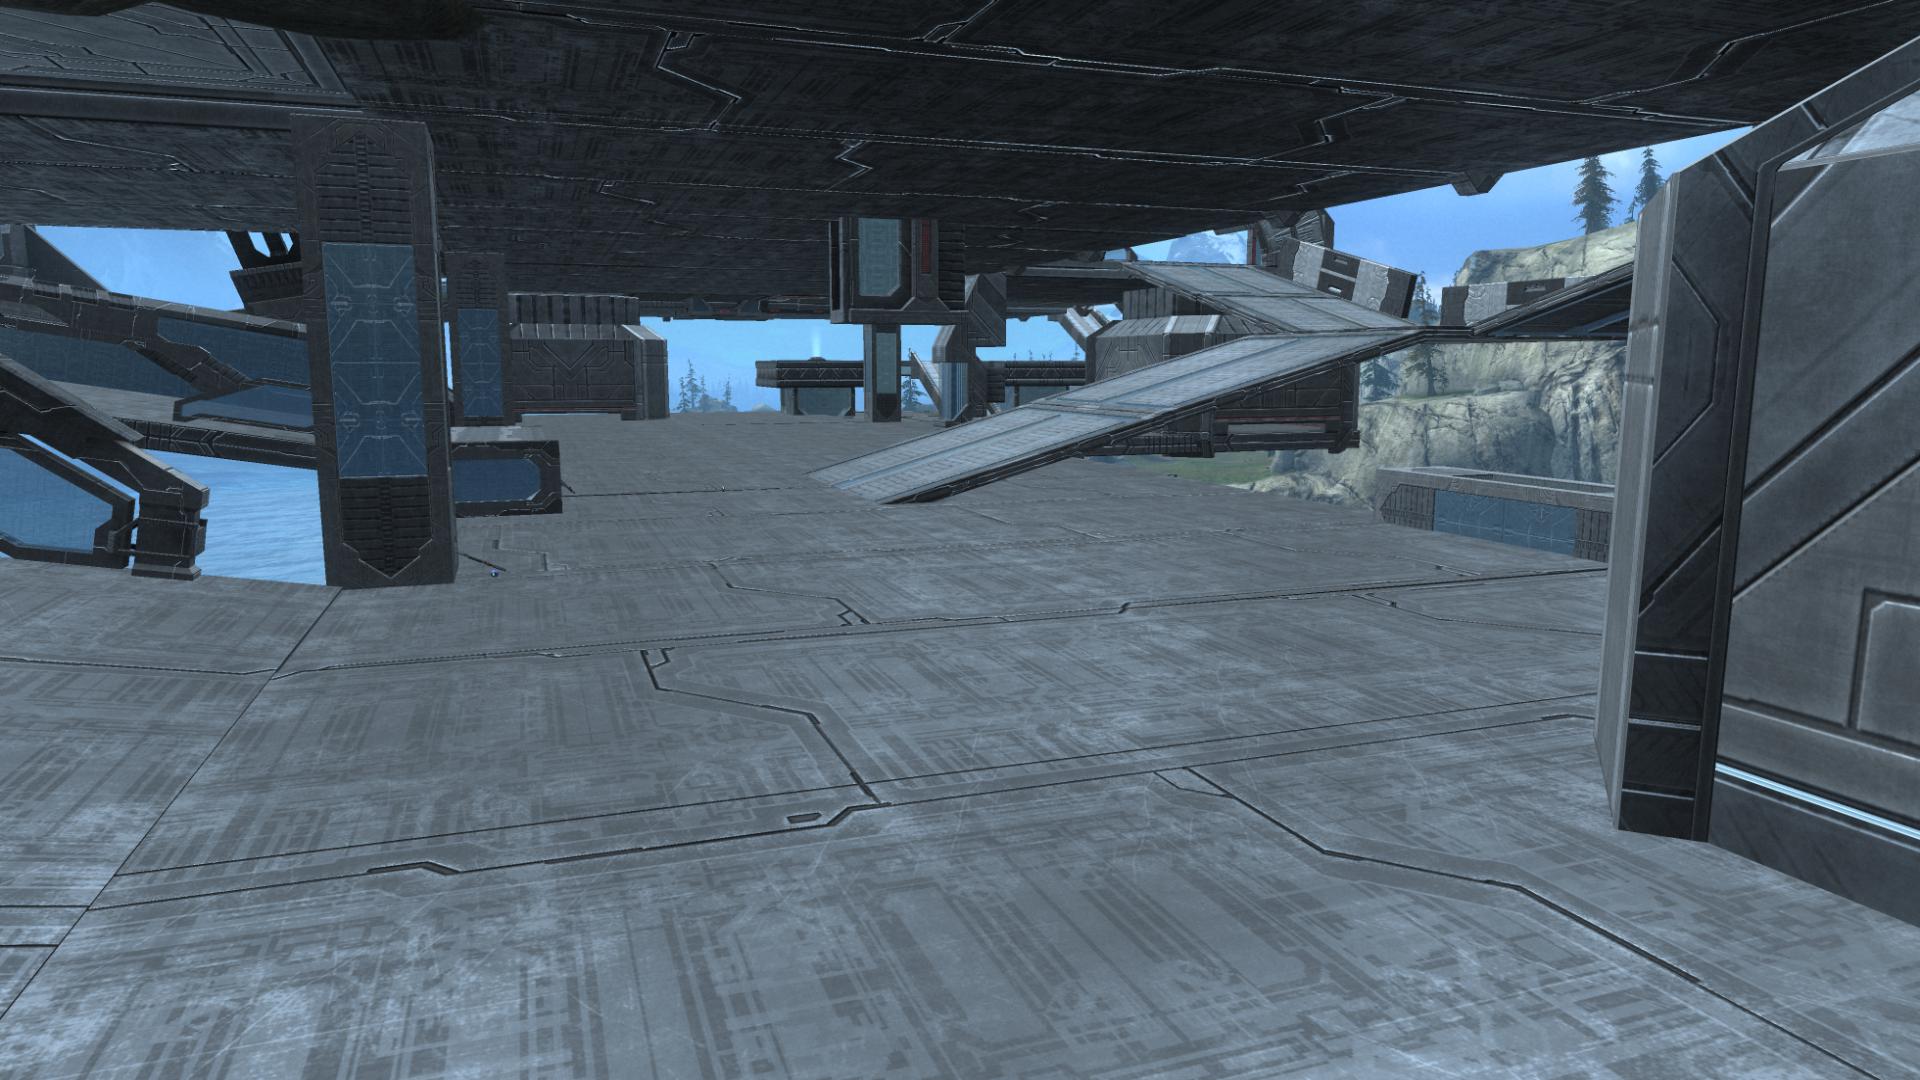
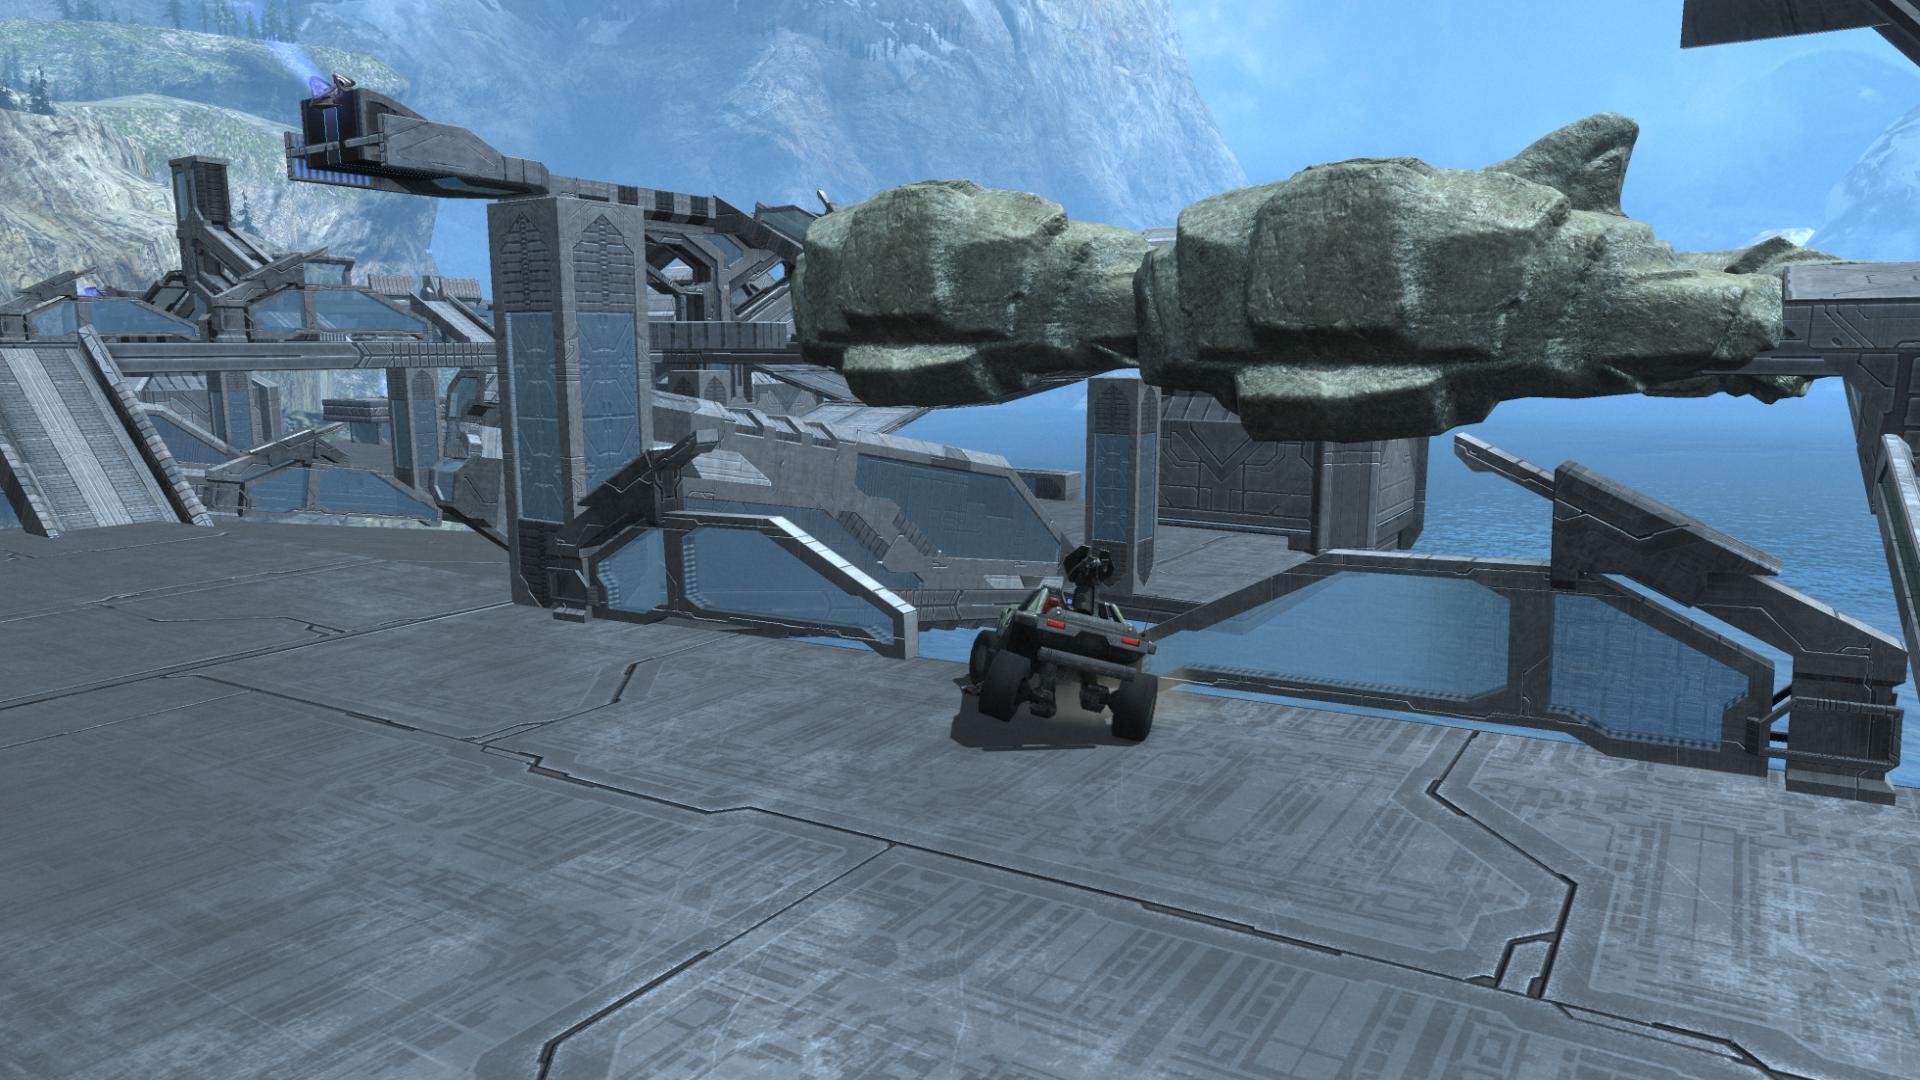
And finally, the area below the t-bridge was too narrow, leaving both dead space under it and not enough room for vehicles to exit the bridge or drive past it with any flexibility.
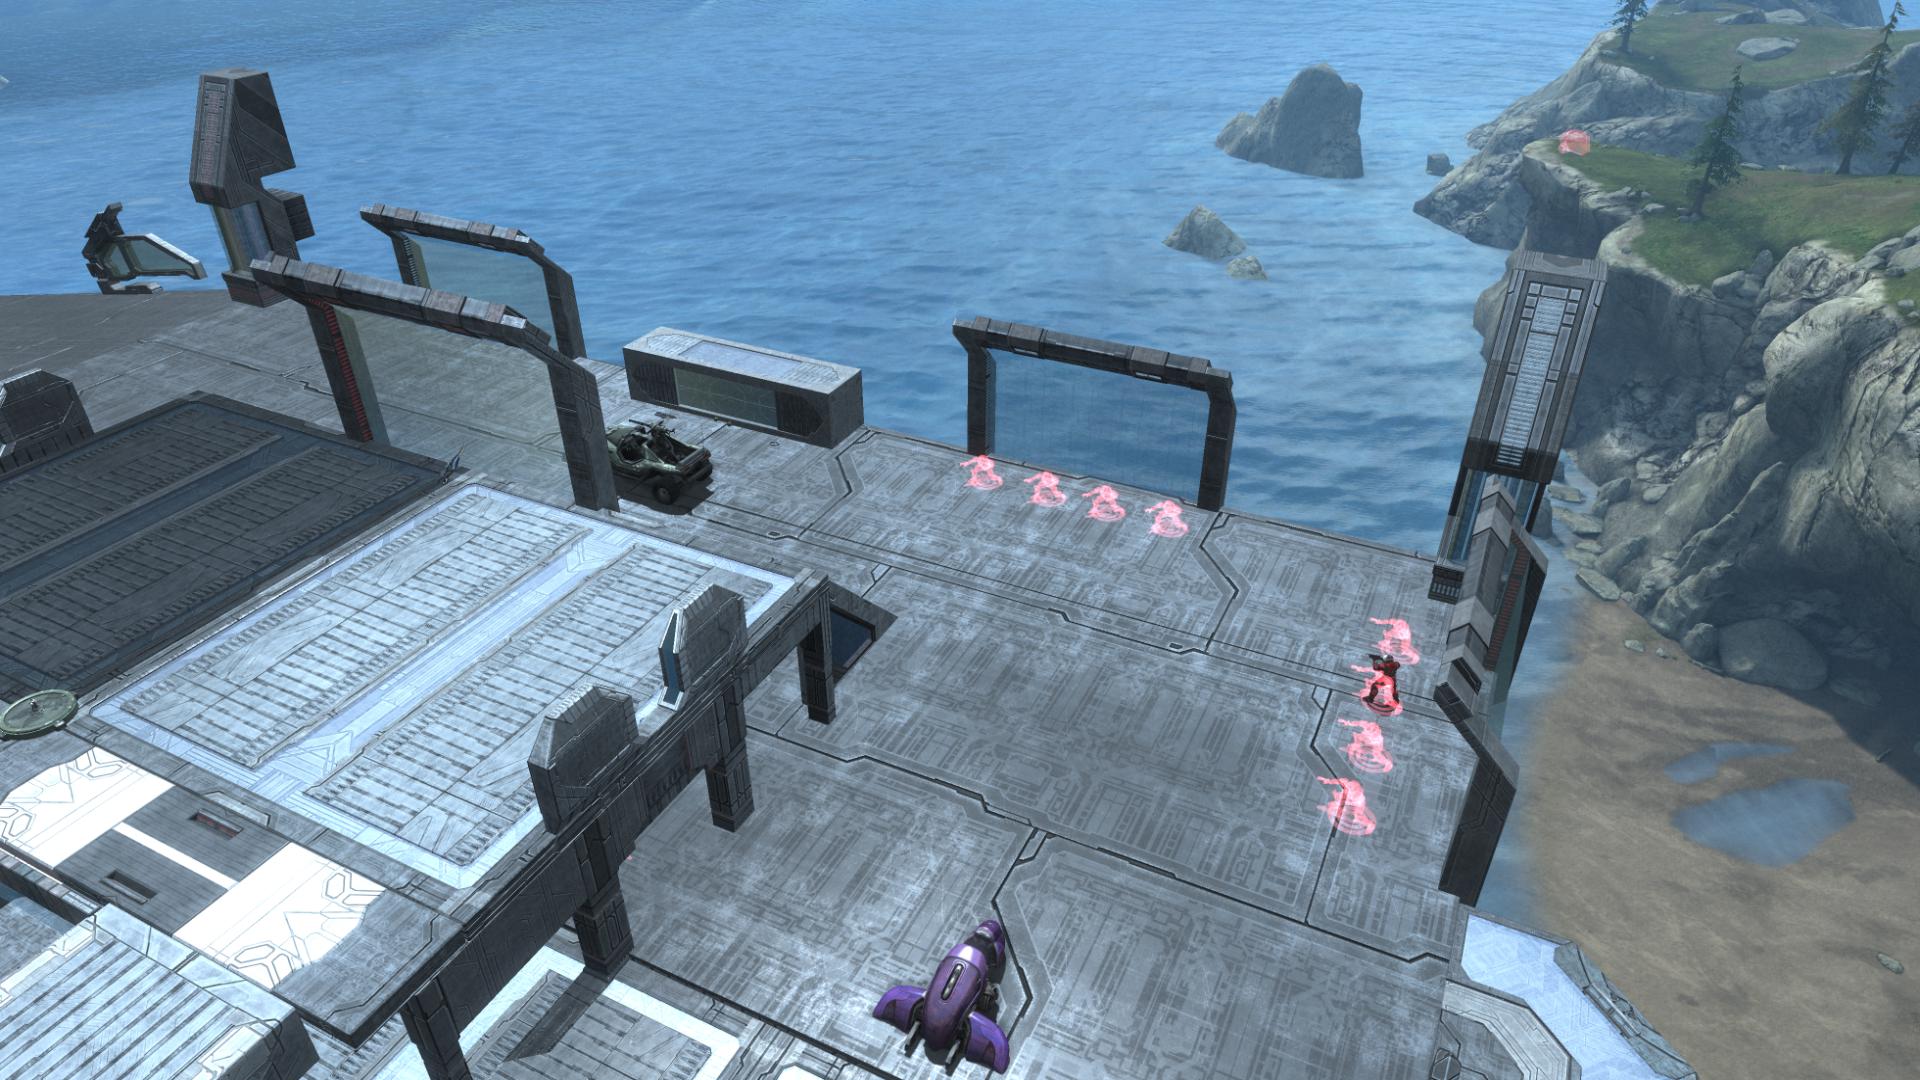
I didn’t yet have any solutions though, as I was (yet again) down to $30 in budget. And so I was stewing, trying to come up with a way to streamline some budget out of the map and then put it to use fixing those issues. The only thing I was certain of came from the play testing: I needed to move the man cannon next to the base onto the base itself. So that’s where I started.
Right away, a number of problems showed up. First, the regular man cannon wasn’t strong enough to get players from the base to the bridge the cannon had been sending them to. And the stronger flavor of cannon was way too strong: I jumped after landing and had a near-fatal meeting with the railing. Complicating things further was the need to angle the man cannon down in order to eliminate fall damage. With the back of the cannon tipped up, the cannon had to be sunk down into the ground in order to smooth it out with the ground. But doing that lowered it enough that I could jump from below the base and get my head caught on the cannon and do a partial (fatal) launch. To prevent that, I placed a solid 2×2 (tall) block on the side of the base and sunk the man cannon into it. But that made the roadway next to it far too narrow.
It was like a big jigsaw puzzle, and the picture would only come together if all the right pieces were in place. But I had a couple pieces that were left over from a different puzzle. Rather than force them to fit, I needed to get all the pieces to be from the same puzzle. So I decided to try a full rebuild of the base in order to address the design issues all at once, rather than shoehorn a new feature into an old, flawed design.
My goals were: clean up the bottom of the base and give it some structure, fit the man cannon in so that it worked correctly, and streamline the size of the base a bit so vehicles could drive around it easier.
The first thing I did was delete one of the two double rooms that had formed the garages. In addition to saving $150 in budget ($300 between the bases), the room was the right size and shape for an area under the base, if it was blocked off carefully. Without a big hole between the buildings, I removed all the flat blocks that were on top of it and let the roof serve as the top platform. But that created a new problem: the reason I had kept two buildings originally was to try and block off the ridges on the window in the floor. There was no way to do that with one building.
I knew there were a couple flat windows in the Windows and Doors category, but with the entire allotment of 50 from that category devoted to the Coliseum pieces that made up the foundation of the map, I didn’t have any to use here. So, I went scavenging around the map to see if there were any I could pull out. I knew I had some dead space in the lower corners under the base, and thought I might be able to yank a couple and replace them with the 5×5 flat blocks I harvested from the base.
I zeroed in on the area under the map with t-ramp, where I had dead space under the ramp, but not enough room in front.
The Colloseum pieces were 10×12 world units wide, and the bottom level used six of them, arranged with the long sides facing one another, for a total of 60 world units wide. It occurred to me that I could rotate them 90 degrees and remove one, and end up with the same length of 60. And that would actually some of the dead space under the ramp.
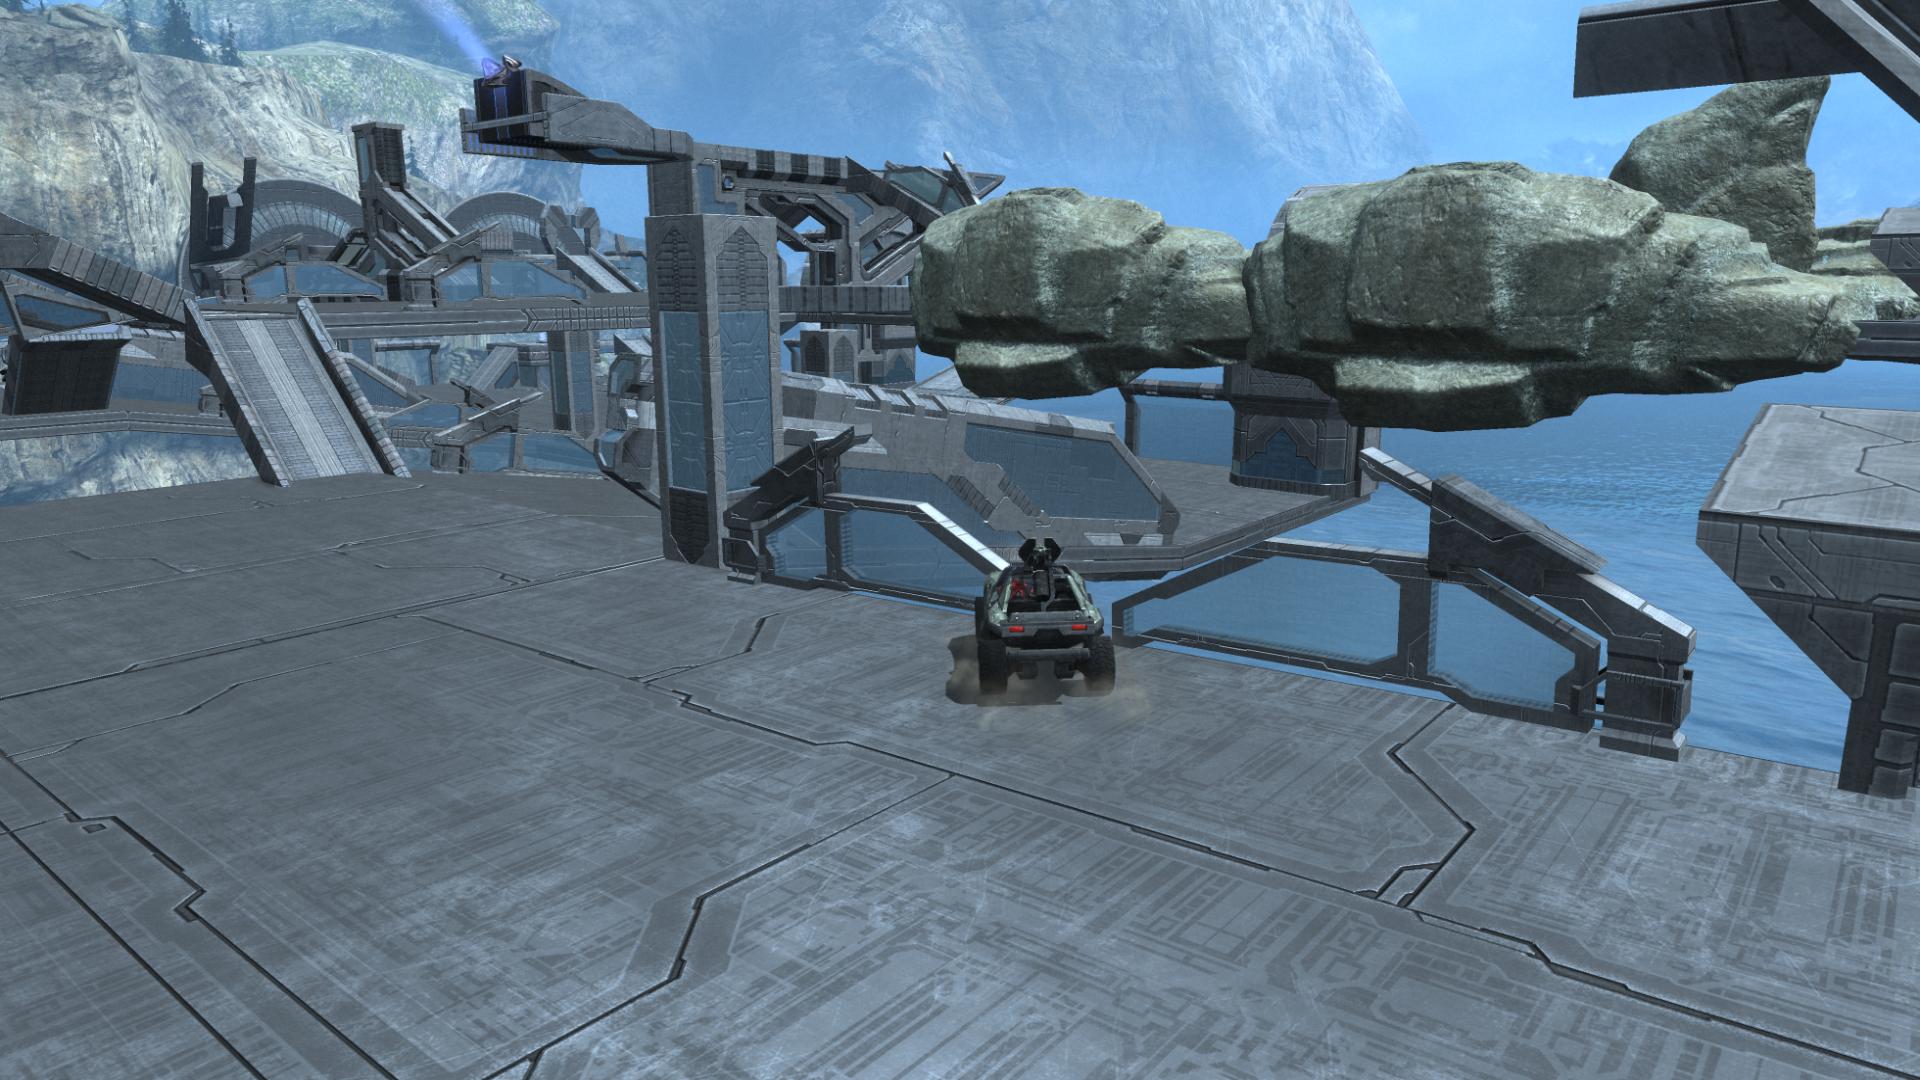
After flipping them around and making other adjustments to line things back up, there was still a bit of room under the ramp, which looked awkward: it was just barely big enough for a player to crouch under, but not walk. To remove it fully, I adjusted the ramp back to the outside edge of the map. The new version opened the road way up a lot more, and eliminated the dead space under the ramp. To compensate for the slightly more narrow spillway when coming from the other side of the map, I swapped out the XXL platform in the corner for the XL one.
After doing this on both sides, I had freed up two objects under the Window and Doors category, which meant I had my flat windows below the base. Replacing the chunky window with them saved another $80 in budget between the bases, and freed me up to place the building comprising part of the base anywhere I wanted.
The base was now narrow enough that I could use a solid block on the side to sink the man cannon into without choking off the road way. The blocks would both add some dance floor to the top of the base, and help shape the lower level.
I decided to fire the man cannon over toward the pyramid structure rather than the bridge between the pyramid and rockets, because it just wasn’t logistically possible to hit the latter with the man cannons on hand. That would put players a bit further from the rockets, but still had that mix of landing in the open, but with cover nearby that I liked in the previous landing zone.
From there the rest of the base came together quickly. To add some shape to the bottom of the base, I added some 2×2 flat blocks to seal off some of the sides. That shaped the lower area into a y-shape flow, with one exit behind the base and exits folding around the sides, with the floor space flowing around the grav lift chute in the center.
I kept the cover along the edges of the top of the base, but kept the side facing the outside of the map unprotected. That way, players who come up the side ramp get rewarded by being able to attack the base’s exposed flank.
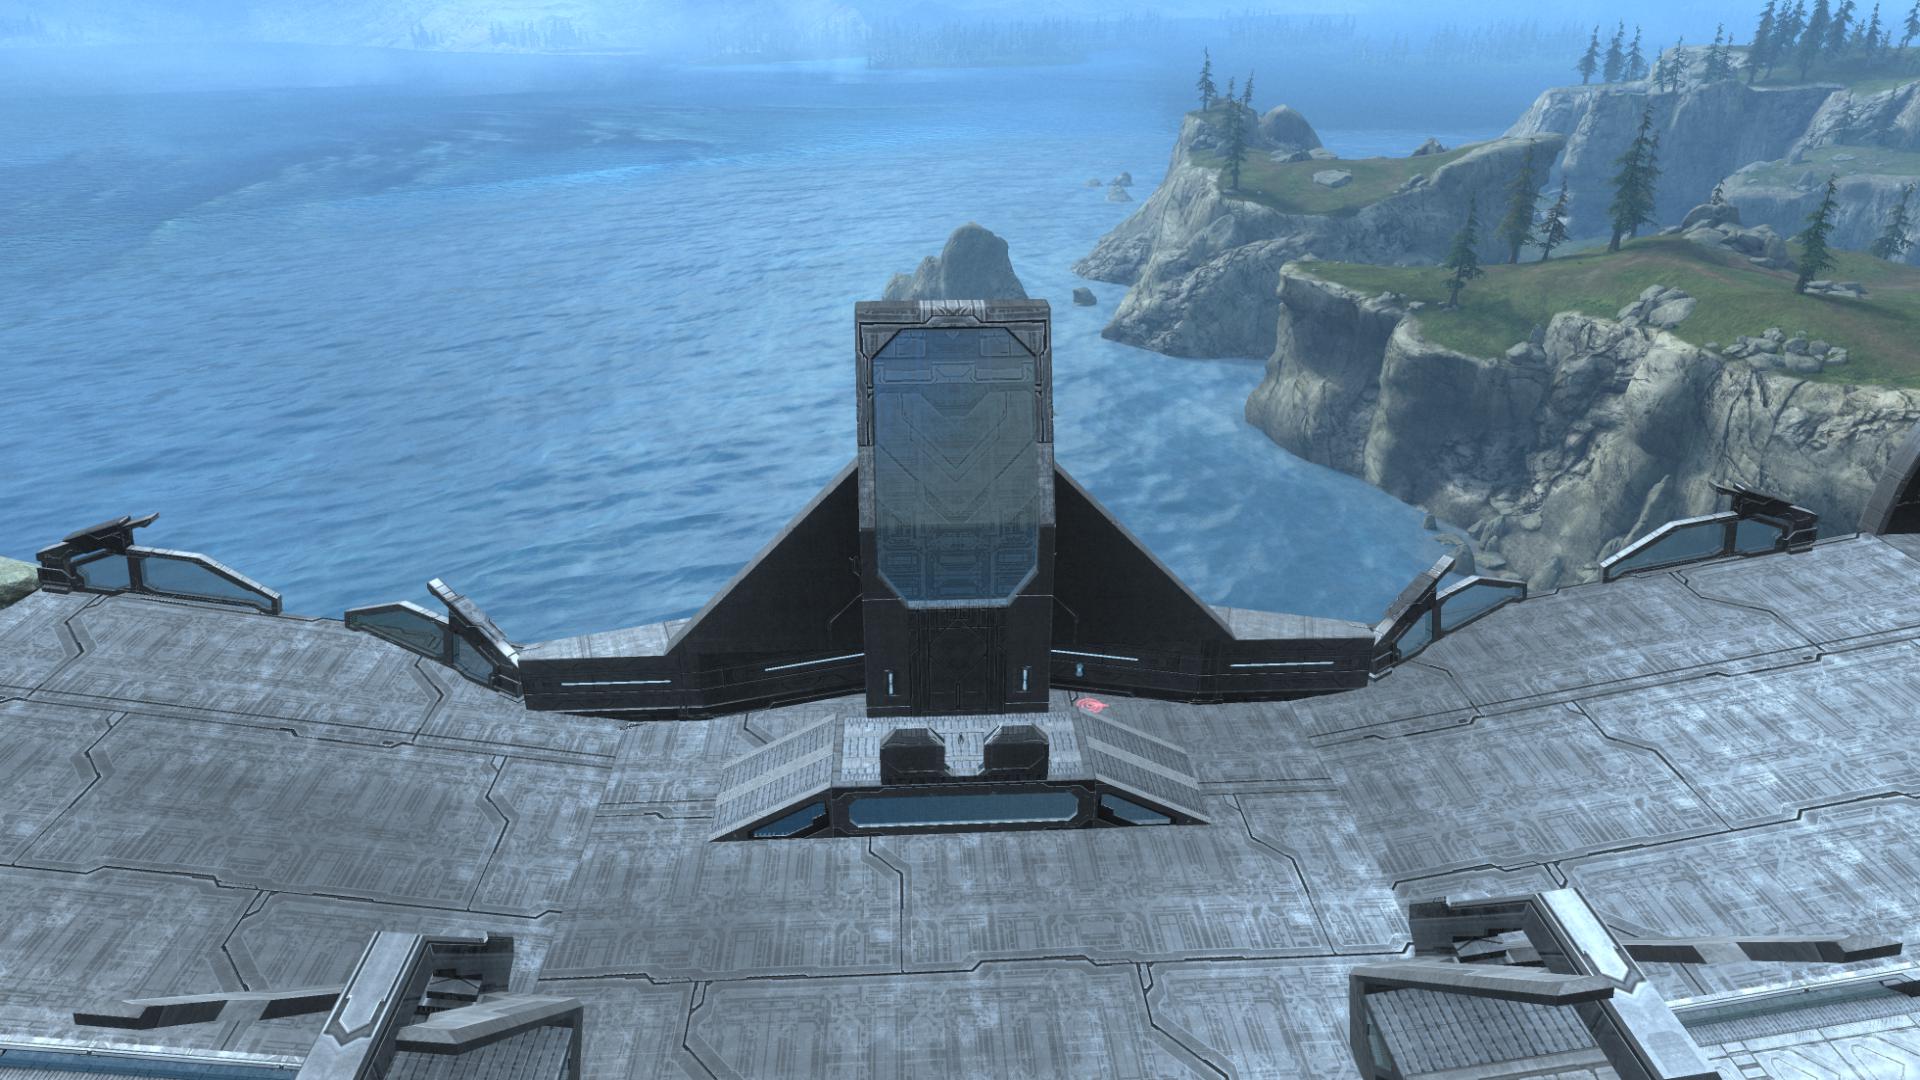
To address the perforated back edge, I swapped out the blocks and windows with a pair of dish halves. That gave the area a unique profile and sealed the edge entirely.
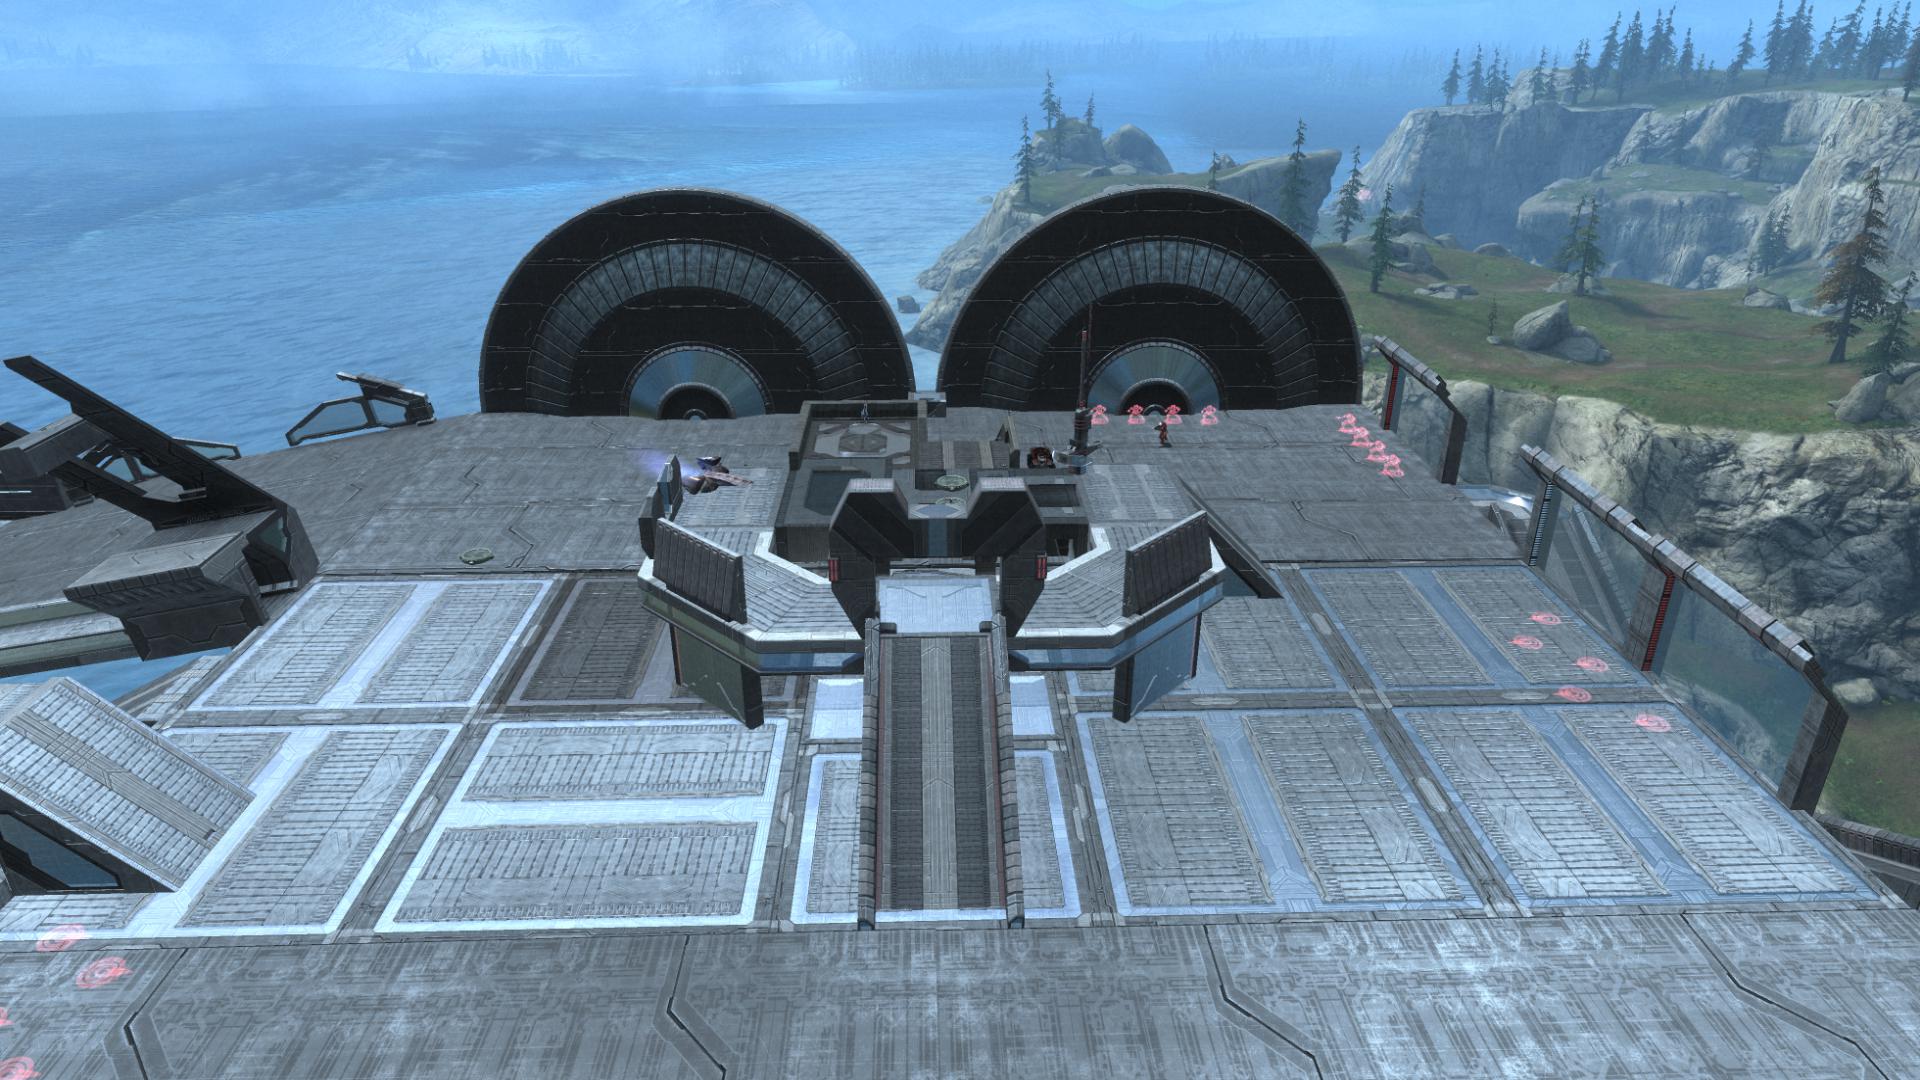
I was finally happy with this design. The top area had enough dance floor, accommodated the grav lift underneath and was accessible from three sides. The lower area was smoothed out and had some shape and form to it. By the time I replicated this design on both sides, I was back up to $1,000 in budget. And with that, I gave the map one final pass to seal off the edges and prevent vehicles from plunging to their death.
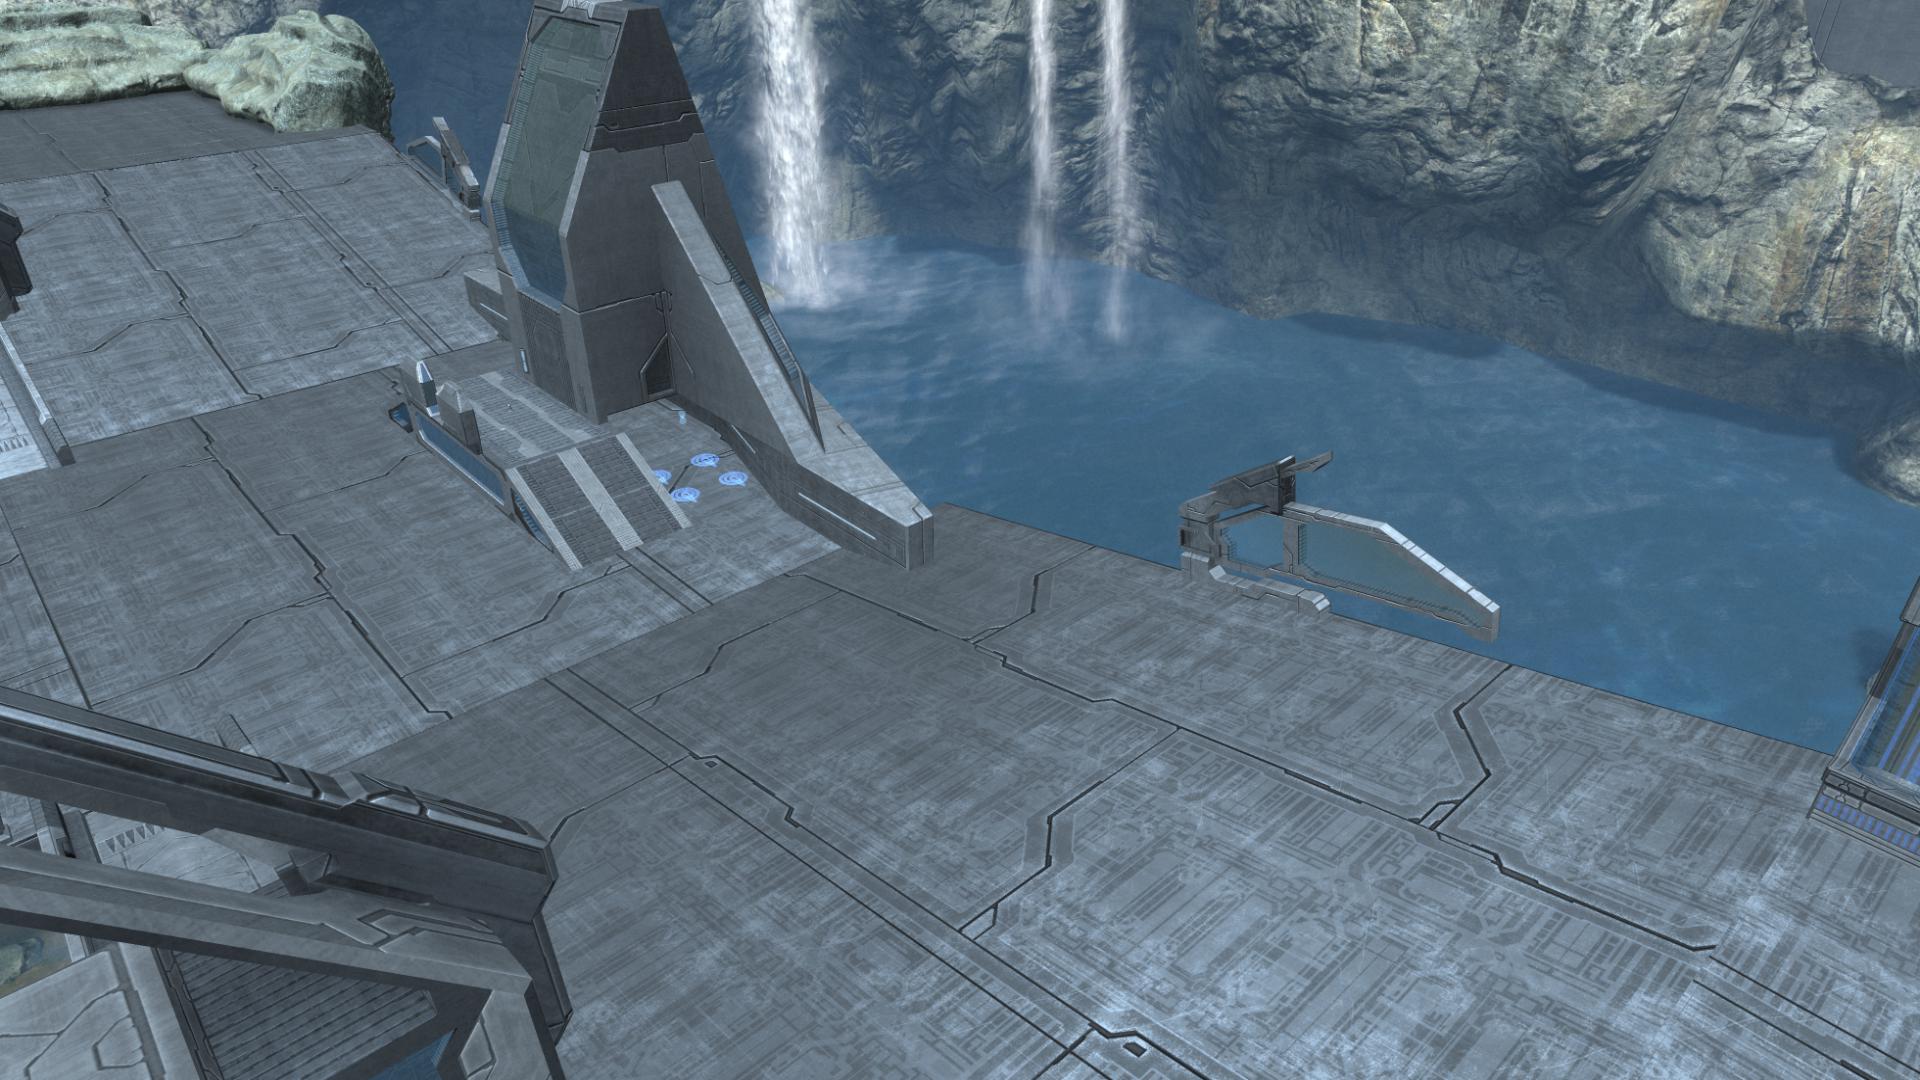
First stop, the pyramid area. The lonely window wedge here was more a warning that a cliff was there than an actual barrier.
I added a second one, and angled it to close off the edge behind the pyramid. The gap between them is small enough that you have to more or less aim a Warthog for the gap to drive through.
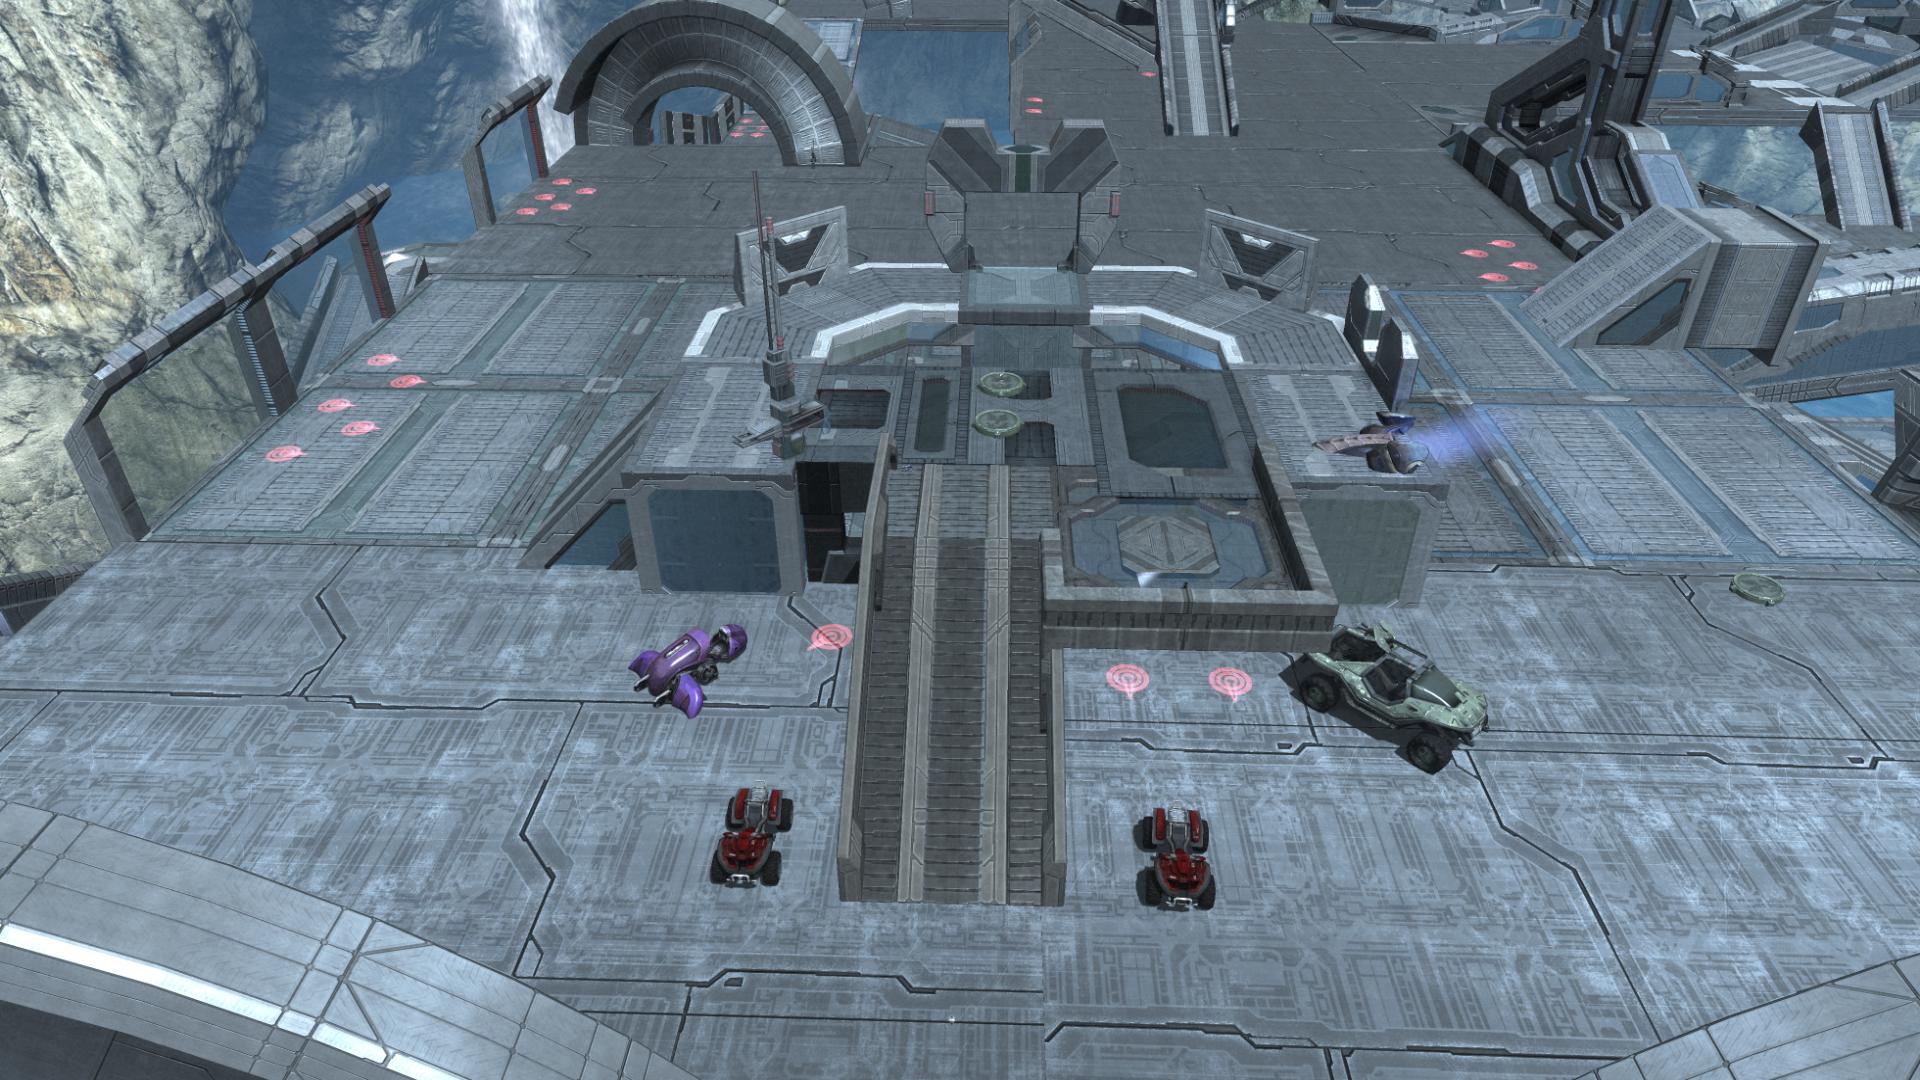
Next up were adjustments to the existing borders. I’d placed edging pieces along the center of the map, but didn’t put a lot of thought into how small the gap should be between them. As it was, the gap was about two world units – which is how big a Warthog is. (The previous play test demonstrated that nicely.) The barriers were about five clicks long each, and two of them had to cover a floor space twelve clicks long. But I’d left the two click difference right in the center, which was wide enough for a Warthog to drive through.
I adjusted them to distribute the two clicks of uncovered space between the ends and center, and the result sealed the edges up enough that it takes some effort to drive a ‘Hog over the side.
Now the area behind the base, the center of the map and the sides were all sealed up enough that vehicle spills were downright unlikely.
And I still had about $800 in budget left. Which was good, because I had one final, big-ticket issue to address from the play testing: infantry movement.
[…] has put up another chapter in his Forge Blog – what happens when you’re not happy with how a map plays? Well, if you’re not […]
I cannot wait to play it!