Forging Ahead: Battle Plans
With the size and shape of the map defined and the major landmarks coming into focus, I moved on to polishing off all of the issues I had flagged so far, one at a time. I wanted to get the geometry locked down before I began placing spawns, weapons and objective markers so as to minimize how much time I had to spend redoing those.
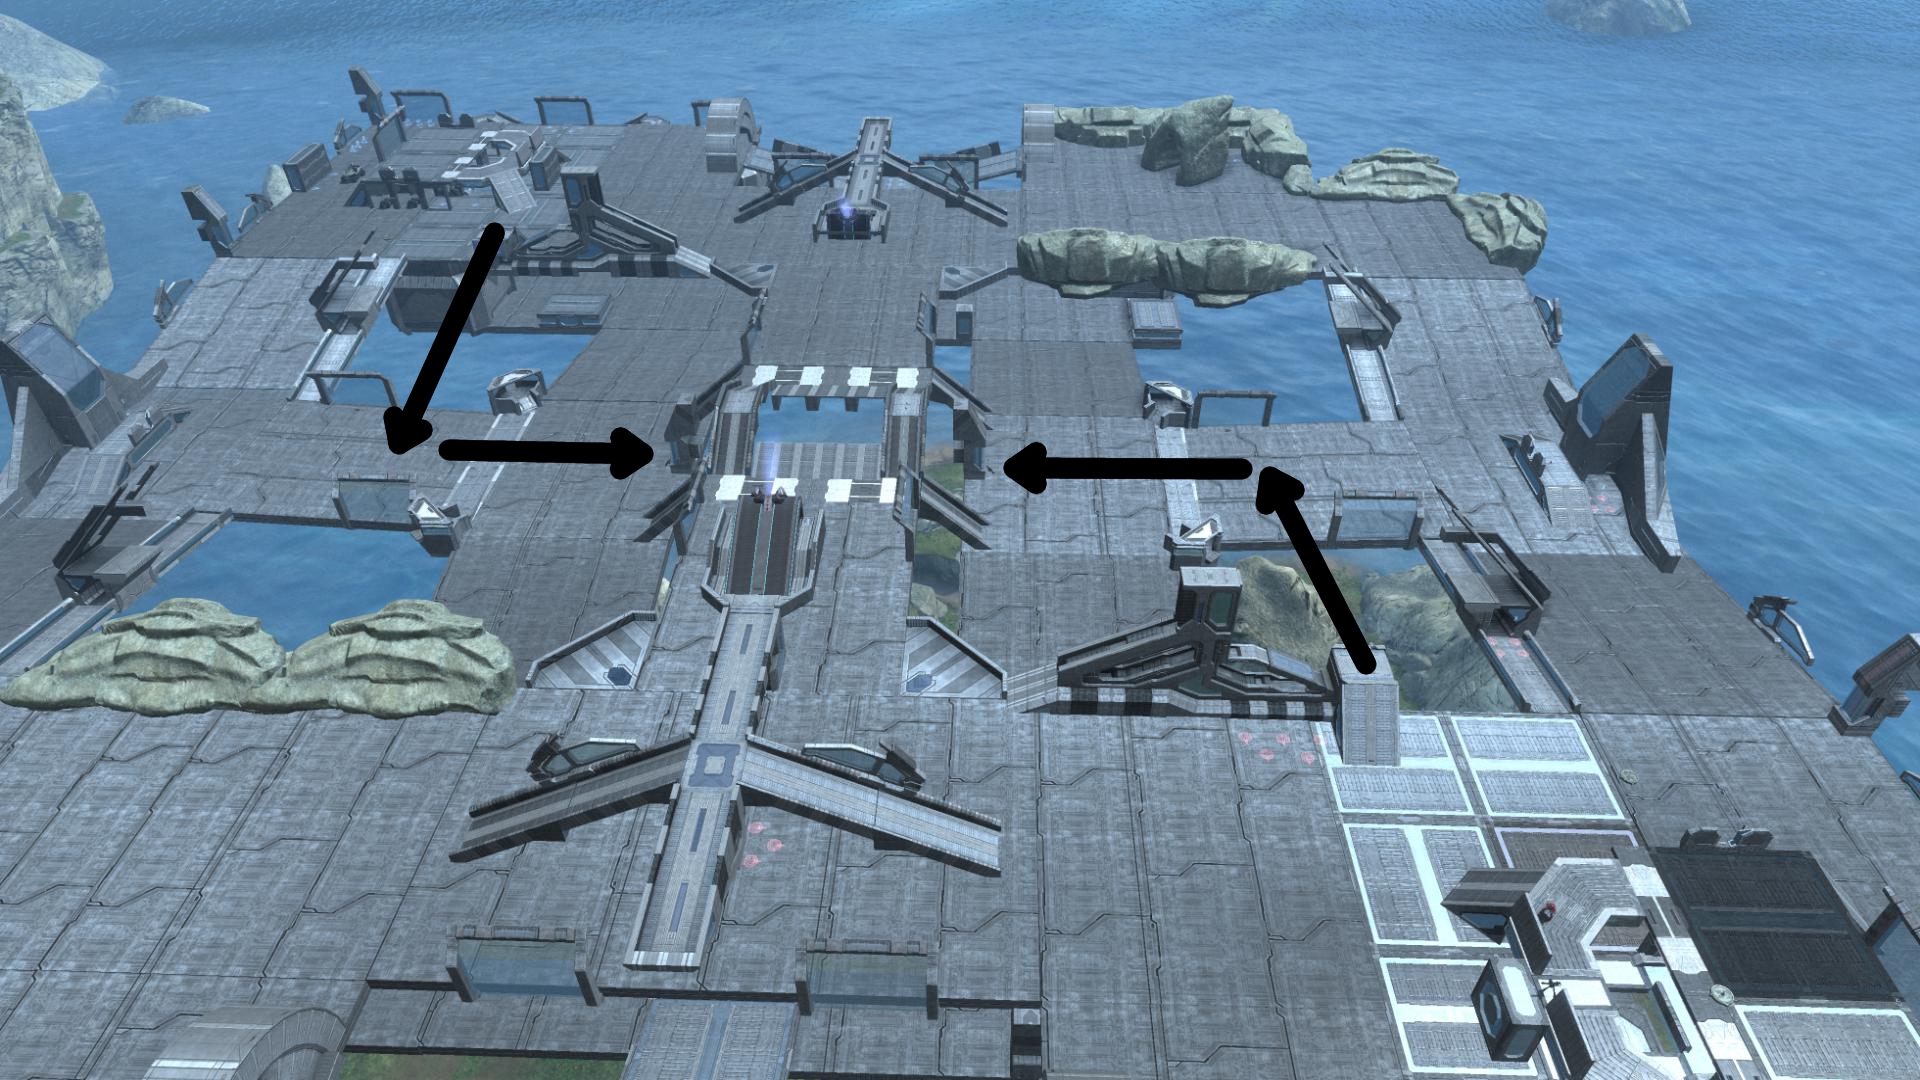
First on my list was getting the man cannons on the towers working consistently. Aside from the base layout of the map, this had been the toughest nut to crack. The sweet spot was going to be fine one: players needed to 1) clear the gulch, 2) not trigger the man cannon facing them as they skim over it and 3) not take any fall damage upon landing. The variables I had to juggle were the height and angle of the man cannons, how close they were together, and how long the down ramp I was placing to soften the landing. As it was, both cannons would occasionally smash a player into the face of the opposing man cannon, but when they did land, the landing was damage-free. I tried adjusting every combination of the variables that I could come up with, but nothing ironed out the randomness of the launch.
And then, breakthrough. I experimented with entering the man cannon from different angles, and found that the launch distance varied slightly depending on whether I took the flight straight on or not. If I walked up the ramp from the corner, I got smashed. If I walked up from the center of the ramp, I cleared the gap. Because I had the man cannon embedded into the surface of the ramp, there was no forcing mechanism to get players into the stream. That meant they missed out on a little bit of the thrust, as the cannon has to first pull them to the center and then fling forward.
The solution was simple: I let the man canon do the work. The object was designed with a narrow ramp and a set of railings to funnel players into the forward thrust, but by embedding it in the ramp I had removed those features. By simply raising them up and then adjusting the firing angle down slightly to compensate, they worked with 100% consistency. I haven’t had any incidents since the change. They were a fun addition that really helped players move across the map with speed, so it was nice to finally check this one off.
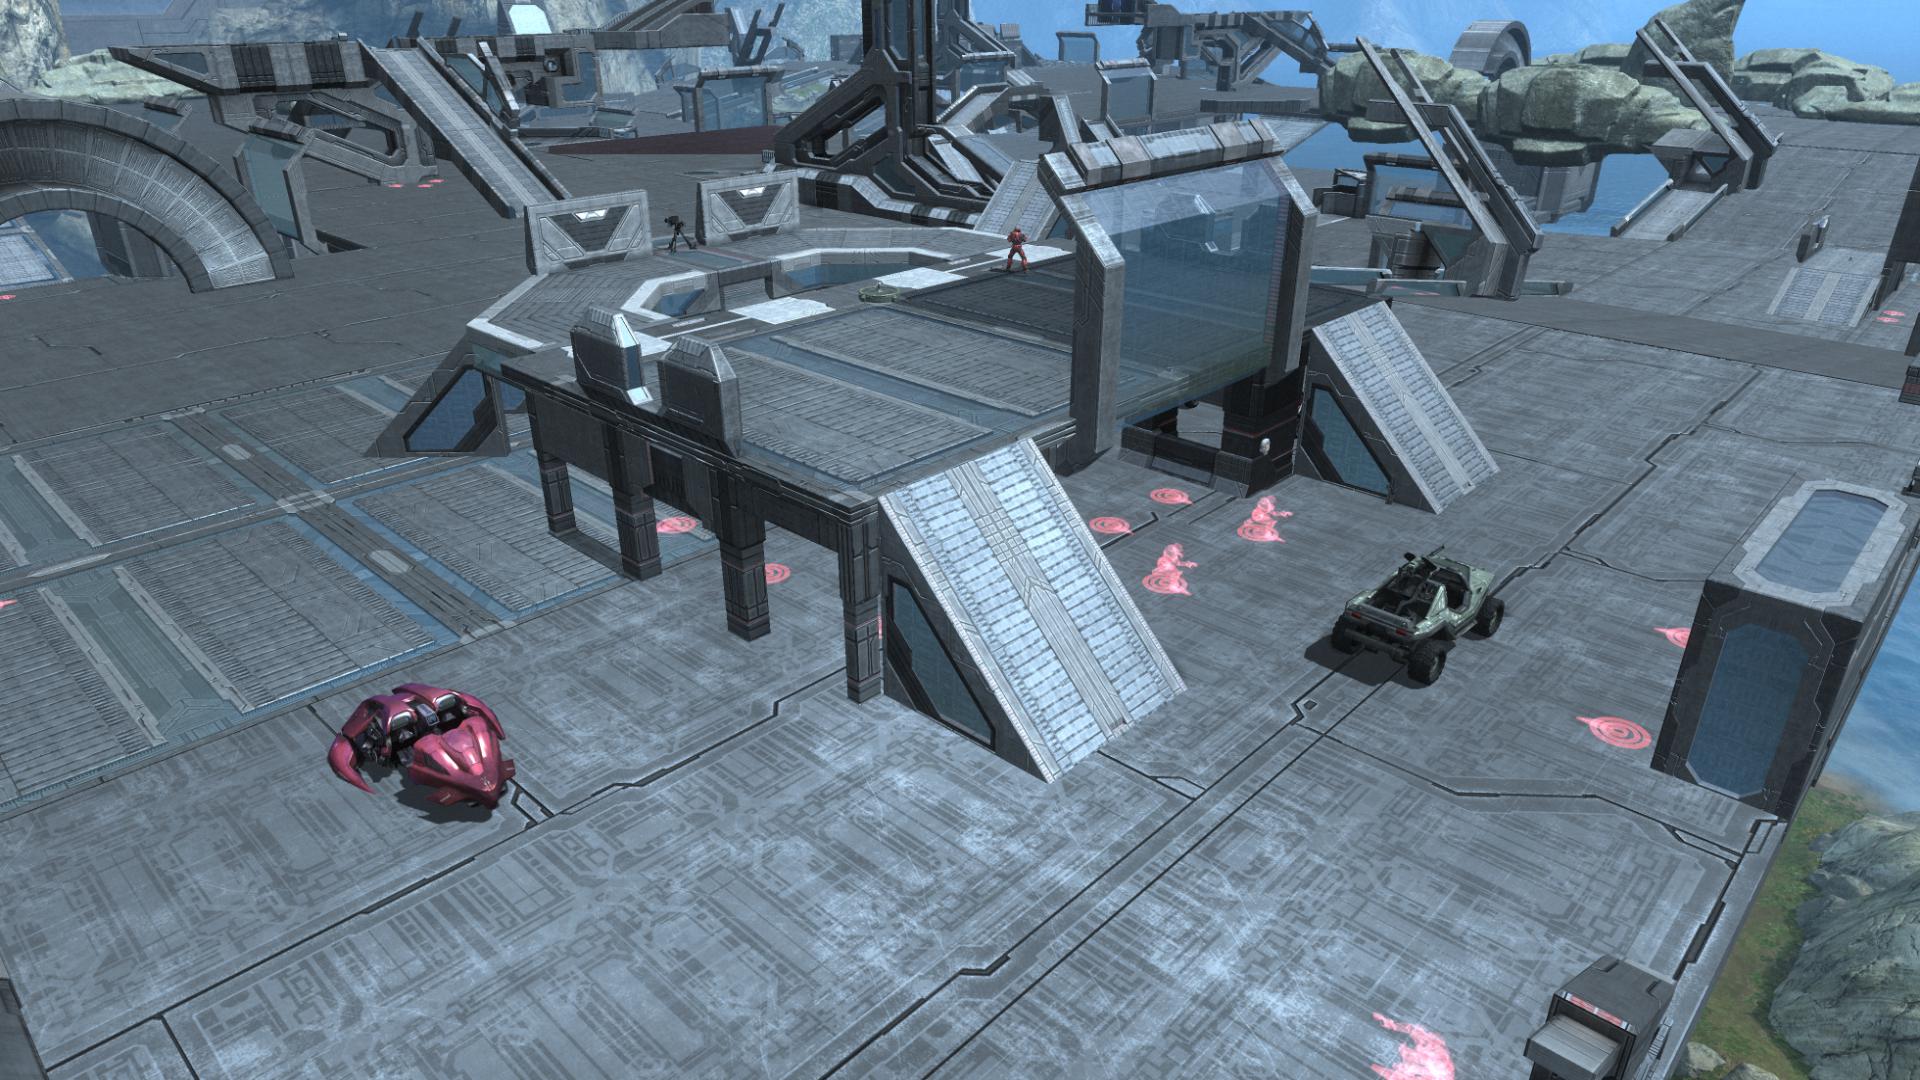
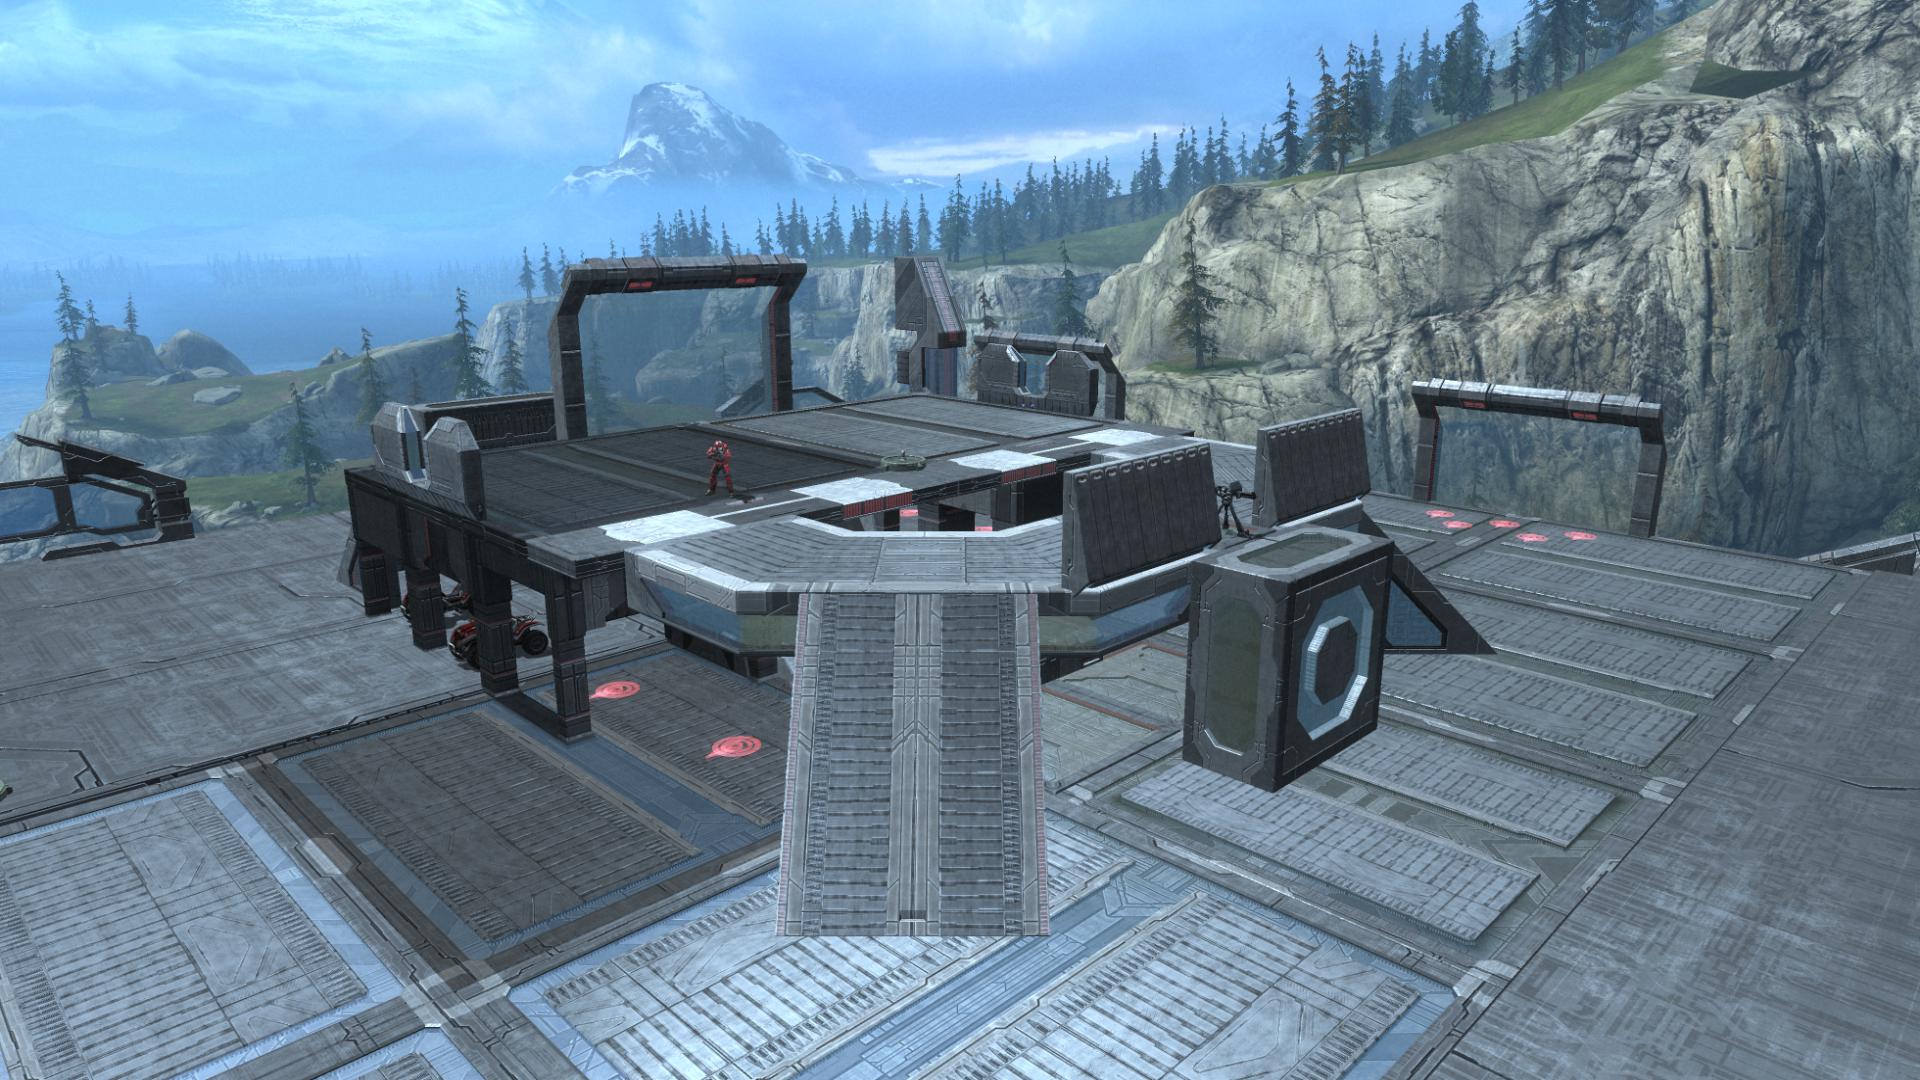
Next up was polishing the base design. The inside of the base was a touch too cramped, and I didn’t think there was enough dance floor on the surface to accommodate some strafing firefights. As it stood, there were two holes in the top: the U-shaped notch in the back, and the chute for the grav lift up front. I decided to level off the back of the base, and pull the bases apart very slightly to accommodate. To prevent players from driving toward the base and straight into the grav lift chute, I placed a block at the front entrance, and to protect defenders from the sniper rifle’s wrath, some cover elements. The glass in the back was wide enough to allow players to move around behind the base without getting sniped. I decided to use glass there because I wanted defenders to be able to scout and spot the sniper on the perch, even if they couldn’t directly engage them. Worst-case scenario, defenders would be able to get under the base or to the vehicles without getting sniped.
To make the area beneath the base less cluttered and the main vehicles more accessible, I moved the Revenant and Warthog out to beside the base. Oh, and I added a turret. For no reason other than I really like the turret.

Next up was ironing out exactly where side rails had to be placed to prevent vehicles from plunging off the map. They had to both signal to drivers what the dimensions of the play space was, as well as prevent spills from occurring at places where they would be pushed to the outside of the road. Namely, on the outside of corners and at the end of intersections. As a rule of thumb, I decided to use tall structures on most corners to call out the shape of the map, and wide, less tall structures as the railings.
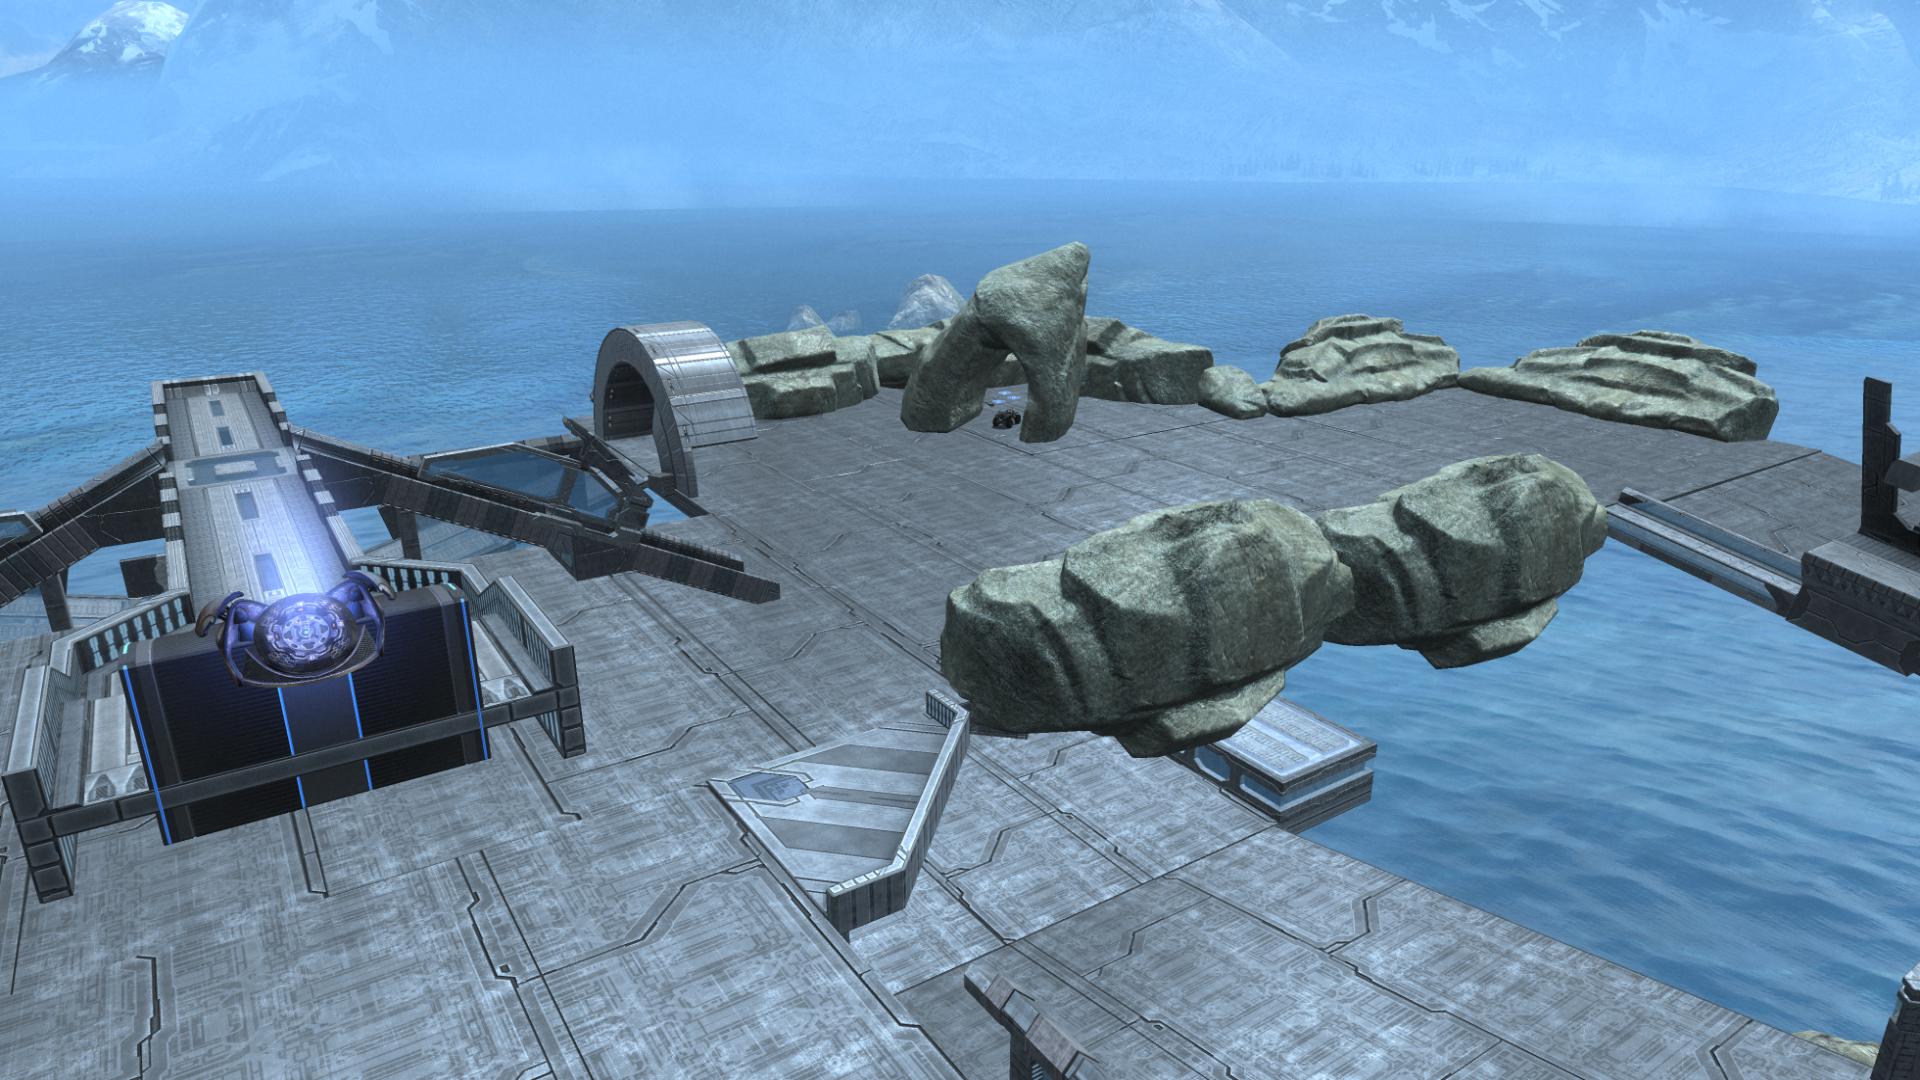
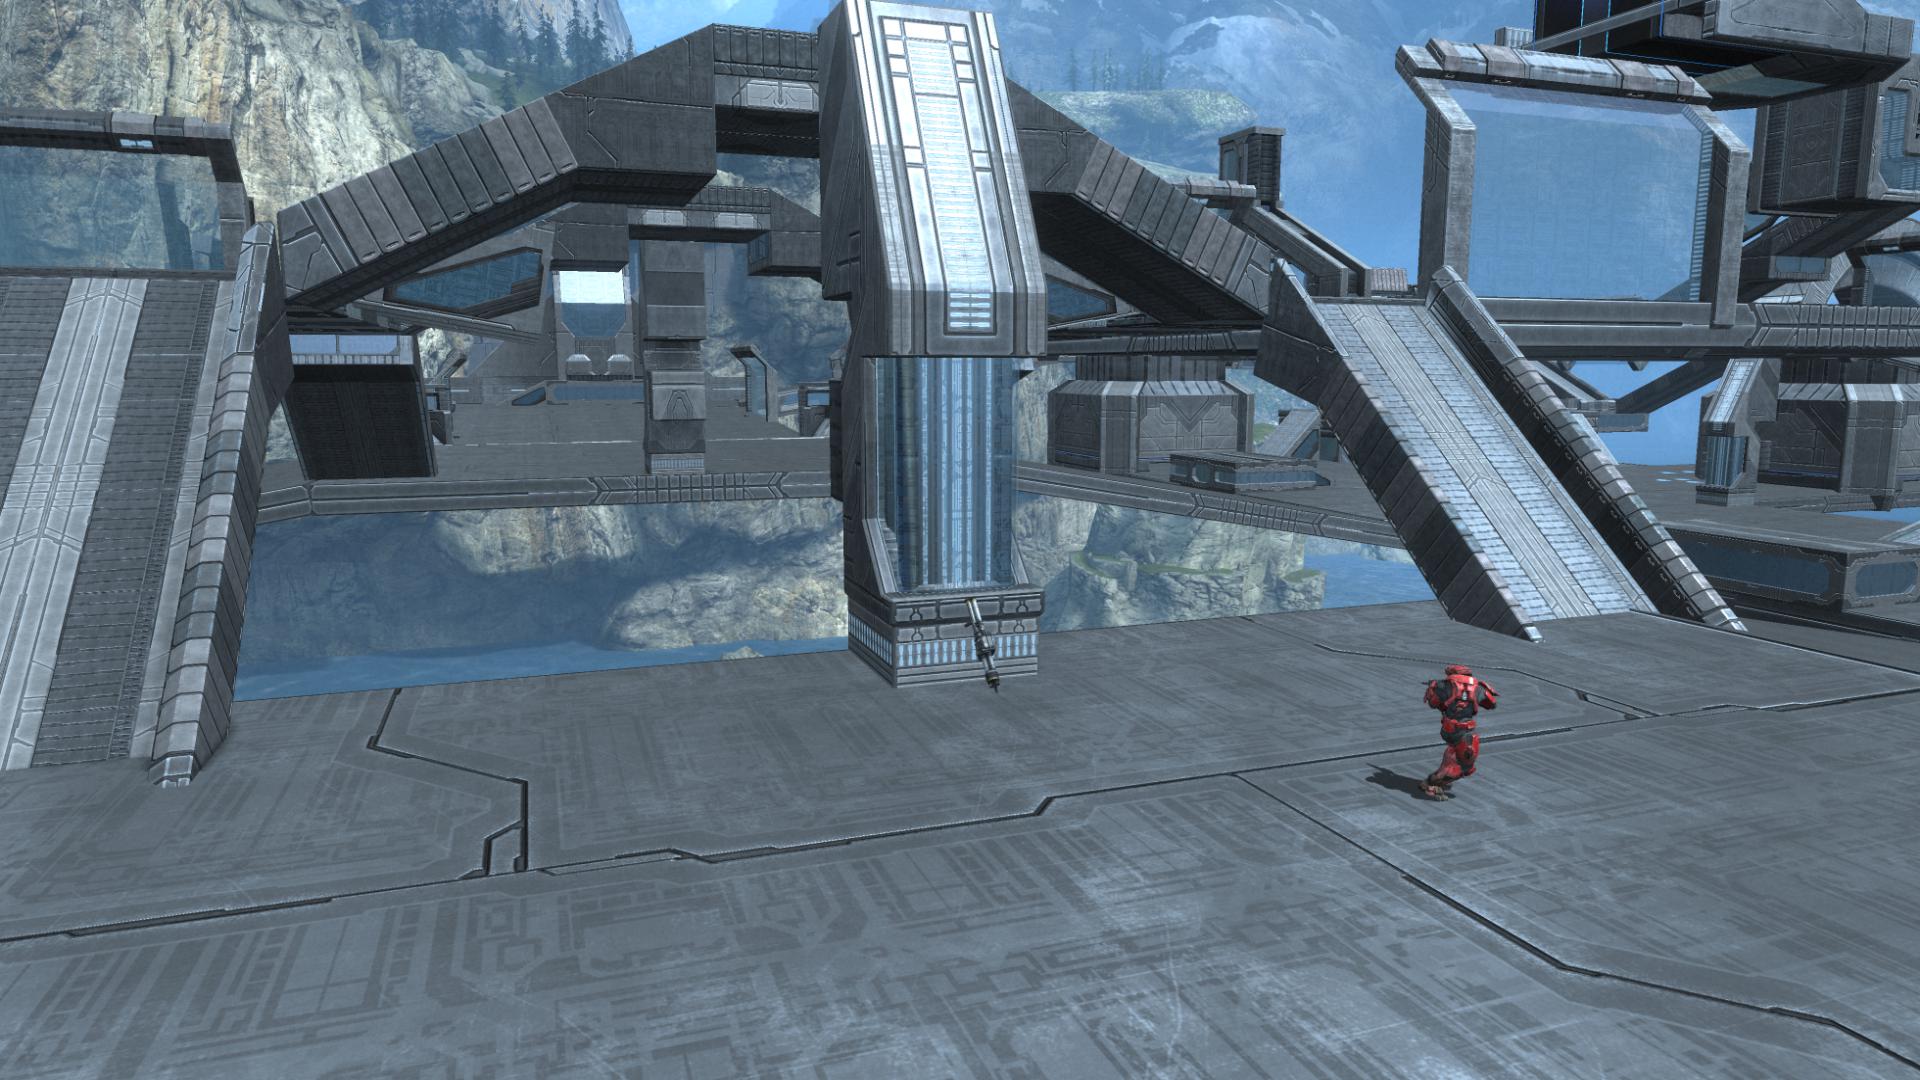
But doing so also meant extracting a bit more budget out of the layout. Every time I worked on an area, I had to go scour another and make it more streamlined to harvest resources. It generally meant trying to find areas with high object density and streamlining them: fewer small rocks and more large ones, redoing the base floor more efficiently, using larger, wider ramps instead of several small ones. I tossed all the large strut pieces because, while I liked the length, I could never find a way to use the curl on the end. The area below is a product of the efficiency effort. To help alleviate the 90 degree corners that vehicles had a hard time making, I widened them with wedges.
For the edging I used mostly glass windows. I liked them because they were as wide and as tall as I needed, and because the visibility might add some color to shootouts, where players could see one another but not engage directly. The pics below show a few of the areas blocked off such.

At this point the map was solid enough that I wanted to start working on the weapon placement. There are some decisions that were easy to make, such as the base armament (two of each grenade, a Plasma Pistol, Magnum, two DMRs and the turret). It was the power weapons I put the most time into thinking about, as they would shape the opening moves of each game. I wanted to place them such that there were some extended, tense moments as players got into position and moved around the map to fight for the power weapons and key strategic areas.
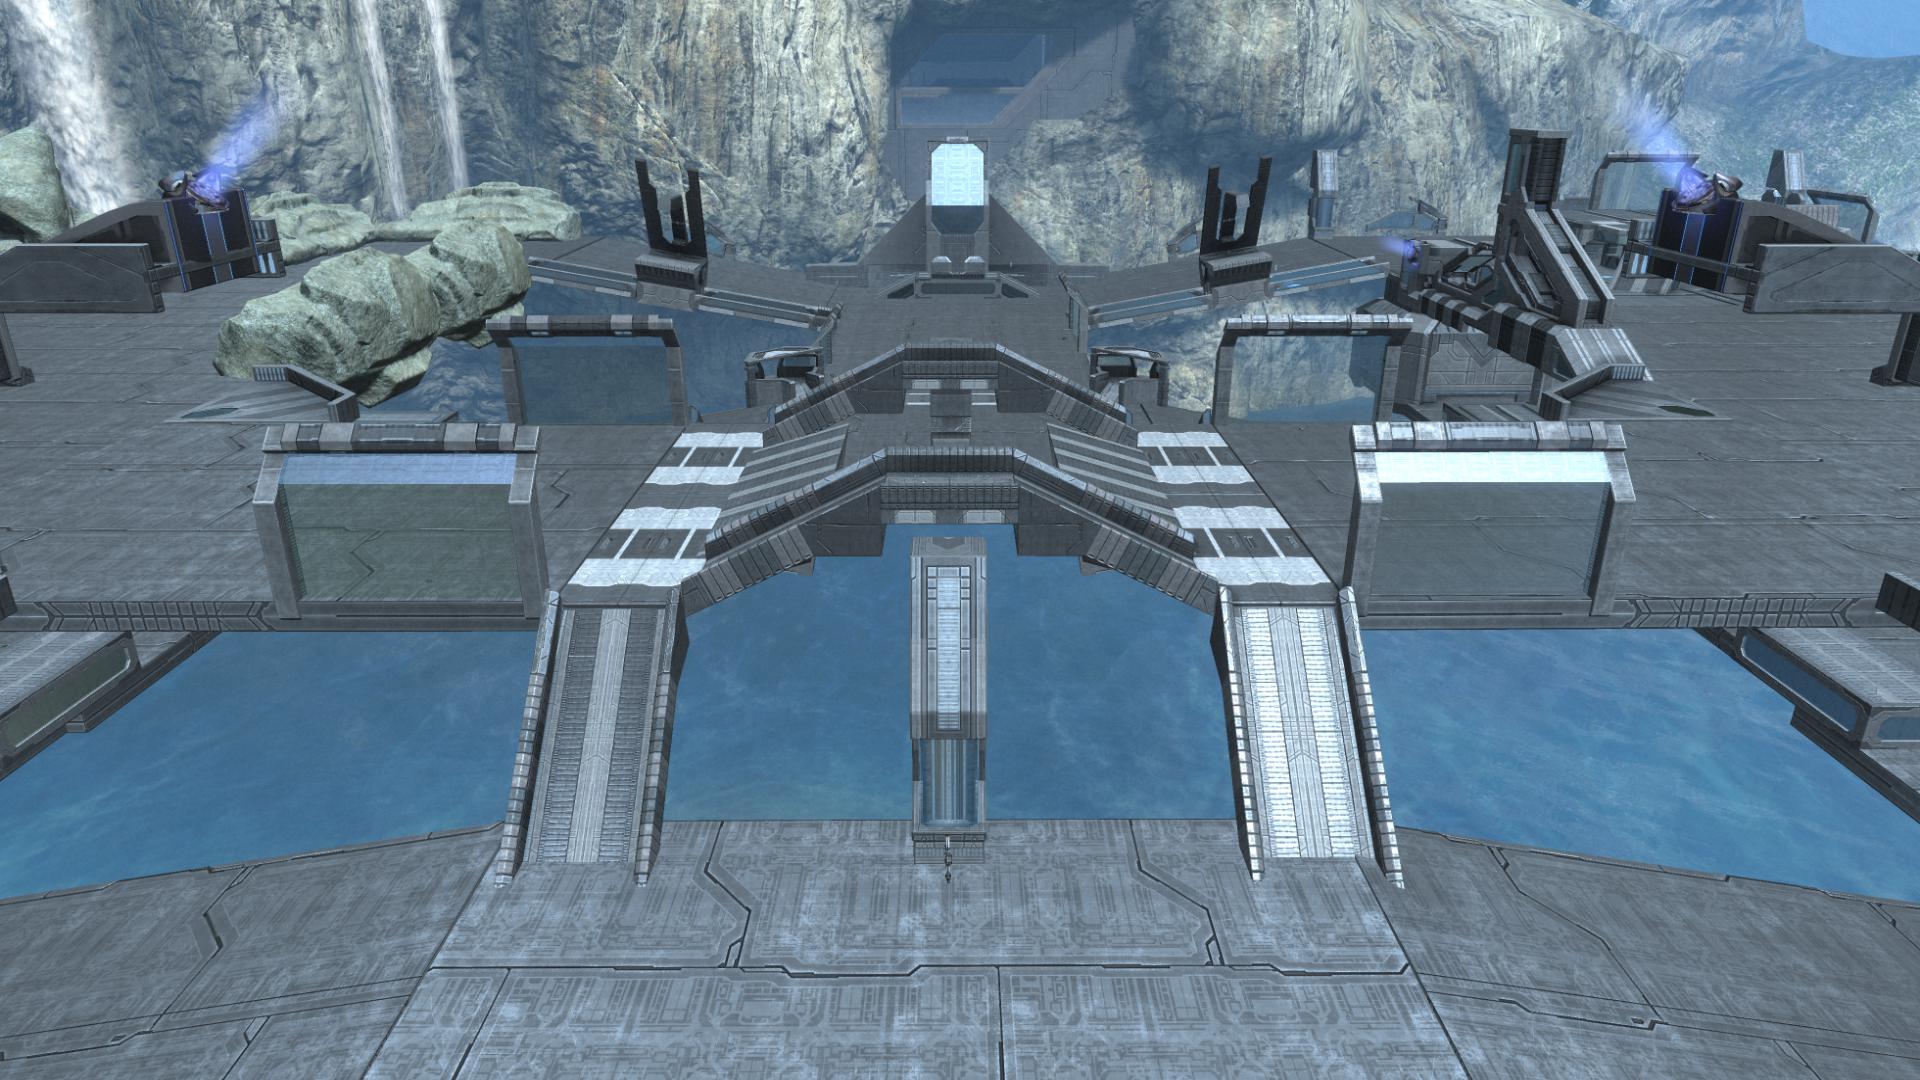
One decision was easy: weapons would have to be symmetrically placed, because there was nowhere to place a single weapon for teams to fight over: there was a hole in the middle of the map. For the rockets, I decided to try and capture the same kind of clashing that took place over Avalanche’s Spartan Laser, but with two Rocket Launchers to fight over. They would be visible to one another, but not so close that one team could easily scoop up both. I settled on the struts in the center of the map, which would leverage the open chasm in the center. Each team had a decided advantage at reaching their own, but the gulf between them would make for some medium to long shootouts on the approach. And whoever grabbed theirs first would have a chance to fire a rocket or two at the players on the other side. But even then, snagging their rockets would be tough because of how visible the other side was to the base.
For the sniper rifle I was less sure of what to do. I didn’t want to park it right next to the sniper perch because I felt the sniper should have to earn the ideal sniping location and work to get it there. I decided to try placing it down low, where they would have view of the lower part of the map, and have to trek up to the top to assume the dominant sniper perch. A player stepping out from behind it can see the other sniper area. And because I was fearful of how the sniper might dominate the open layout, I nerfed it to just one spare clip (eight shots in total) and put it on a three minute respawn. If my fears didn’t pan out I could beef it up a bit later. With these placements, a similar dynamic would hopefully play out over the sniper and rockets, but at different ranges.

The rest of the weapons took on what I think are natural placements, with a couple other power weapons (Grenade Launcher and Gravity Hammer) at the pyramid and quarry areas, and a mix of DMR, pistols, grenades and other small arms weapons at the primary intersections and cover points on the map.
I had made an important conceptual decision on the spawn design already. I did not want to use any neutral spawn zones that either team could use, for one simple reason: I don’t trust the Reach spawning engine to correctly select when players should spawn on them. I’ve seen and heard about far too many instances of players spawning right near players from the other team, so I was going to use brute force to make sure that didn’t happen here. Which meant that each team would have their own half of the map to spawn on.
I wanted players to spawn in the vicinity of their base, unless the base was under attack. I envisioned a three tier spawn regime: the base respawns, a set of nearby spawns away from the base, and a set of “bail out” spawns to be used when the base was under heavy assault. To learn about the spawn influence zones, I read JonnyOThan’s superb guide to spawns and objective placement in Forge. The Spawn Zone, Weak would inform the spawn engine to only use the respawns within it if the other spawns were too dangerous due to team mate deaths or the presence of the members of the opposing team. So I used those to mark off the “bail out” spawn areas. (I should note that I’m deliberately NOT using the “best practices” methodology here, which is all neutral spawns and spawn zones to determine who spawns there.)
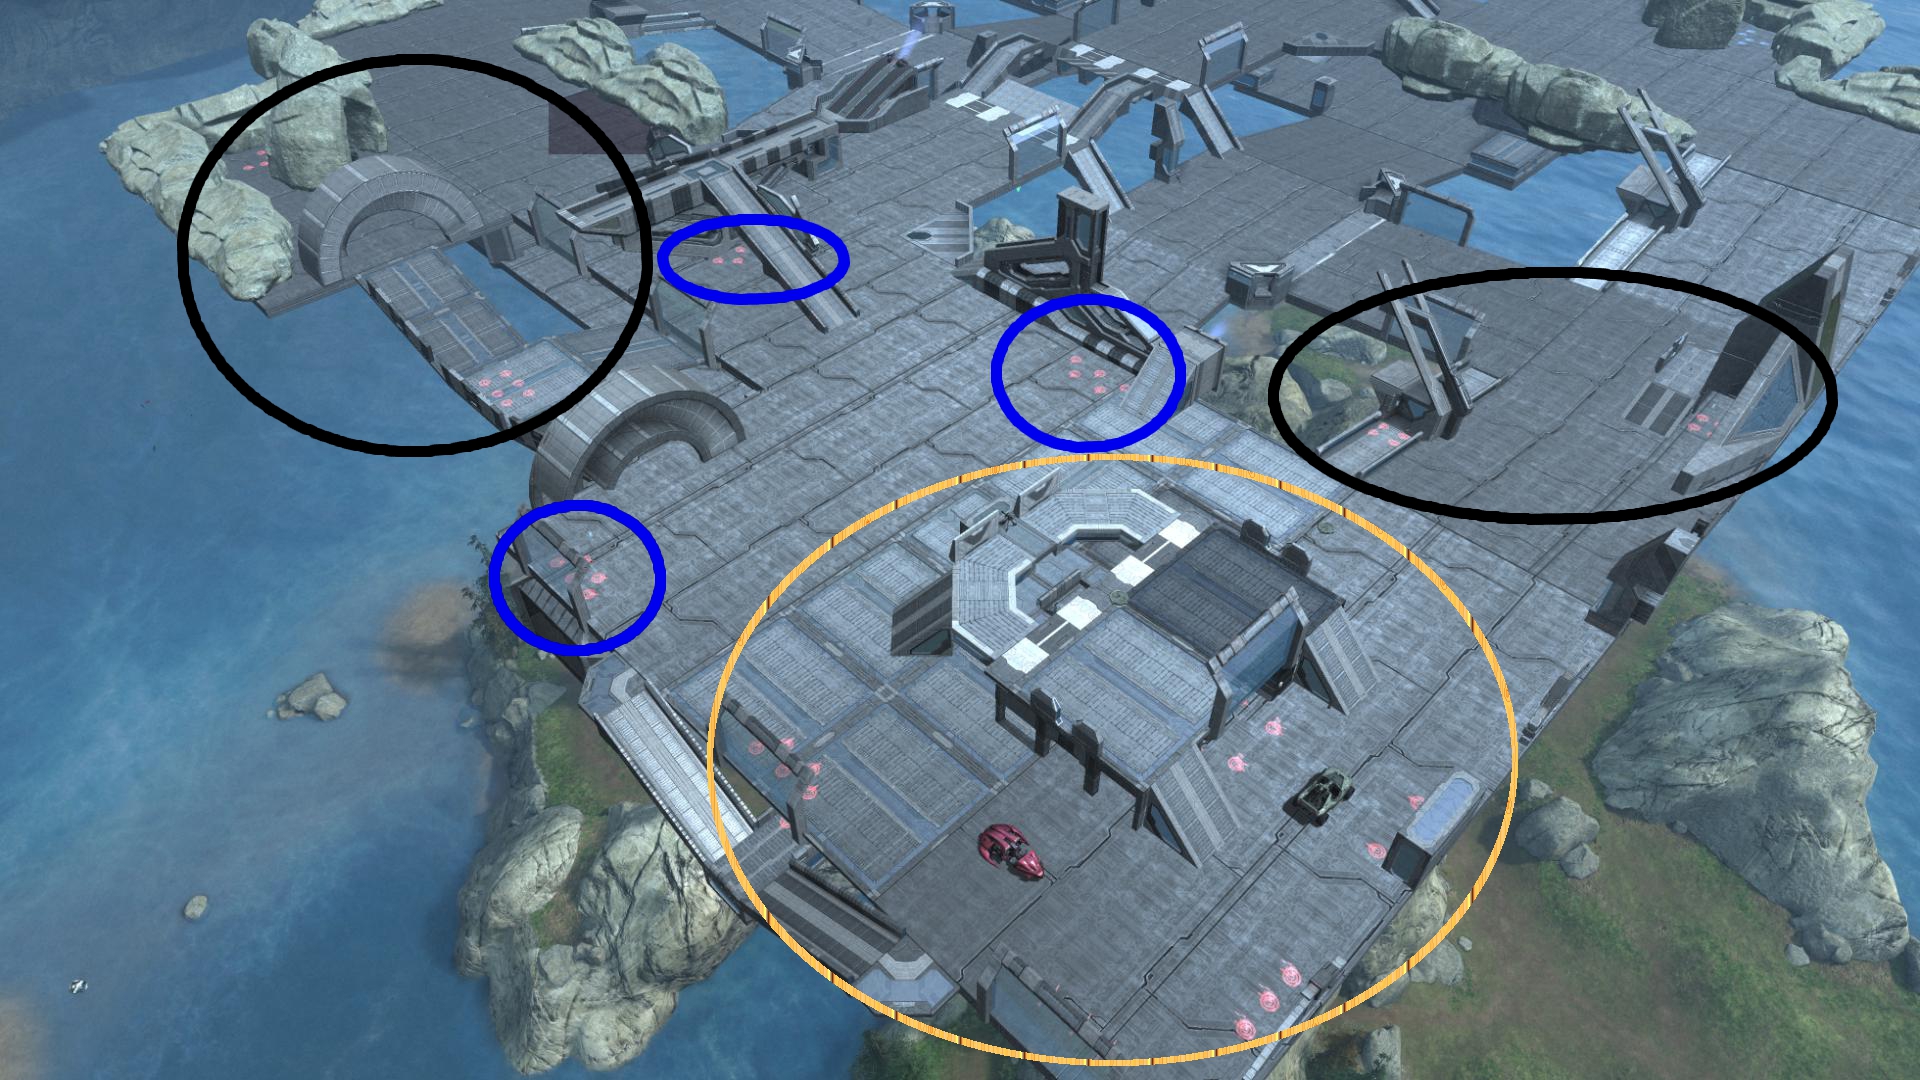
Below is a professionally marked up screen showing the general spawn locations. The yellow circle contains the base respawns, the blue the locations just away from the base, and the black circles the “bail out” spawns. They were located far enough away that players could not immediately engage the team at the base, but close enough that they could engage after a short walk. I used four weak respawn zones so that the location of the “bail out” wouldn’t be predictable. Not shown are the spawns placed on the lower level of the map. All told I used about 70 respawns for each team, in about a dozen different areas.
I followed a couple of simple guidelines when placing the spawns. First, players should always spawn facing a recognizable landmark on the map so they can quickly get oriented. There are still spawns inside the bases of Valhalla that cause me to turn around a time or two in order to figure out where I am, and I wanted to avoid that symptom. Second, players should have cover from at least two and preferably three directions when they spawn. And they should never respawn facing something they have to jump over, or so close to and edge that a move in any direction will cause them to fall. To make sure I was following my own rules, I stood in every single spawn I placed so that I could see what a player would see when they respawned there; it eliminated the guesswork.
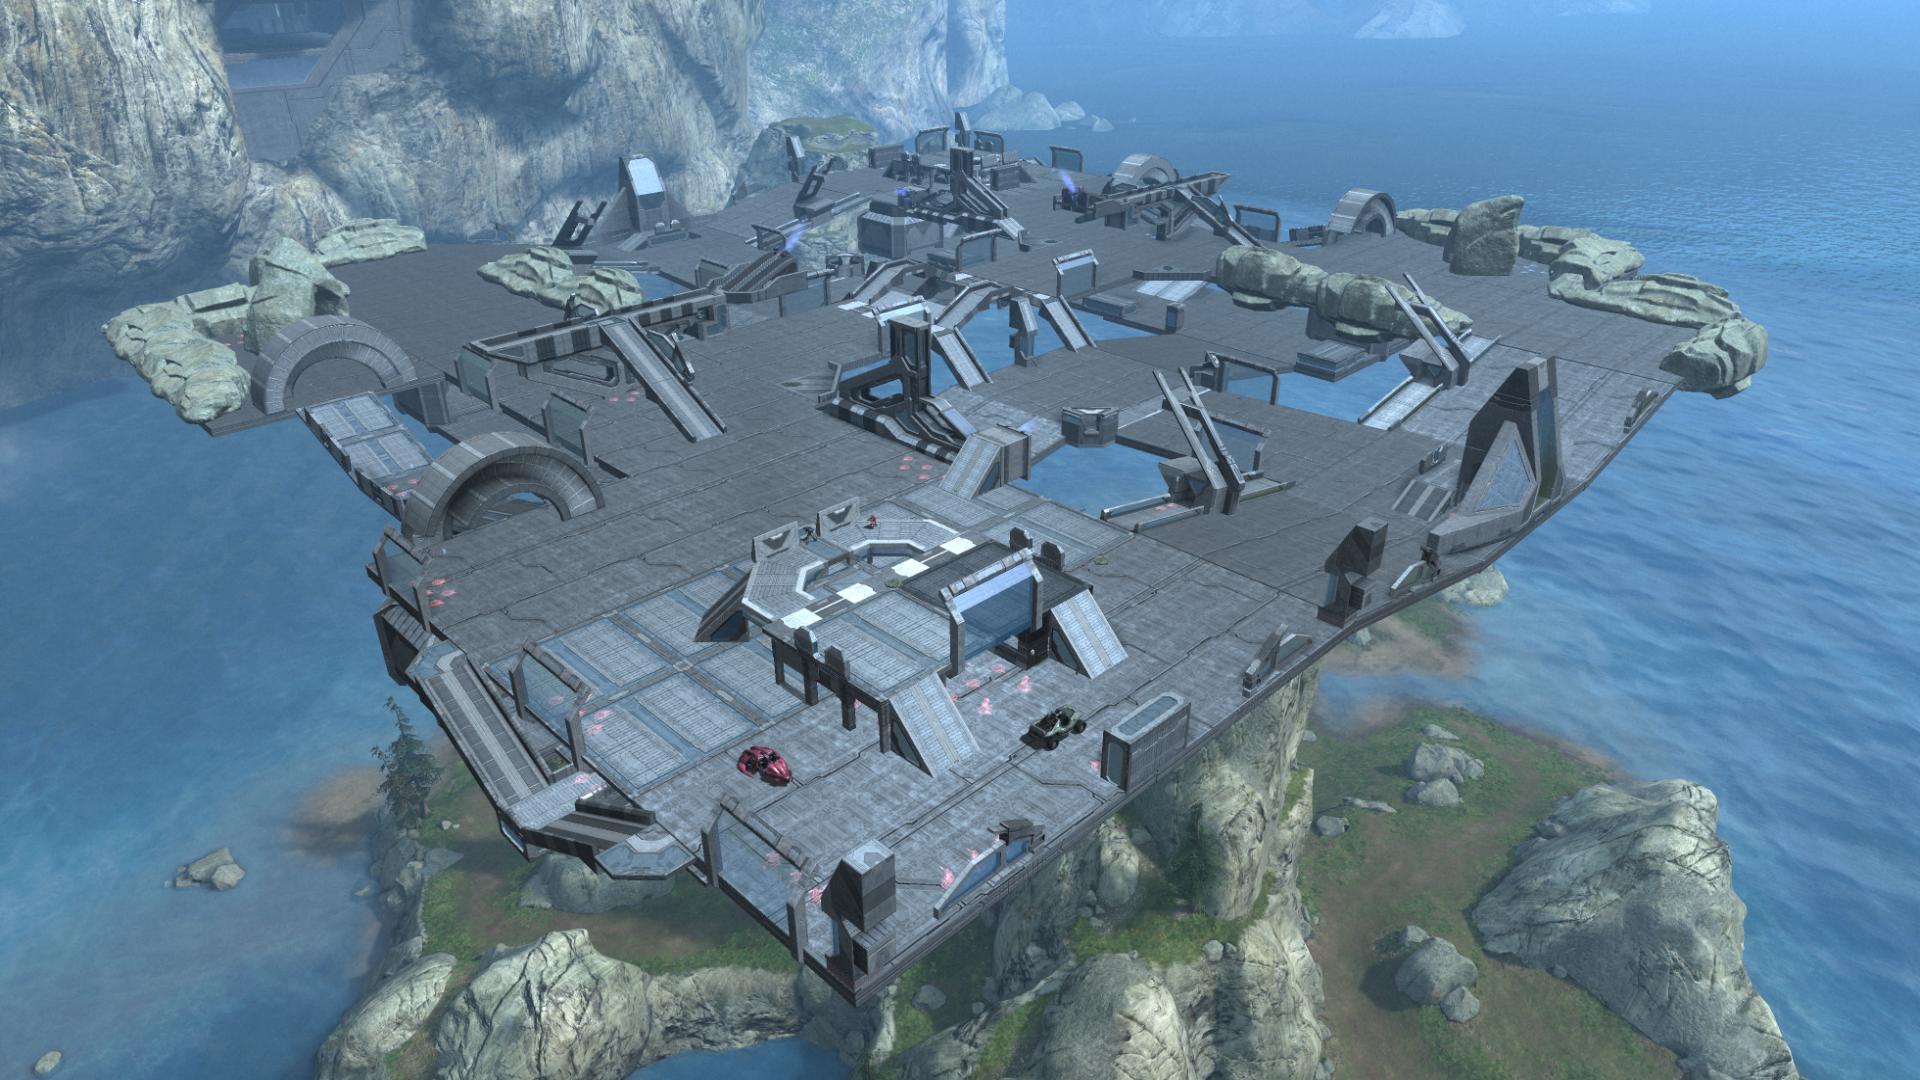
For this first play test, I just set up Slayer and Capture the Flag, because if those game types didn’t work, then none of the others would either. With the map in relatively smooth shape and populated with spawns and weapons, it was time for its first play test in 8 v 8 customs.
The state of Crossroads just before the first play test:
(Programming note: in the interest of heading off any requests to join the customs session, the play tests have already occurred. At this point, this series is running at somewhat less than real time, and I’ve already made a host of updates in response to the testing; I’ll get it all caught up next week.)
I can’t imagine focusing long enough to research; much less write this kind of article. You’ve outdone yourself with this material. This is great content.