Data Hive
Mombasa Streets: ‘Kikowani Station’ – ‘Data Hive’ Interim
The screen fades from black, and the beginning notes of “The Light at the End” greet you upon your return to the city. The title of the song is appropriate, as it is almost daybreak and we’re closing in on the end of “ODST.” We can see the light at the end of the tunnel.
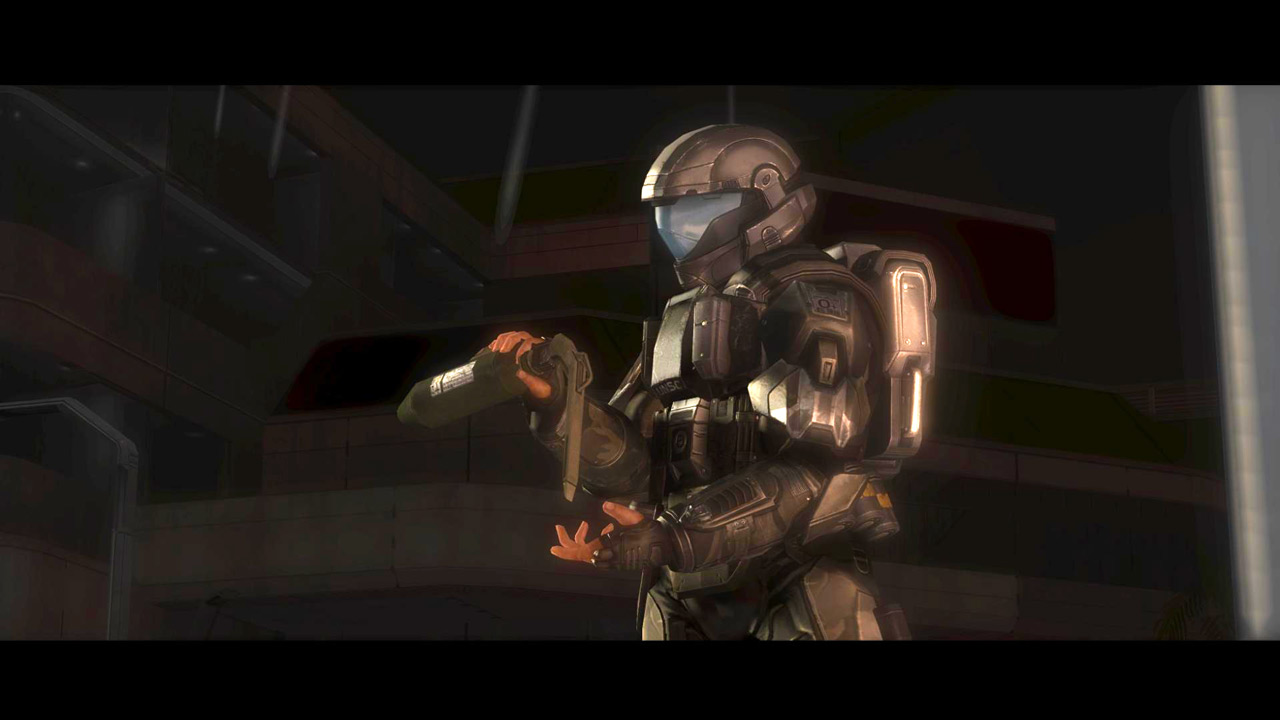
The Rookie checks to see if there’s any more bio-foam in the canister before he discards it.
“Can anyone here me? This is Captain Veronica Dare.”
A familiar voice, but not one you’ve heard in a while. After so much silence during the Rookie’s gameplay, it’s rather jarring.
Dare: “My beacon is active. Need immediate assistance.”
Above, a Phantom reroutes from its original flight path and heads in the direction of her signal.
Dare: “Someone please respond.”
The Rookie readies his rifle and heads in the Phantom’s direction.
—
On your last visit to the Mombasa hub, you’ll immediately notice a couple of things that will make this trek different from all the rest. The moment you return you’re greeted by a waypoint that directs you to the other side of the building in front of you. The waypoint eventually fades, but the marker in your HUD’s compass remains to point you in the right direction.
Soon enough you’ll hear the squeals of two squads of Grunts trying to flank you. They shouldn’t prove much trouble.
Hitting the back button will show the rest of the city is inaccessible besides the small section the Rookie is in. There are two ways to get to the beacon point on the map—one longer, the other shorter. There’s a heavy Covenant presence guarding the entrance to the beacon. Taking the longer route will give you more room to maneuver with two different entry points instead of the one as allowed by the shorter route, but you’ll have to fight through a pair of Hunters to earn that advantage.
On my playthrough, I had a Ghost waiting, so taking out the Hunters didn’t cause me too much pain. Keen observers will recognize you return to this location later on in the game.
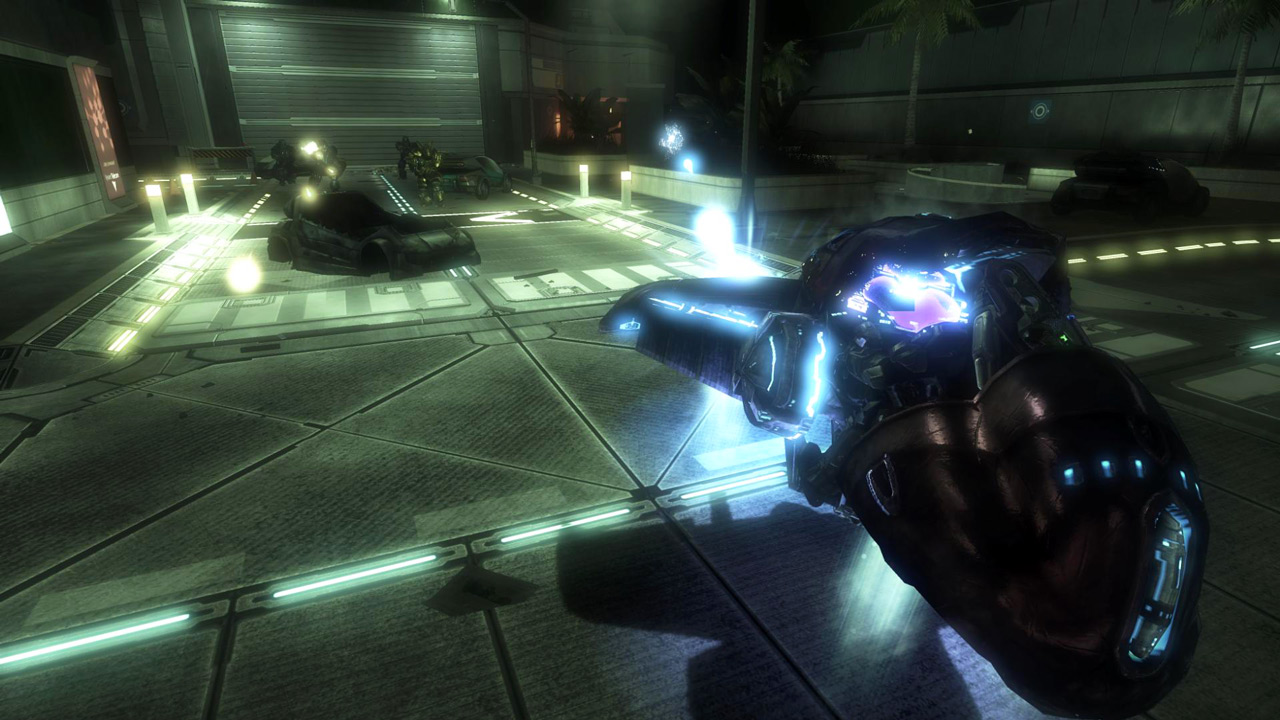
Once you get closer to your goal, you’ll see there’s a small Brute pack, topped off with a Chieftain wielding an FRG, blocking your way. Supporting them are two Jackals with sniper rifles and Brutes in Jetpacks.
Using my Ghost, I exchanged fire with the Chieftain as I zipped between the two adjacent entrances allotted to me by the longer route. The difficulty you’ll have with this encounter varies with the weapons you brought with you before the “Kizingo Boulevard” flashback. Obviously you’ll have a much easier time killing the Covenant with heavier weapons than you would a silenced-SMG and an M6D Pistol.
Collect some weapons and ammo from the fallen Covenant (the FRG and sniper rifles will come in handy) before you take the plunge into the city’s underworld. When you get close enough to the correct door, the sign next to it changes to read “DETOUR” with an arrow pointing you in the right direction. Make sure you have everything you need, then open the door.
The Rookie discovers an elevator shaft, with an intact guide wire winding down into the depths. Looking over the edge reveals nothing but darkness; the power seems to be out. As far as the Rookie can tell, there’s no other way to get down. He takes another look at the cable, slings his SMG, and jumps. He grabs on and holds tight. Slowly, he lowers himself into the darkness.
DATA HIVE
The Rookie lands on top of an elevator cart in a dark room. Dare’s static-filled voice sets the level’s claustrophobic and urgent tone.
Dare: “They’ve got me cornered. I’m low on ammo. If you can hear me, I’m on sublevel nine. New—”
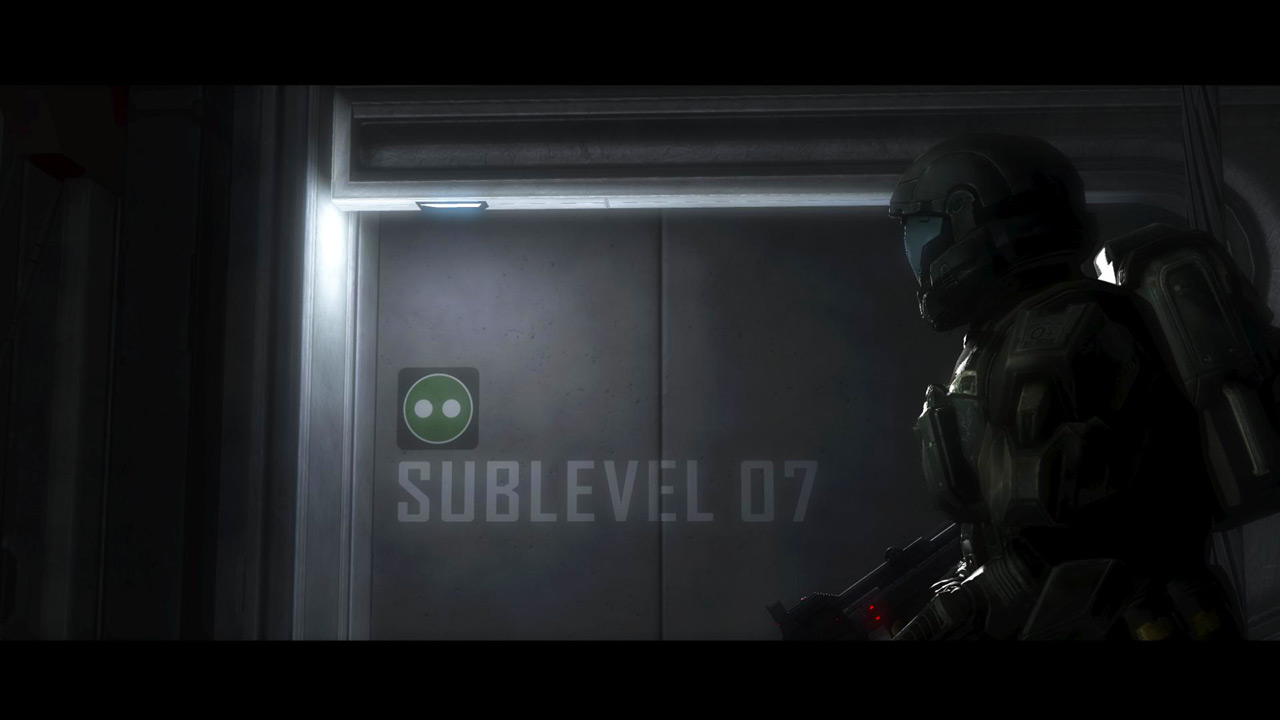
Her transmission cuts off. The Rookie taps his helmet to no effect. He turns to the sign on his left, which reads “Sublevel 07.” Bungie’s favorite number aside, that means he’s two levels from where he needs to be.
When you take control of the Rookie, you’ll have to jump down from the elevator. A quick glance around the room tells you your VISR mode is going to come in handy this level.
The first room in “Data Hive” gives you a strong indication of the state of the city’s functions after the Covenant have rolled through. Main power is out. The only illumination is coming from malfunctioning wall panels and door status indicators, floor markers, and a couple of overhead lights.
Turning on your VISR makes things much easier to see. Looking around a bit more will make you realize you’re in a loading/unloading zone. To your right and back you’ll see empty bowls, cups, and food canisters on a ledge next to some helmets. Chairs lay on the floor, abandoned in a hurry.
There are three doors toward the front of the room. The one on your left is inaccessible. The one to your right burns a malfunctioning yellow. Inspecting the audibly troubled door reveals the foot of a dead body in the doorway’s path, preventing its closure. If you crouch and maneuver yourself just right, you can see through gap and make out the body of a dead drone; a precursor of things to come. There’s also a shotgun next to this door. You might want to grab it; this level features significant close quarters combat.
The center door is lit up as a welcoming green, so this is your only path forward. Walking towards it you’ll past overturned trashcans and piles of trash, toolboxes with “Traxus” everywhere, gas canisters, and the bodies of dead Grunts and humans. There’s a couple of grenades, another shotgun, and a plasma pistol near the green door for you to consider.
Walking through the door will lead you into a wide hallway with a color scheme and pattern similar to the room you just left. Here, though, there’s a noticeably icy feel to the environment, most noticeable on the frosty glass. Servers line the wall to either side of you, and work stations, power modules, crates, and independent servers dot the path ahead. If it wasn’t clear already, there’s a sign in front of a workstation that reads “Sublevel 07 Maintenance.” It’s a service corridor, basically.
Here is where people maintain and, if need be, repair the Superintendent. He runs the city after all, so making sure he’s operating at 100% efficiency is a monumental task; throughout the facility cables snake across the floor and safety cones surround repair points.
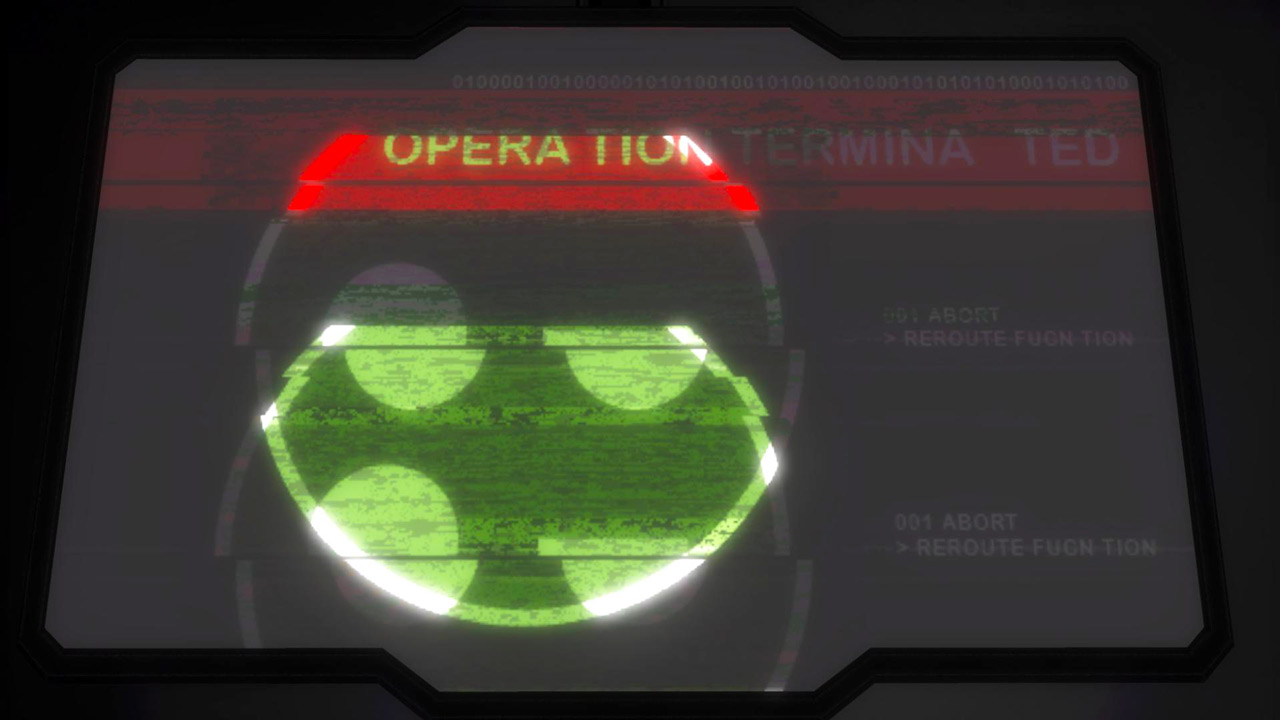
Walking down the hallway, you’ll hear the beeps and boops of the automated machinery, the hums of the air conditioning, and whatever else is functioning on emergency power. Computer monitors are still operating, but there’s a trick to them. From far away they’ll display two different pictures—core temperature, or the status of the backups—but when you get closer, the screen fizzles to reveal either a Superintendent sad face icon, or a curious face and the ONI symbol, along with statement “OPERATION TERMINATED.” It looks like the Super is trying to communicate something to the player…
A little farther on you’ll see a squad of Grunts. You can play the encounter sneakily, quietly taking them out, or plow through them as you have countless others. If any escape, they’ll go through a short, narrow hallway that’s very similar to the corridor you just left. This one is noticeably in greater disrepair, though, with sparks from disconnected wires hanging down from panels in the ceiling.
Jackals and Grunts are waiting for you on the other side, alerted to your presence if your previous firefight left survivors, but they’re easy enough to kill. There will be light resistance until you pass through another door at the end of the hallway. On the other side is a circular room. Three Grunts will panic at the sight of you and scramble to escape. Kill them before they notify the Covenant in the next room.
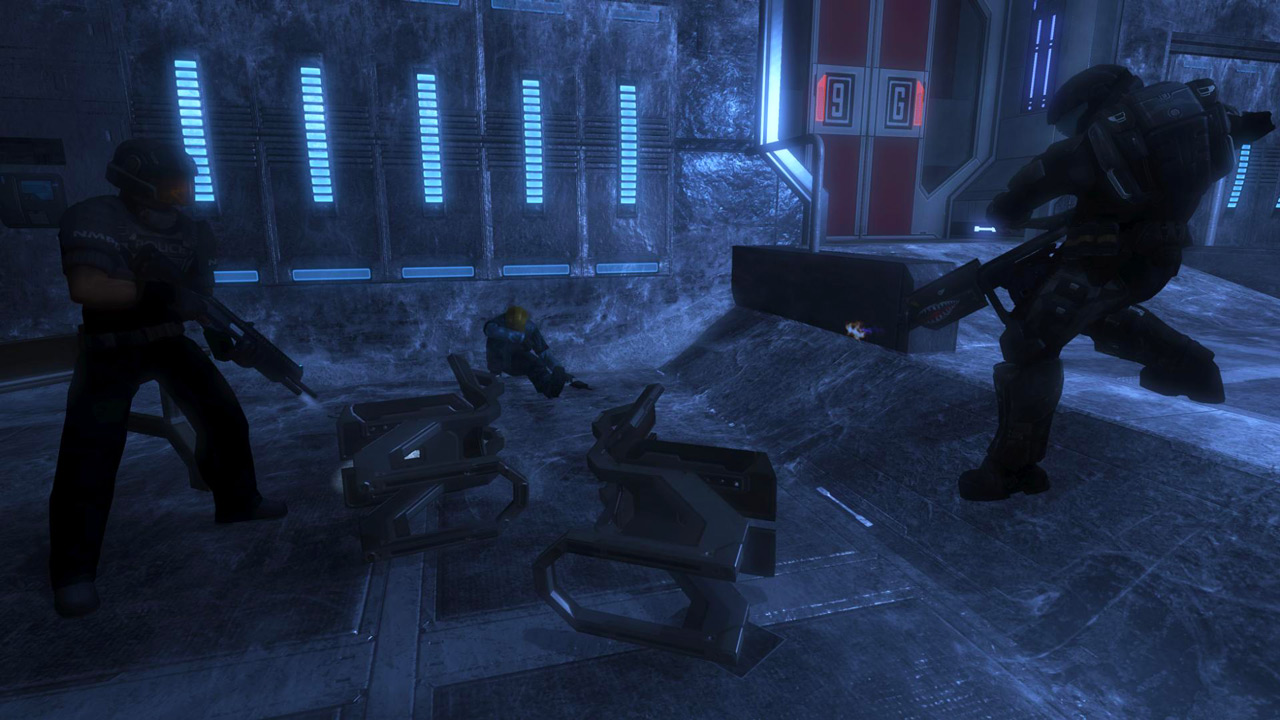
Your only option going forward is to walk down a narrow, gray path that leads into another circular room. Here you’ll find a Brute and three Jackals. The first time you will have seen a Brute in the level. Fight through them and move on through a series of the circular rooms. Though the environment is proving repetitive, there’s something different going on in the next room; a Brute and two Grunts have cornered a human.
Brute: “This way! We have it trapped!”
Officer: “Do it, Vergil! Now!”
Superintendent: “CONSTRUCTION AHEAD. EXPECT DELAYS.”
Officer: “I’m gonna die! You hear me?”
After a short amount of time and fighting through more Covenant, you’ll be in the room from where the chatter was heard. The human voice you heard was that of an NMPD officer.
Officer: “Thanks, Trooper. They almost had me. I’m trying to get down to the next level to check on my team, but this stack is locked down tight.”
The structures in the middle of these circular rooms are called stacks; another way to store data. When you get closer to the stack, the Superintendent chimes in. Literally.
Superintendent: “WELCOME. ACCESS GRANTED.”
Officer: “Well, looks like you got the magic touch.”
You’ll be prompted to raise the stack when you get closer to one of its consoles. Unlocking the machine will cause the stack to rise. Four or five Drones will fly out from the opening and open fire. When all the Drones are dead, the officer will take out his anger on the Super.
Officer: “What’s wrong with you Vergil? You trying to get me killed?”
Superintendent: “WARNING! HITCHHIKERS MAY BE ESCAPED CONVICTS!”
For longtime fans of the Halo series, the Super’s line is a reference to the final chapter title of Halo: Combat Evolved, shortly before players begin the famed Warthog trench run. The title’s significance in Halo has been hotly contested by fans, but if players have been following the audio logs scattered throughout the city, they should know to pay heed to Vergil’s cryptic warnings…
Officer: “Drop down, Trooper. I’ll follow you.”
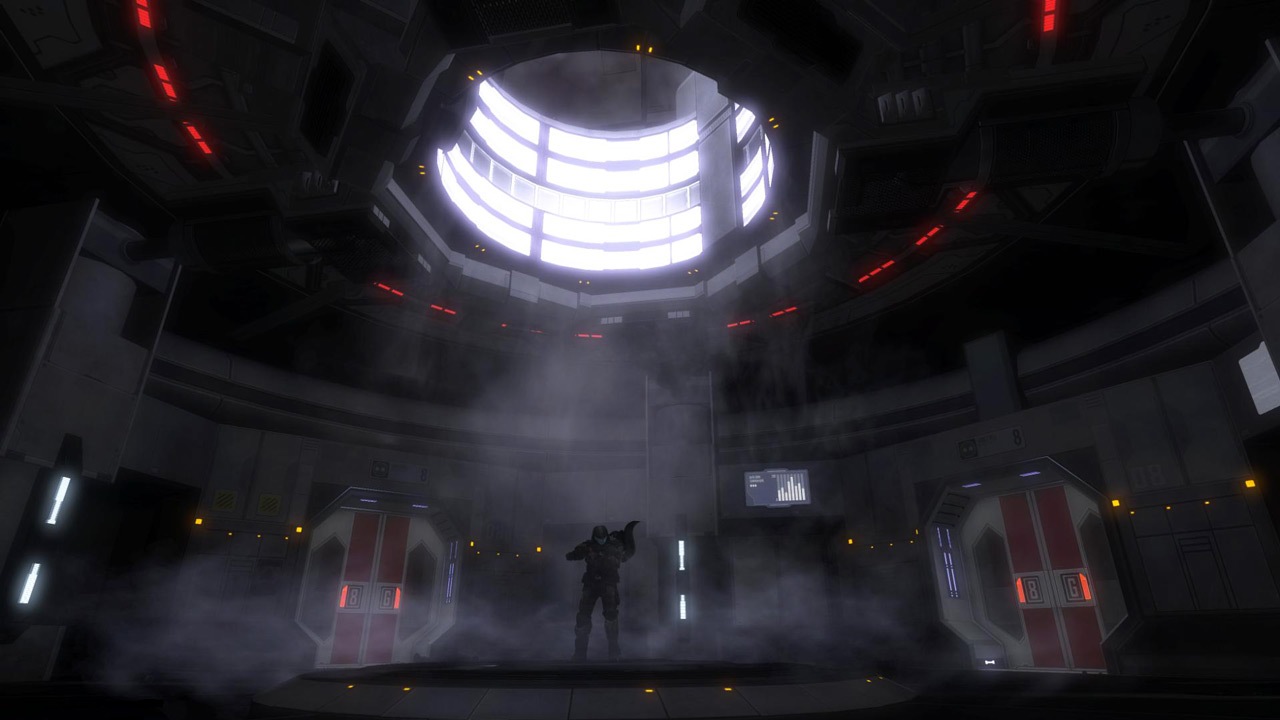
The jump down to the next floor is a big one, so after you land your stamina will need to recharge. The Rookie is in another circular room, but you’re one more level closer to your goal. There is a dead body of an officer and corpses of several Drones on the ground. The human is surrounded by spent bullet casings. A shotgun, Carbine, and Plasma Pistol are there for you to use if need be.
The officer, true to his word, follows you down.
Officer: “Cant’s see a damn thing. You go first.”
He turns on a flashlight at the end of his shotgun. You should take one last look at the room before moving on. The steam falling down from the data stack, coupled with the light pouring in from above, makes for very beautiful scenery.
Through the door, you’ll walk into another service corridor. Here there aren’t any lights to guide you aside from some floor markers and buttons on the walls, so it’s best if you use your VISR. With it on, the two Drones gnawing on human corpses are easier to see. If you’re quiet and quick, you can melee them without warning the other Covenant down the hallway to your presence.
Officer: “Son of a bitch! These are my guys. Buggers got all of them! Now I’ll have to check on the Doc myself…”
If you follow him, he’ll take you through a door to your right that leads into a narrow white hallway. If you’re lucky, you can get in the hallway without alerting the Covenant. When you’re in the hallway, the officer will begin to question you:
Officer: “What are you doing down here, anyway? …Don’t want to tell me? That’s all right…we all have secrets.
From here, you have two choices: You can continue down the hallway and tackle the Covenant from the side, or double back and choose to take them head on through the corridor. I usually take the narrow approach, but this time I was in the mood for a direct confrontation in the corridor. There’s a Brute Captain here with a couple of Brute Infiltrators. Once they’re out of the way, head through the door in the back.
On the other side is another circular, data-stack room. There’s more Covenant to fight through, and the officer will push forward to the next area. There, a data stack is partially exposed, with the Covenant trying to lock them down and seal the lower levels. You battle standard groups of Covenant for the next few rooms until you come across one that’s guarded by three or four Brutes.
Officer: “You’re going down to level nine too, huh? Guess I could use some back up…”
There’s a beep and you can hear a loud click. The data stack unlocks.
Superintendent: “WELCOME. ACCESS GRANTED.”
Here players’ experiences will diverge depending on how many audio logs they have obtained. If the player doesn’t have 29 audio logs by this point, the data-stack will close before the officer can jump down with you. Trapped, the Superintendent will let Drones into the room, murdering him. The Superintendent will follow that up with a short sermon: “CRIME DOESN’T PAY.”
If on, on the other hand, you have 29 audio logs collected, the officer jumps down with you to level nine, the last known position of Veronica Dare. The corridor beyond isn’t as dark as the most recent ones you’ve been fighting in, but you’ll immediately notice this one looks much colder. There’s a conspicuous mist floating just a foot or so above the ground, and as you advance the frost on the glass, walls, and floor increases. You don’t have to travel too far to come across Covenant resistance. It’s basically a scouting party with one Brute and a few Grunts, so the real fight is farther ahead.
It’ll be the toughest battle in the level thus far. You have to face an entire Brute pack with a Chieftain wielding a plasma turret. Using the work stations and data storage units as cover will help to avoid fire from Spikers, Maulers, a Carbine, and Brute Shots. Flame grenades can be really useful here, as the Brutes are forced to stay close to one another in the cramped corridor. Your one ally is valuable as a distraction, especially if you can get him into a fight with the Chieftain for an easy assassination.
With the Chieftain out of the way, the officer will want to get to work immediately.
Officer: “Trooper, hold up a sec. I got to check on a…personnel issue.”
Ice increasingly thickens on the floor and the walls around a door on your left. There’s a camera above it, too, from which the Superintendent is watching. The officer stops before the door.
Superintendent: “CRIME SCENE. RESTRICTED ENTRY.”
Officer: “Shut up, Vergil! You hear me?”
Superintendent: “ICY CONDITION. CHANGE REQUIRED.”
Officer: “Freaking machine! The whole city’s gone to hell…. Wait here, watch for hostiles! I’ll be back.”
The officer passes through the doors into the room beyond. You may choose to push on ahead and leave the officer to his business, or follow him into the room to find out what he’s after.
The door opens to reveal a short, icy, sterile hallway. On the other end is a small room where the officer stands over a dead corpse.
Officer: “What are you stupid? I told you to stay outside!”
You can still turn back, but if you move any closer to the corpse…
Officer: “Step away from there. This ain’t none of your business.”
If you don’t step back:
Officer: “Kinsler gave me real specific instructions: Make sure the Doc’s dead, and make sure no one knows about it.
Superintendent: “CAUTION, TRAVELER! CAUTION!”
Officer: “Sorry, friend…you know too much.”
The officer points his shotgun at you and fires. You’re forced to fire back. It doesn’t take much to kill him, and as his body collapses to the floor, dead, the Superintendent, for lack of a better word, gloats:
Superintendent: “CRIME DOESN’T PAY. GOOD CITIZENS DO THEIR PART.”
The skirmish with the police officer is only the second time in the Halo series in which you’re provoked into killing another human (the first being the crazed Marine from “343 Guilty Spark”.)
Grabbing the final audio log nets the player the “Audiophile” achievement and concludes Sadie’s Story. The corpse was Dr. Endesha, a civilian worker responsible for the management of the Superintendent. Endesha was killed when Commissioner Kinsler, the antagonist of Sadie’s Story, activated the fire extinguishing systems of the doctor’s facility, killing him and everyone in it.
The audio logs, combined with some text from ODST‘s trailer, also help piece together the backstory of the game. When Regret’s ship parked itself over New Mombasa, the Prophet sent hundreds of Engineers into the city. One of them stumbled upon the Superintendent’s damaged data center. Driven by its curiosity and its desire to fix things, the Engineer began to repair it. At the time, the Superintendent had been in communication with the ONI vessel Tokyo Rules. Communication between the AI and the ship began to falter. Right before communications broke down completely, the COMM officer aboard the Tokyo Rules told the AI that ONI would dispatch a team to retrieve it–led by Dare, and sparking the events of the game.
At the end of “Sadie’s Story,” Sadie refuses to leave the city because she doesn’t want to leave Vergil behind. She relents and departs on a train after Vergil tells her a team from ONI would get to the AI before it was too late. As a side note, while Endesha’s only appearance in the franchise is in ODST, players hear a lot more of his voice actor–Hakeem Kae-Kazim, voiced Jorge in Halo: Reach.
After leaving the frozen room, you can proceed down the corridor and find flamethrower nestled inside one of the cubicles. Flamethrowers are fun, right? Ahead, the mist in the air will dissipate, returning the corridor to the more recognizable sterile state saw at the beginning of the level.
Captain Dare: “Buck? Who knows if you can hear, me but…I’m sorry. I should have told you more about this mission…about everything.”
It’s the first you’ve heard from her since sublevel seven. Go through the double set of doors at the end of the hallway and continue quickly down the next short corridor, past the dead bodies of Drones and Jackals.
Passing through another set of double doors, you’ll find yourself in another short corridor with a group of Covenant – a Brute Captain, Drones, and Jackals – trying to force their way through a door on the opposite side. Interestingly, in this encounter the Drones do not fly around; they stay on the ground and attack you much like every other Covenant. Personally, I find them more fun to fight this way.
Vergil unlocks the door when the Covenant in the room are all dead.
Vergil: “WELCOME. ACCESS GRANTED.”
You trot down another narrow, gray-white hallway. There’s a red-lit door at the other end, with a prompt for you to knock on it.
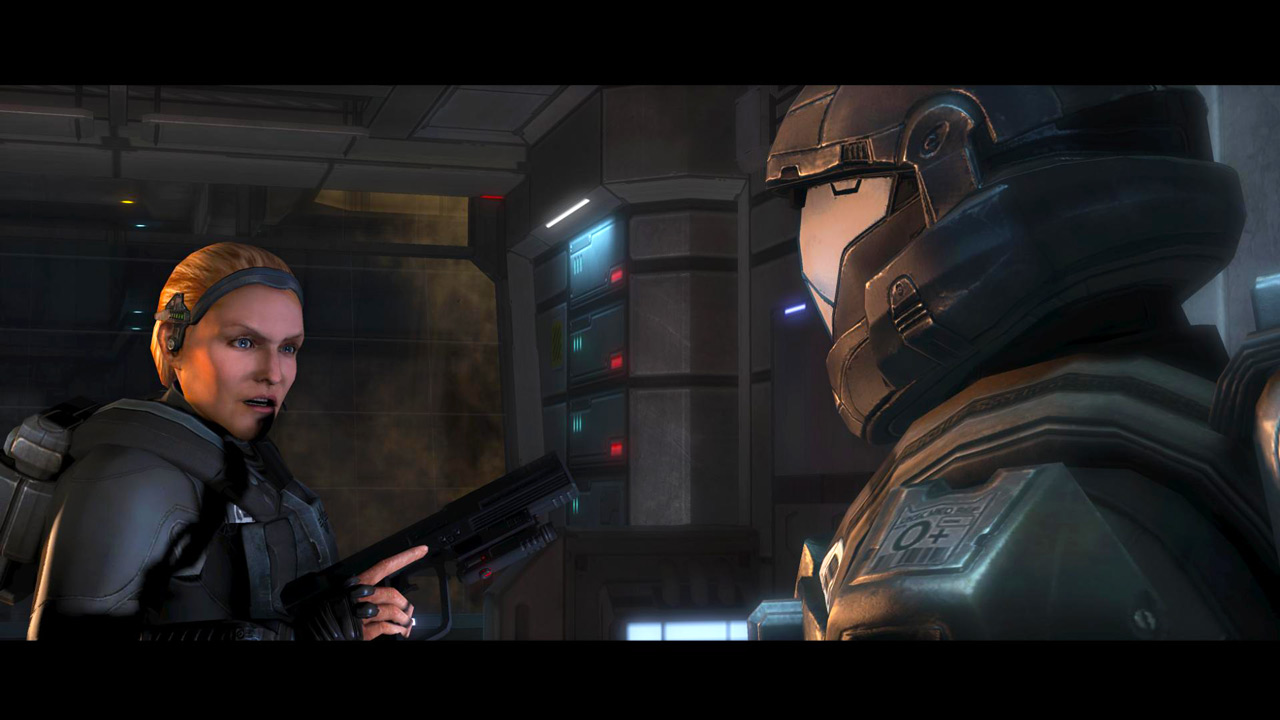
The Rookie slowly approaches the door with his back to it, and knocks. The door opens with a gun pointed at his head, but Dare lowers her weapon at the sight of a friendly contact.
Captain Dare: “It’s you. I thought…nevermind.”
It’s clear she hoped her rescue was Buck.
Captain Dare: “What was your name again?”
The echo of Drone movement travels down the length of the hallway. There’s no time for pleasantries.
Captain Dare: “Inside. Now.”
Dare locks the door behind them. Dare’s been holed up in some sort of laboratory with huge observation windows.
Captain Dare: “This way, and stay quiet. Some idiots blew the building at the top of the shaft. Woke the whole hive.”
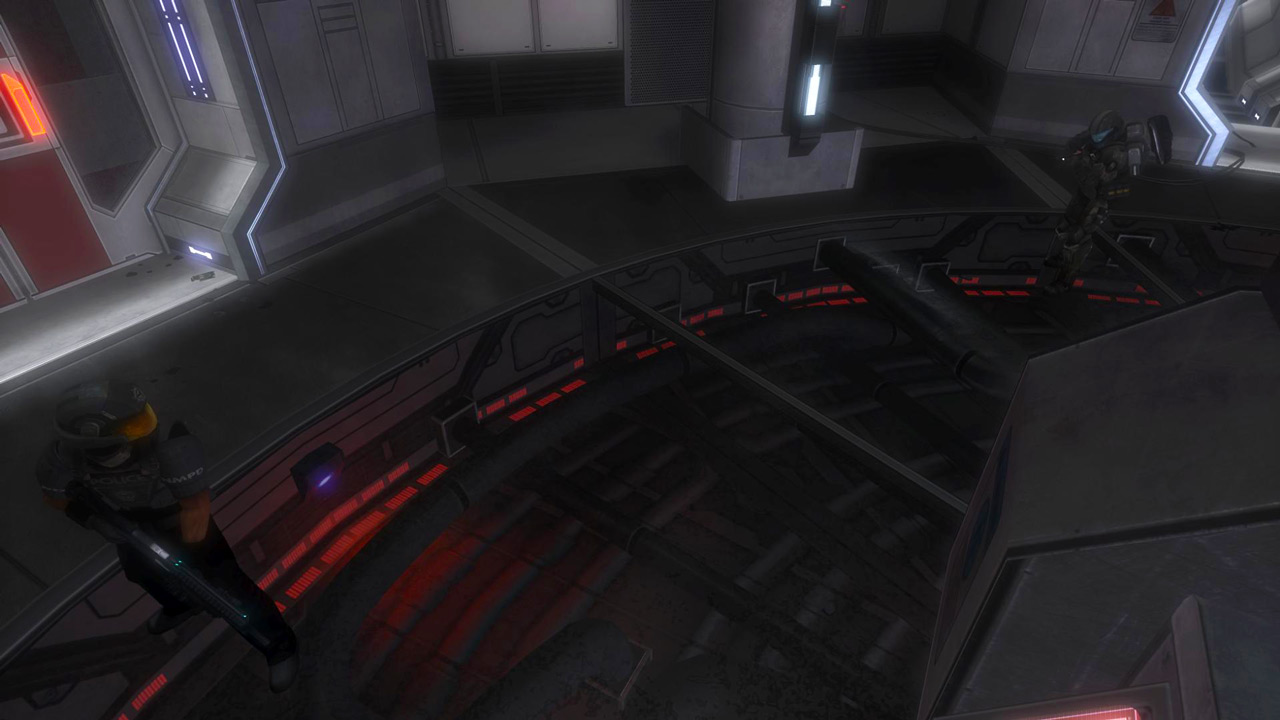
Those idiots were you (as Dutch) and Mickey. The Rookie allows himself a look out the windows. There’s a large structure in the middle connected to the sides of the cavern by means of a bridge.
Captain Dare: “Down there? That’s the Superintendent. The AI that runs every system in the city. My mission – our mission – is to secure the Superintendent’s data. The problem is, there’s only one way in from here: right through the Hive. It would’ve been suicide to go alone, and I was hoping for more backup…but I guess you’re it. You’ve been solo since we dropped? Fighting on the surface?”
The Rookie nods.
Captain Dare: “Unless you spent all night hiding in your pod, you must know your stuff. Show me.”
Of course, if one thinks about it, the Rookie has been in his pod for most of the night, unconscious. The Rookie doesn’t bother to quibble, however.
You resume playing in the same space in which the cutscene took place. The real treat of this location is the view. It may be the Superintendent’s data core, but its size and the light spilling in from above, criss-crossed by falling, flaming debris, make it a beautiful sight. A couple hundred meters above, stood the ONI building, now a smoking ruin.

Another grey-white hallway at the back of the laboratory leads the pair into a service corridor. Dare warns you of company.
There’s moderate Covenant resistance from here until the end of the corridor. Small, mixed packs of Grunts, Brutes, Jackals, and Drones. You’ll know you’re getting closer to the end when you start to see a weird, thick type of webbing on the work stations and walls.
Captain Dare: “Here, Trooper. Through the door.”
After the door, you’ll be greeted by a huge drop. Dare jumps down first. Well, if its safe for her….
It’s a hard landing, one that knocks out all of your stamina and takes a chunk of health. Thankfully there’s medpacks lining the walls. Following the corridor, you end up in a grey semicircular room. A fence-like floor separates the top from the bottom. The webbing you saw in the corridor above is here too. Here you’ll face lighter Covenant resistance than in the hallway. It’s easier to get through them if you stock up on Brute shot ammo that’s to your left, right after you jump.
It’s a short passage. When it looks like you’ve arrived at a dead end, a door on the right opens up to reveal a huge, dark grey room. It’s most distinct feature is its many narrow walkways at the top. A sign on your right helps you place yourself in the facility: Sublevel 10 Power Juncture.
Captain Dare: “It’s getting warmer. We must be right under the Hive. Head across the bridge. Let’s see if we can find a way up.”
There’s two Beam rifles to your right as you immediately enter the room, and two Carbines a little farther on. Take your pick and move on. I usually stick with the Carbine as its more useful for what’s ahead. There’s no Covenant on this floor, so crossing the bridge to the other side of the room is without problems. Dare points you towards a door that leads to an elevator.
Superintendent: “ELEVATOR UP. NEXT STOP.”
Captain Dare: “…Bugger central.”
When you reach the top, you only have to spend a couple of moments in another long, grey, and narrow hallway before you can turn right to get outside where the walkways are. Still no Jackals, Grunts, or Brutes…but from this side of the room you can see why. Kind of. There’s a very dense concentration of webbing on the other side.
Captain Dare: “Let’s stick together. Move fast and quiet.”
As you get closer, you’re able to get a better look at this hive Dare has been talking about.

Apart from the Skirmishers, who only appeared in Halo: Reach, Drones or Yanme’e are the most enigmatic Covenant race. Appearing in Halo 2 with no formal introduction, they’ve been in most subsequent games. They’re more side characters than anything in comparison to the other Covenant species, and they largely only feature in special encounters or locations in the campaigns rather than being mixed in to the regular infantry. Most of the information on the Drones comes not from the games but from the expanded universe—in Contact Harvest we learn that they often function as support workers and laborers, albeit inferior ones compared to the Huragok or Engineers. Despite resembling giant insects of Earth, they are actually quite dogmatic, intelligent, and cunning; a Drone dubbed “Hopalong” tricked the Spartan Black Team into freeing its brethren from a Covenant penal colony where they were being held.
In much the same way Halo 3: ODST fleshes out more of the Engineer’s story within the games, it does the same for Drones. A “hive” is more than an apt description for what the Drones have made in the city’s underground levels. The webbing around the ceiling is extremely thick, so much so that the Drones have constructed holes to move in and out of them; the formations are somewhat reminiscent of inverted termite mounds. Patches glow red, perhaps suggesting some sort of heating apparatus. A green haze blankets the air below the webbing. Players with a good eye will notice that some Drones glow more brightly than others, indicating a possible pupal stage.
Captain Dare: “Damn! Here they come!”
Drones crawl out of the vents and fly at you to thwart your progress. The best thing to do for this area is to stick close to Dare, and take out as many Drones as possible without stopping. If you’re feeling overwhelmed by the firepower of the swarm, you can drop down below to decks where you can recharge your stamina. You can tell how far along you are by what Dare shouts out. When you’re near a large section of the hive that glows red, you’re nearly finished. There’s only one green-lit door at the end of the cavern. Follow Dare through it. You’ll find yourself in another one of the grey, narrow hallways with a short jump to get down to the next level, and thus the data center.
When you emerge, you’ll see a Phantom retreating from the center structure and into the shaft above.
Captain Dare: “It won’t be long before they smash through that door. Let’s take them out now!”
Two Brutes and a Brute Chieftain are trying to force their way into the Superintendent’s data core.

Brute Chieftain: “Open this door, traitor!”
Superintendent: “SPAY AND NEUTER YOUR PETS. ALL DOGS MUST BE KEPT ON LEASH!”
Brute Chieftain: “By the Prophets… You will pay for your insolence!”
If you’re quick enough, you can assassinate the Chieftain and his two minions before they realize you’re there, but if not, it’s best to quicky take out the Brute Minors first so you can focus your full attention on the Chieftain. Dare proves a valuable distraction when fighting him. In such a confined space, he’s able to cover a lot of ground in a few short strides.
Captain Dare: “Not bad. You do know you’re stuff.”
The Covenant dead, the Rookie and Dare approach the door. The Superintendent unlocks it with a welcome. The pair continue inside, past signs that read “Sublevel 10 Data Core.” They walk down a tight hallway, past a blue scanning device until they arrive at a green-lined door. There’s a prompt to enter.
The data core is a dark, small, and vertical room. Like the rest of the facility, only the emergency lights are on. The door closes behind them, so Dare turns on her flashlight. There’s a faint cry from an Engineer as the two walk deeper into the room.
There are actually two versions of this cutscene: one if the player has found all the audio logs, including the one next to Dr. Endesha earlier in the level, and the other if the player hasn’t found all the audio logs.
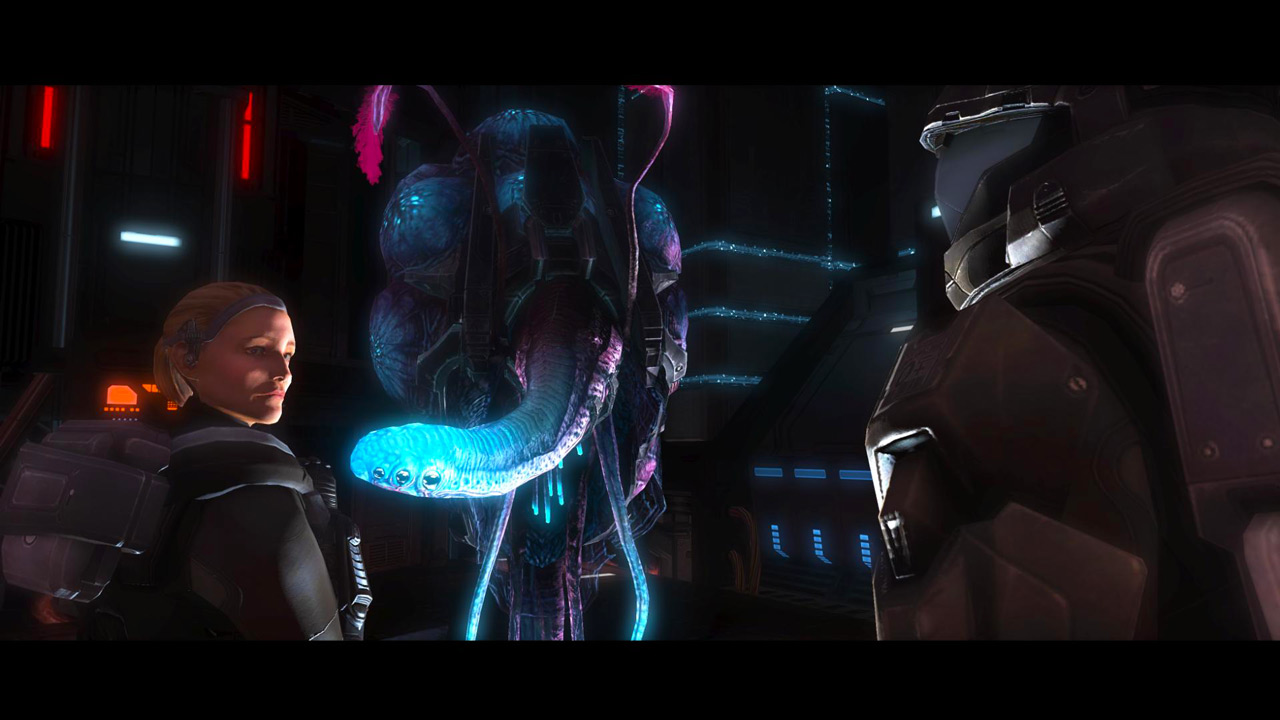
If the player found all the audio logs, the Rookie will gesture for Dare to lower her weapon, and whistles at the Engineer. The alien will fly out from behind the central structure.
In the other variant, Dare will tell the Rookie not to shoot the alien. She lays her gun on the ground, and the Engineer slowly emerges from behind the central structure.
Captain Dare: “We’ve seen them before on other ops but we’ve never gotten this close. Best we can tell, their prisoners or slaves…either way, they don’t like the Covenant anymore than we do. I spotted this one in the tunnels. Watched it access COM lines, security cameras, traffic controls, you name it. Eventually it holed up here.”
The Engineer gestures to a piece of armor attached to one of its air sacs. Dare takes it off.
Captain Dare: “ONI calls them Engineers. Believes they’re some sort of biological supercomputers. If I’m right, this one has taken the Superintendent’s data and combined it with its own.”
In other words, Vergil and the Engineer are essentially the same being now.
Captain Dare: “Everything we need to know about what the Covenant, what they’re looking for under the city is…right…in…here.”
A series of beeps forces Vergil to divert his attention to a nearby control panel. He pushes a button with one of his tentacles, making a nearby monitor switch on. Dare and the Rookie move in closer to have a look. Brutes with jetpacks landing on top of the data center from the shaft above.
Captain Dare: “Damn! Buggers must’ve raised the alarm.”
The camera pans over to the other side of the bridge…where Buck is seen walking out of a door.
Captain Dare: “Buck!”
Buck: “Veronica?! Where the hell are you?”
Dare: “Data center, but we’re coming out.”
Buck: “We?”
Captain Dare: “No time to explain, but do not, repeat, DO NOT shoot anything pink.”
Buck: “Whatever you say, just come on!”
Dare walks over to where her pistol rests on the floor and picks it up.
Captain Dare: “The Brutes are here for the Engineer. They’ll kill it if they get the chance.”
She takes a few steps forward to stand in front of Vergil. She points her finger at it, and her tone takes an oddly soft tone, as if she were talking to a child.
Captain Dare: “You. Stay. Behind. Me. Okay?”
Vergil acknowledges her by glowing brightly for a few moments. The Rookie and her ready their weapons and aim them at the door.
When you take control of the Rookie again, one thing that’ll jump out at you are the shields surrounding your body. The Rookie doesn’t have Mjolnir armor equipped, so what’s going on?
Captain Dare: “The Engineer still has shields, but they won’t last long in a firefight. Take point, clear a path to Buck.”
The shields will come in handy in the fights ahead. A waypoint appears in your HUD notifying you of Buck’s location. Leaving the data center, you will come face to face with the Brutes in jetpacks you saw on the video feed earlier. There’s three of them initially, but they are quickly reinforced with two Phantoms that flank the bridge to drop off one large group each of Brutes, Grunts, and Jackals.

I find it best to fight the two groups one side at a time. With them out of the way, you’ll eventually get to Buck, who’s standing next to a door.
Buck: “This is our exit, Rookie. Head through the door.”
Get inside, drop down, and you’ll find yourself in another gloomy corridor. VISR use is an absolute must. There’s a reason for this room’s darkness; hanging from the ceiling are about a dozen Drones, all sleeping. These Drones, as well as the Drones in the fire-suppressed and frozen areas of the datacenter, suggest that they aren’t simple ectothermic insects that depend on outside sources of heat and grow lethargic in the cold. Perhaps they have additional technology to provide them with that heat, much like how their antigravity generators allow them greater flight capabilities in the gravity of Earth. Alternatively, they may have evolved a natural solution; many animals on earth make use of antifreeze or ice structuring proteins (AFPs or ISPs) to prevent or slow ice formation in the cold.
If you don’t fire your weapon at any one of them, you can simply sneak by. If you’re that eager for some quick kills, you can jump and melee each of them without waking the others up. The corridor adjacent to that one has a locked door preventing you from going any farther.
Buck: “Door’s locked. Damn.”
Captain Dare: “Don’t worry. We have a key.”
Vergil floats near the door, causing blue electricity to jump around between the “12” and the “G” on it. Buck and Dare take the respite as an opportunity to engage in some repartee.
Buck: “I’ve seen hundreds of these things today. Why’s this one so important?”
Captain Dare: “This Engineer knows what the Covenant’s after. If I could safely capture more of them, I would. What they know could win the war.”
Buck: “Oh…”
Captain Dare: “You haven’t…killed any of them, have you?”
Buck: “No! …Well, maybe one or…two.”
Dare: “Nice work.”
Buck: “How was I supposed to know?”

Shortly after, Vergil unlocks the door to one last corridor. This one has sleeping Drones in it too. Dare and Buck can be trigger-happy here and cause the local swarm to wake up, but if you get lucky you can breeze past the sleeping Covenant.
The corridor leads to an elevator room similar to the one you started the level in. Follow Buck’s lead and get inside. The journey is almost over; you’ve found Dare and recovered the original target of the ODST’s mission. Escaping Mombasa alive and with the target is all that’s left.
As always, the Covenant won’t be making it easy.
[…] Hindsight: ODST, by guest writer Dax01, has just been updated with the penultimate ODST flashback mission. Follow the Rookie’s descent into the bowels of Mombasa in Data Hive. […]
Ah, it’s been too long. Great to see this hasn’t been forgotten. Wouldn’ve hurt if it leaned more toward gameplay or more toward story, as straddling the line like this give you just two incomplete experiences. I mean, you could also go all out on [i]both[/i] topics, they’re not mutually exclusive. Though specializing in one would theoreticall require the same ammount of work as this currently does, as opposed to more if you went all out on both.
Nevertheless, a great read.
Excellent as always. One of the best levels from the best game in the series. I’m glad you mentioned Dare and Buck shooting the sleeping Drones. That always annoyed me. It totally ruins the mood.