From Visegrad With Love
Climaxes of a Different Sort
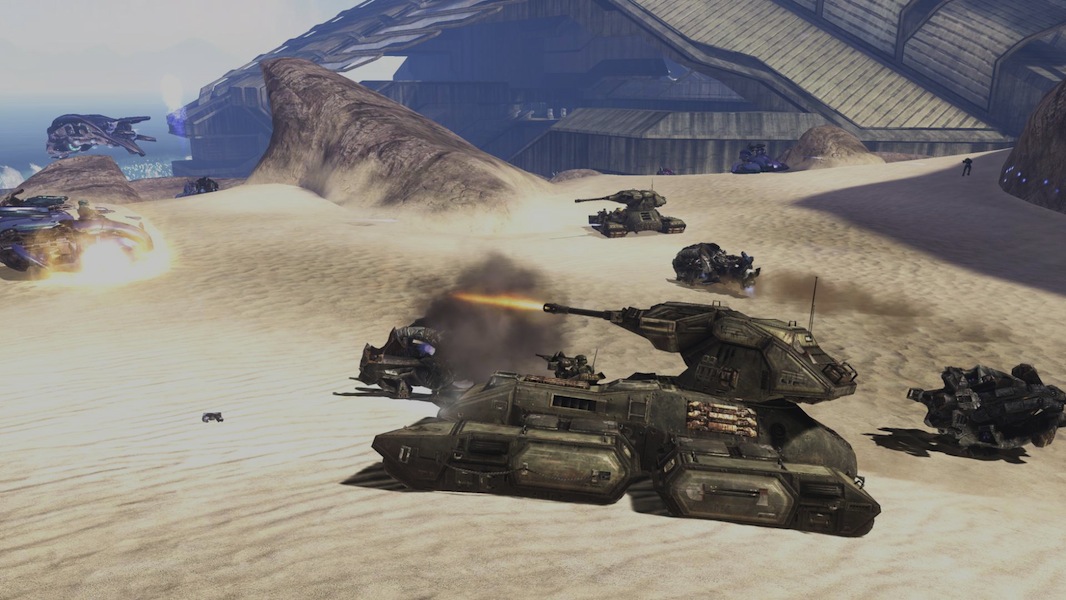
While excellent missions, as set pieces they are surprisingly small in scale, comparable to the smaller battles on Halo’3 Tsavo Highway. The largest vehicle battle in Reach is set outside the rocky entrance to the ONI base. As we return near mission’s end, a few Ghosts and Revenants block the way. In terms of space, combatants and pacing, it’s a small skirmish compared to the larger battles in ODST and Halo 3. The lack of large-scale vehicle combat feels like an omission from a pacing standpoint, but it also muddies the narrative. Reach is being invaded en masse by the Covenant, something we experience in a series of small- to medium-size skirmishes.
In lieu of large-scale, climactic encounters are a handful of set pieces sprinkled throughout the Campaign, built from mechanics outside of the core combat sandbox. These include two ‘rail rides’ along the side of a Falcon, the space combat in Long Night of Solace and the mass driver climax at the end of The Pillar of Autumn. Each plays out like a minigame within the Campaign, and the payoffs are quite mixed.
In particular, the rail rides on Tip of the Spear and Exodus are poor substitutes for open combat. They amount to mowing down on a set of pre-determined enemy positions as the Falcon is flown through a linear path from one location in the mission to another. Fun the first time, they quickly grate on repeat playthroughs and are a prime illustration of why the series has correctly not included them in the past.
Were the rail rides just extra shooting sequences as the missions transitioned from one location to another, this criticism wouldn’t stand. But as the rail rides are replacements for the missing larger battles, it’s difficult to understand why the resources were poured into them instead. There are a lot of bucks on display, but very little bang.
The same art assets we fly past in the canyon rail ride would have been better suited as a ground mission. The territory would have made an ideal Scorpion rampage path. Imagine if we had a choice of either side of the canyon to traverse, offering two different styles of battle on the way to the spire and enabling fire to be exchanged across the chasm. Instead, all those resources amount to some scenery while we memorize turret locations.
Far and away the worst such sequence in Reach are the final few moments before the credits roll in the seat of the MAC cannon on Pillar of Autumn. Literally a game of memorization — Legendary in particular punishes a missed shot or two with death — it primarily serves to illustrate why these kinds of gimmicks were best left out of the rest of the series. Halo’s combat has always been about letting us choose how to approach a battle, and confining us to a chair for the duration of one is an unwelcome addition. It’s everything that Halo’s combat is not about, and it’s particularly disappointing to end the campaign proper on that note.
The most conventional of Reach’s set pieces have an equally small payoff. In an effort to mix the formula up, the final mission in Reach features a trench run near the beginning, rather than the grand finale as in Halo 1 and Halo 3 (ODST as well, a brief coda siege aside). In a further twist, it takes place on a Mongoose rather than in a Warthog or a Banshee. The choice of vehicle was a serious mistake, one that forces the entire sequence to be scaled down. While speedy and agile, the Mongoose also flips easily on a hard turn, doesn’t take jumps as high or as gracefully, often tumbles upon landing and can overturn from even modest bumps in the road. In order to accommodate the Mongoose, the run is smoothed down to a simple, winding dirt road. Effort is put into making things more exciting by throwing all manner of threats along the roadside, from drop pods to Scarabs, but they can only have so much effect when the most exciting part of the drive is a gentle downhill S-curve. The attempt to remix the now-traditional trench run is appreciated, but the execution falls very flat.
The largest standalone set piece in Reach, and the most successful, is the Sabre mission that takes up the middle third of Long Night of Solace. Created whole cloth out of new combat elements, it successfully transfers Halo’s combat style into space combat. The weapon and enemy mixture is small (two weapons, three enemies), but they work together to mirror aspects of Halo’s infantry combat. Banshees (Grunts) are cannon fodder, Seraphs (Elites) are best dispatched by using the machine guns and rockets in tandem to strip shields and land the killing blow, while Phantoms (Hunters) are the heavies and require multiple salvos of missiles. A longer sequence would require more content, but as crafted the battle ends just in time.
The only misstep is in the way the battle escalates; like so many of the ground-based siege battles, it feels mechanical. Wave one is cannon fodder, wave two is a light mix of Seraphs, wave three is a larger mix and in wave four, the heavies (Phantoms) arrive, with each wave literally announced and a break in between. These breaks prevent the battle from growing organically and make the entire sequence play like Firefight in space. The Corvette assault and the subsequent battle do a much better job of selling a small-scale space battle.
As with the ground combat, that battle is smallish in scale, between two capital ships and a handful of smaller combat vessels. A space battle after the bulk of the invasion force had arrived would have held many possibilities for more interesting missions. Nonetheless, the space combat in Reach is a welcome — and gorgeous — break from the normal combat, and as a narrative device, it helps transform Long Night of Solace into a fantastic mission. The three-part arc is one of the most ambitious things ever put into a Halo mission, and for the first time we really get a look at what a squad of Spartans are capable of doing — singlehandedly taking down a Covenant super carrier.
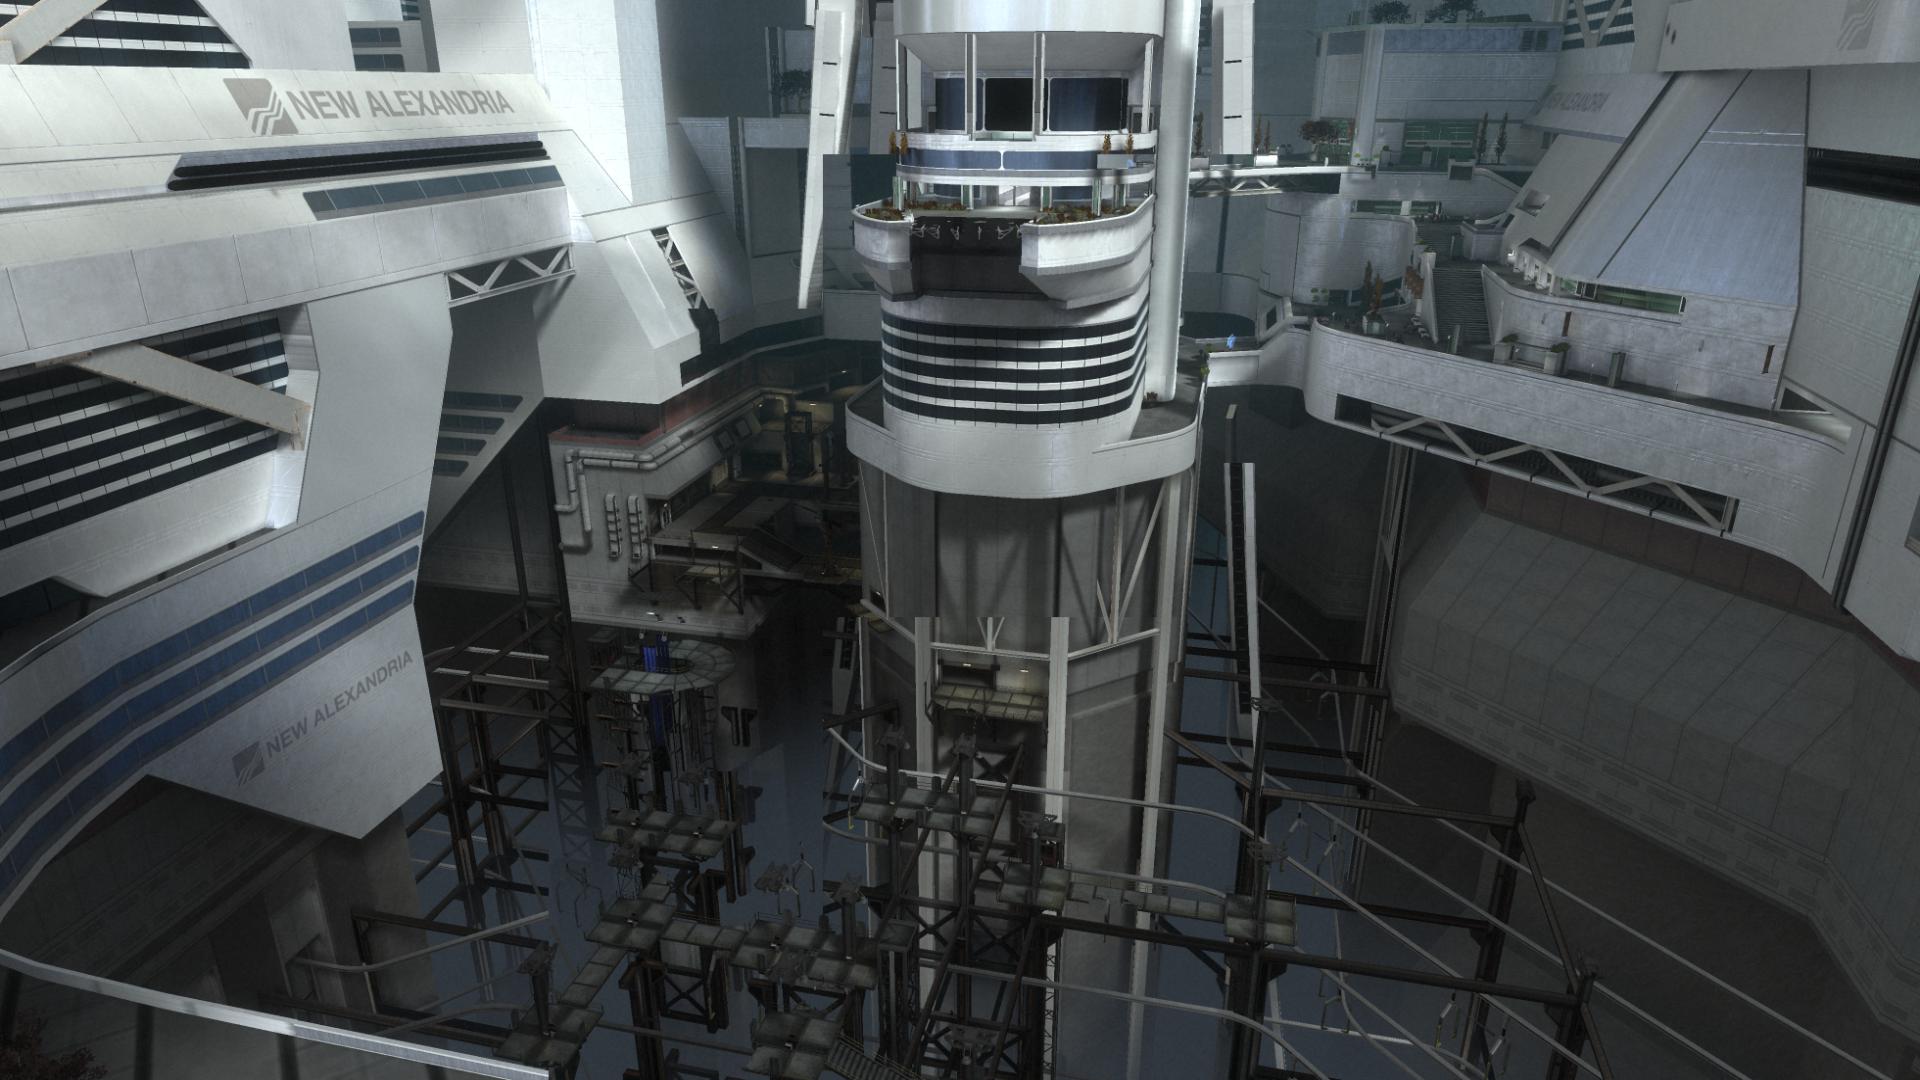
One mission is a sort of set piece unto itself — New Alexandria. Set in the dark, rainy skies over a crumbling, besieged city, both setting and structure make it feel like ODST’s hub city in the sky. Slotting the Falcon into a starring role brings out that vehicle’s strengths and weaknesses. The vast cityscape and extreme verticality put its maneuvering capabilities to the test, and it passes with flying colors. The Falcon feels weighty and powerful, and the locking mechanic used for vertical movement streamlines the complexity of aerial combat. It’s a pleasure to fly, which makes the armament so disappointing. Holding down a trigger and aiming is all that is required, and the steady burst of machine gun fire makes for a boring firing cadence. A secondary firing method put in the pilot’s hands, rather than solely the side gunners, would have added much to the Falcon combat cycle (and so would fighting more than pairs of Banshees and the odd Phantom).

Even though the air combat grows stale, the mission itself does not thanks to the randomized sequencing of its objectives. The order we are given the three communications jammers is random, and the side missions set in between them are selected from a set of nearly a dozen. In remixing the flow of the mission and the territory we cover, New Alexandria is able to compensate for the less-than-engaging air combat. And as a set piece, the final turret-clearing sequence is the most interesting and large-scale vehicle battle in the game. The oddest feature of the mission is the primary goal itself. After the grand sweep of Long Night of Solace and the tightly crafted fallout mission, Exodus, the narrative grinds to a halt as we scour the city to hit three buttons. The beautifully crumbling city itself tells a more compelling story than the events that take place in it.
Medium is Well
In the end, the most successful set pieces are also the most ambitious, set in the skies over New Mombasa and in orbit over Reach itself. But back on the ground, the best encounters in Reach are decidedly smaller in scale. Reach is at its best when encounters are designed around mid-range engagement, where the environment forces combat at a range where all corners of the sandbox can mingle and shine. These encounters offer enough space that the sluggish base movement traits are less a hindrance, yet long range combat is not an option.
The beginning of Pillar of Autumn, the interior of ONI’s Sword Base, the mining facility on Tip of the Spear, the hospital shootout on New Alexandria and infantry sections of Long Night of Solace are all sequences where the combat sandbox excels. The level designs feature the kind of wide, cover-laden battlefields that enable us to select multiple approach vectors and a range of different weapons to support them, without creating a clearly preferential option, and enemy proximity enables a richer mix of weapons to come into play. They play, in short, the way the best Halo encounters can play, but with Reach’s excellent and diverse weapon set.
The problem is, most of the first five missions in the game take place outdoors, with only pockets of medium range combat in the mix. With so much of the campaign set outdoors or in large environments, shooting gallery syndrome sets in for much of the game thanks to the range the rifles provide.
But there are a few outdoor encounters that are able to find ways to make the longer sight lines work. In particular, the battle right after the Mongoose trench run on PoA stands out. The way structures are placed makes it more difficult to sit back and dismantle the encounter as sight lines are broken up, and the Wraith acts as a suppressor, preventing us from setting up in any one position. It forces us to constantly move, make use of cover and encourages experimentation as the battle progresses. The Wraith presents a high risk, high reward target for taking down or commandeering.

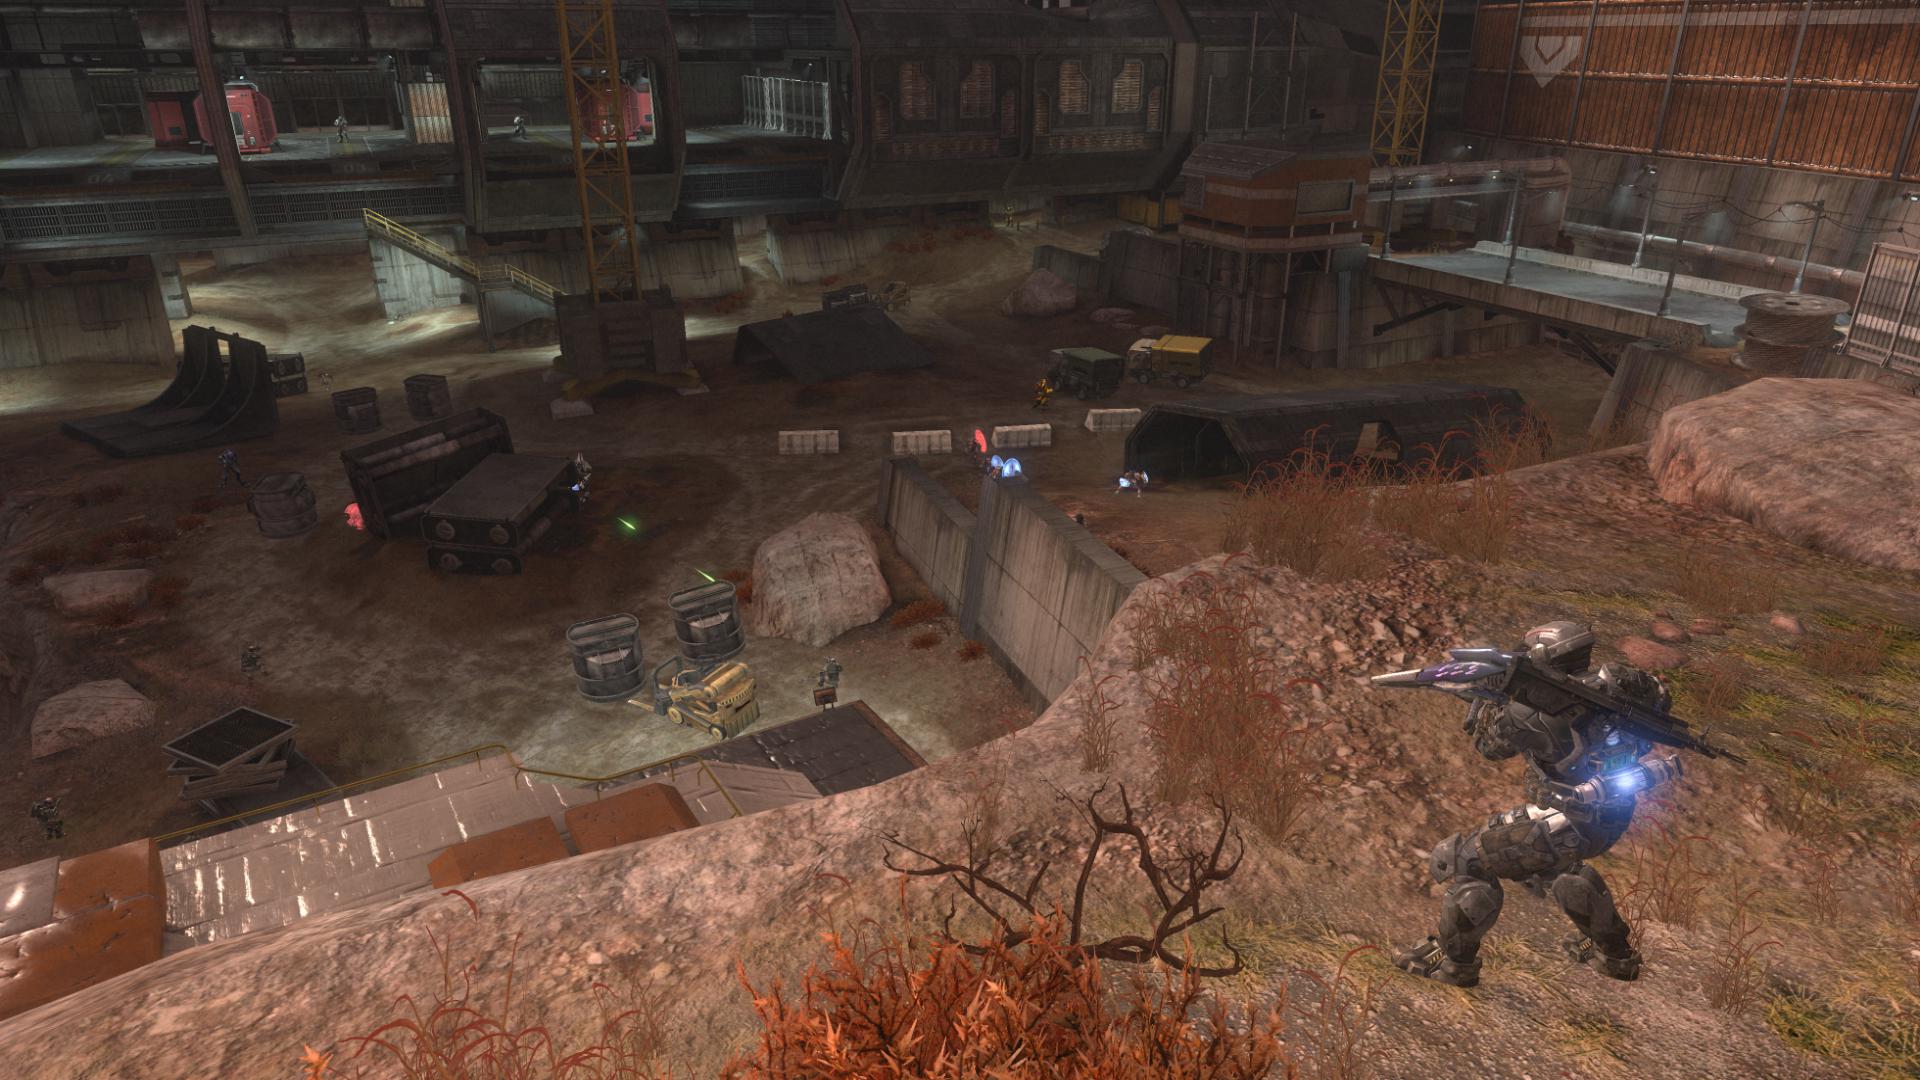
The only mission in the game to hold encounter ranges within this spectrum for its duration is Exodus, and as a result it’s the most continually engaging in the game. There isn’t an encounter in the mission that can be conquered by sitting back untouched with the DMR, yet combat is never cramped. The mission is set around the skyscrapers of New Alexandria, wrapping around and through walkways, landing platforms and apartments. While linear, the layout features layers of side routes, high perches, split staircases and other looping paths to flank or fall back on. Much of the level makes excellent use of the jetpack, though it would be even better were we given the option of using it rather than being stuck with it for much of the mission.
It also makes the most efficient use of space of any mission in Reach. The middle section involves a long, winding trek to a landing pad in need of clearing (in a great touch, we can glimpse the AA guns lifted to it via Phantoms if we look at the right moment). With the pad visible above, we wind through a long series of walkways and balconies, the open center enabling us to keep track of our progress toward the goal. It’s a relatively compact environment that packs a lot of gameplay, which only once resorts to a siege encounter to prolong the trek.
The final combat zone, set on the environment that makes up the Firefight map Beachhead, opens the mission up and lets us hit one of two goals as we see fit. The map is wide open, and we’re free to tackle them from any approach. The catch is the presence of Wraiths, which suppress location camping, and the undulating terrain between the three targets breaks up sight lines into compact mid-range lanes; there is no one place from which the entire battle can be managed. It’s a shame that much of Reach’s outdoor combat is not crafted as well.
Too Much of a Good Thing
Just as excellent gameplay can trump poor level design, so too can poor gameplay design decisions trump good level design, and Reach features a great deal of the latter. Many large environments go underutilized because the encounters are designed around an ideal solution, which undermines what could have been highlights of the campaign. The eagerness to hand us the right tools at the right time combine with the long combat range in ways that undercuts the potential of many encounters.
A good example of this takes place around the second AA gun on Tip of the Spear. A pair of Wraiths and a throng of Covenant infantry are bunched up around the base of the gun tower. A safe distance from that throng is a rack of Needle Rifles, a Plasma Launcher and a drop shield armor ability — just what we need to take out the infantry, Hunters and Wraiths. We can set up camp right where these tools are provided, and the enemy AI will not respond to our tactical advantage — they remain in a clump on the far side of the battlefield. AI that spreads the field or sets shock troops and vehicles in pursuit would make for a much more flexible encounter and better utilize the space. Instead, the end result leaves much of the geometry underutilized as the whole pack can be eliminated by staying near the ammo station, using its supplies. Had the same tools been placed in a hot zone, a reward for breaking through the first ranks, such placement would be more rewarding and the battle more interesting. (The encounter is similarly inflexible should we want to do drive-bys with the provided Ghosts or Revenants — the enemy stays in a convenient clump, regardless of our strategy.)

This same setup is used again in the two largest infantry battles in the game on Pillar of Autumn. After beginning with two excellent encounters from medium range — first when we’re limited to the Magnum, and after the trench run during the Brute/Wraith battle — the mission crumbles in quality. We are provided the high ground and ample DMR ammo as we enter the Boneyard area, which means the considerable cover throughout the battlefield is useless. The Covenant is positioned as fish in a barrel. Had we been given a ground level approach, the entire encounter would play out differently and the cover utilized for flanking tactics.
Likewise, the second half of the Boneyard environment is oddly used. There is no resistance provided in order to reach the all-important high ground inside the partially constructed cruiser. Once there, we have an ideal view over the battlefield, which has a large crowd of Grunts, a few Elites, a Ghost or two and three Shade turrets. Fortunately, we’ve got a fully loaded Sniper Rifle and a Spartan Laser leaning up against the perches, right where they are needed. From the safety of the ship, the entire Covenant pack below is taken out with ease and minimal return fire.
The same environment could have been used very differently. Picture a choice presented to us in the form of a well-defended interior of the partially constructed cruiser in which the power weapons are found. We would have to decide whether to risk taking on, say, a pair of Hunters and a mix of other high-ranking infantry in exchange for those power weapons and high ground, or to bypass that encounter and tackle the defenses from ground level. But as before, Reach never presents us with these choices. We have the DMR or Needle Rifle at all times, and whenever we need something else, it’s on tap. This undercuts even climactic, large battles such as those on Pillar of Autumn and makes them just another shooting gallery.
This is not to say that Reach prevents us from tackling encounters in different ways. The PoA encounters in particular can be flanked, jumped into, worked around to tackle from behind or even skipped entirely. The difference here is rather than presenting an encounter that can be handled any number of ways, encouraging and rewarding experimentation, many encounters feature an approach that is clearly safer and more effective than the others. Players have to deliberately give up advantage in order to make the battles interesting; jump into the barrel of fish rather than sit on the edge with a Sniper Rifle. But every time an FRG round blinds us, or a Concussion Rifle juggles us, or we can’t escape a plasma grenade because our base traits tethered us a bit too much, it encourages us to use the best approaches for the situation. The best Halo encounters had no such optimal method. Rather, the best tactics were the ones that suited our play style, and were discovered to work.
Nice job elaborating on Reach’s strengths and weaknesses – we shared many of the same opinions here, but you did a much better job examining them than my brain did. 🙂
Woah….. there’s a lot of thought in there – I’d never really thought about how the change to DMR really changed up the play from H3/ODST to Reach – I think it’s a sign of a great game where most players would not have noticed this variable change – at least in their first run through.
Cheers
I shared much of these thoughts myself, but as Leviathan has already said, you pulled much more out of it than I managed to.
I really wanted to love Reach, but these rough edges that you touched upon, combined with the loss of signature Halo music (which was much more of Halo than I thought, because I missed it constantly) really hampered it for me.
I still think of Halo 3 when I think of the Halo series in general.
It’s like you took the most wonderfully high level of vocabulary I don’t have and used it to write out exactly how I felt when playing every bit of Reach. Bravo, sir. This surely was a pleasure to read through.
Being able to put words to how Reach makes me feel is a powerful thing.
I liked the Magnum’s roll in campaign. During LASO challenge runs, I’d use it up whenever it was available over using the DMR. Gotta save that precious DMR ammo for the long range encounters. As you know, prepping for LASO or any other high difficulty is an important part of the game plan. If the Magnum is in limited supply during the easier difficulty settings, is that really a problem? Perhaps it’s all part of a required redundancy to accommodate the variety of difficulty settings.
I think I prefer the Halo 3 Hornet over the REACH Falcon. I believe it filled campaign and multiplayer roles better. I know your document is about campaign but the inability for the Falcon to carry objective holding passengers in multiplayer has me ticked off at it.
Regarding the Chopper. You said “a shadow of the Chopper where the gulf between a skilled and unskilled pilot was vast”. I feel you let multiplayer capabilities creep into the discussion here. I doubt driver skill level plays a serious role for either of these two vehicles in campaign. They both have a fairly good stand off capability in campaign though I’m quite sure the Chopper had greater range with easier aiming than the Revenant has. That would make it easier for unskilled pilots to use in campaign. As for multiplayer, I think the story is reversed.
Regarding vehicle health decoupling. I am okay with vehicle strength being completely independent from personal health. I also believe occupants with any shields and full health should survive the exploding vehicle. While playing campaign, this situation was never a problem for me. It is a bigger problem in multiplayer.
I am very impressed with your inclusion of video examples.
Absolutely spot on. Many issues in this article are ones which I picked up myself but couldn’t seem to fathom [i]how[/i] it was an issue, something which you have enlightened to me now. I have to agree with HSAR’s opinion of Halo 3 being the monument of Haloness. I think we will see these issues much more clearly when Halo:CEA is released. Thanks for writing such a brilliantly thought out article.
Wow, italics fail on my behalf ^. Still kinda new to that kinda stuff =D
Regarding the Crow’s Nest, hallway and Brute encounter. I always used the same approach with the BR as I now do with the DMR. Whittle away the shields or armour with lesser weapons and then headshot them with the BR. There was a perfect yet narrow range for this combat to occur. So I guess I disagree with your opinion on the BR vs DMR in some situations even though I agree the DMR has a greater effective range.
One thing that must be considered is, the statistical information the developer has acquired from previous titles. I.E. They know how many people have completed the campaign and on what difficulties. Some of the design decisions you are unhappy with may have been the result of an effort to attract more players into playing further into the game and at greater difficulty settings. If successful, the game could become more satisfying to a larger player base. The side effect of such efforts is the loss of the game’s long standing veterans. Perhaps such losses are inconsequential when it comes to selling games and dare I say, ‘beneficial’.
Sorry for the multiple posts. I am not sure when I’ll stop reading the article and when I might get back to it. So I am reading a bit and posting a bit.
The space flight sections were what I enjoyed the least. Like so many flight/space battles, you wind up chasing pixels. Specks of information on the screen which you target and destroy. The enemy is rarely close and the narrow POV makes for either extremely difficult or very easy combat. Once I learned to hide behind the main station structure or behind the Savannah later on, the battles became boring while praying not to get killed on the higher difficulty settings. I simply endured the situation.
I was skimming at the end because it was so extensive and my attention span had expired. Perhaps you should have released this in segments starting months ago.
Great write up GhaleonEB. I’ll bet a couple of developers, who are near and dear to us, are going read this very carefully.
Much of what’ve you said, I agree with. It’s a superb analysis. There is one bit though, which disappointed me more than any other facet of Reach’s design, and that’s the story.
In the FoR novel, there are incredible opportunities to create the greatest Halo campaign of all time. Almost all were ignored. We get no true sense of grandeur, or epicness, save for the truly brilliant New Alexandria mission. Noble’s Spartans are very poorly utilised, as you pointed out. The game failed for me, spectacularly, and was almost insultingly easy to complete on Legendary. Only the Halo 2 campaign failed worse than this, in my opinion. If I want to remember Halo ten years from now, I’ll play Halos 1, 3 and ODST…and Reach will lie forgotten.
I hope 343i take head of your comments about friendly AI and your comments about their driving.
If 343i can’t fix friendly driving then don’t have them drive unless they have been told to drive via script. Or… there are plenty of spare buttons and axes available when you are a hog gunner for giving the driver instructions (stop/go, directions) and for fast position switches that wouldn’t even require dismounting.
We should have Warthogs in Halo 4 but will we have friendlies?
-PS
You can ditch Jorge in the spire encounter – equip jetpack and drive one of the trucks. Jorge will take his gunner position and then you can drive the truck over the cliff. Jorge will have no hard feelings about it and will give you encouraging comments from time to time from his position at the base of the cliff.
You will find it easier to board a Banshee without Jorge shooting both craft out of the skies.
I disagree on multiple points. The biggest one has to be saying that Combat Evolved had a rafined combat. Once the Magnum was introduced, all of the levels became a walk in the park. The only moderately difficult level was Truth and Reconciliation, and that was because it had no Magnum. That Pistol, like the DMR, lead fight on long ranges where enemies did not stand a chance, and it was, honestly, the best weapon for all enemies and ammo for it was abundant.
Another thing I disagree is on weapon “babysitting”. Combat Evolved did have that…in massive amounts. Take Assault on the Control Room, once you get outside you have a Sniper and Rocket. Ok? You are basically set for the rest of the level. There is ammo in the first area you find them, then there’s ammo in the next area near the Scorpion (another tool that makes the level a cake walk), then you have ammo inside the cave, once outside you have, yet again ammo near the pillar structure in the next canyon. Once you go through there, you have ammo again after you defeat the hunters. Another thing is that massive battles are seldom avoided by the use of active camo, which is found in lots of convenient places. The camo in AotCR is found in the big pillar, and it gives you enough time to make it to another one where the Marines are pinned down by the Hunters, and that ones allows you to run from a massive army. The saddest thing is that, without that camo, you could have actually helped the marines which were pinned down from the Shades, but no. Another one is found in the invis elite room, and allows you to walk outside in the Control Room canyon and jack a Banshee and end the level…? All you need is to replay the level and you are set. Like you said in some cases in Reach, you can diversify the combat, but you are risking by not accepting the easier way out. That is true in the encounter I mentioned earlier. Why fight your way to the pyramid when you can just jack the Banshee and skip?
Another thing that i disagree is the Marine/Noble team friendly AI. Noble team needs to be the meat shields, the NPCs that kill few enemies, since they are pretty much invincible, they are automatically overpowered. If you have enough patience, you ca let them do everything, yet it takes a long time. That’s the general concept of not making hard difficulties easier by aid of invincible allies. As for Marines, they will generally do a good job at shooting, I mean you can play easy normal, and see that they do a pretty good job, the only thing they really don not do well is driving, i agree on this. Their driving is horrible. But aside from that, as in previous Halos, arming them with better weapons will give you a great advantage. In ONI, i got Kat on the Gauss turret, and a rocket marine in the side seat. They tore through everything, yet you still had to drive them well. The Hog is a teamwork vehicles, be it in MM or Campaign, bot the driver and gunner need to do something. If you just drive the Hog close, stop and expect the AI to kill everything, the enemy will take advantage of that. You need to navigate the vehicle so that the gunner has a chance to shoot, while the enemy has a hard time to react.
Yet another thing is the vehicles, they do “seems” to have a random explosion pattern, but it is not the case once you start to learn them. Revys and Wraiths can take a beating and will not explode even when smoking. Ghosts and Warthogs will once the vehicle’s body begins to degrade and when fire/smoke rises from it. In that case, the solutions are to either abandon it or to driver through and maneuver is such a way as to not get shot. Elementary. And the Revenant has a pretty big role. It’s the medium assault vehicles between the overpowered wraith and underpowered Ghost. It fills in the gap of defending medium sized area with moderate firepower, and somewhat resembles the Prowler by the added passenger.
Spectacular write up, but I’m going to disagree with your analysis of Lone Wolf. It just seemed tacked on to me, like Bungie said ‘whoops, we forgot to kill off Noble 6, let’s just throw him up against some enemies in an unwinnable situation’. I would have preferred that Noble 6 die at the end of PoA, perhaps sacrificing himself somehow so the PoA could safely escape. This could have even mirrored Jorge’s death, ie, someone has to stay behind to arm the bomb. Otherwise I just felt that Lone Wolf was a rather lazy way to have Noble 6 die off, and not even in an honorable or inspiring way.