Uplift Reserve
Mombasa Streets: ‘Uplift Reserve’ – ‘Tayari Plaza’ Interim

The Rookie has gotten all the use out of the helmet as he’s going to get.

In the distance, the Superintendent lights the way with signs to your next flashback. Backtracking is the quickest way out. Smooth music accompanies to your journey.
You’ll stumble across two patrolling Grunts in the tight corridors on your way down. After exiting the building, the Rookie’s situation gets a little more interesting.

A whole section of the city is open to the player now. Viewing the map you downloaded from the Superintendent will reveal the location of all the flashback items. The player can do them in any order, but in all my games of ODST I’ve never strayed from the chronological sequence. The Superintendent won’t fail you should you choose to follow this path. Through the signs and billboards that dot the streets, he’ll show you the way, and there’s a marker in your HUD that’ll automatically load to show the location of the next chronological flashback item to further assist you.
The rain has tapered off. The sky has also calmed considerably; the lightning and thunder have moved on.
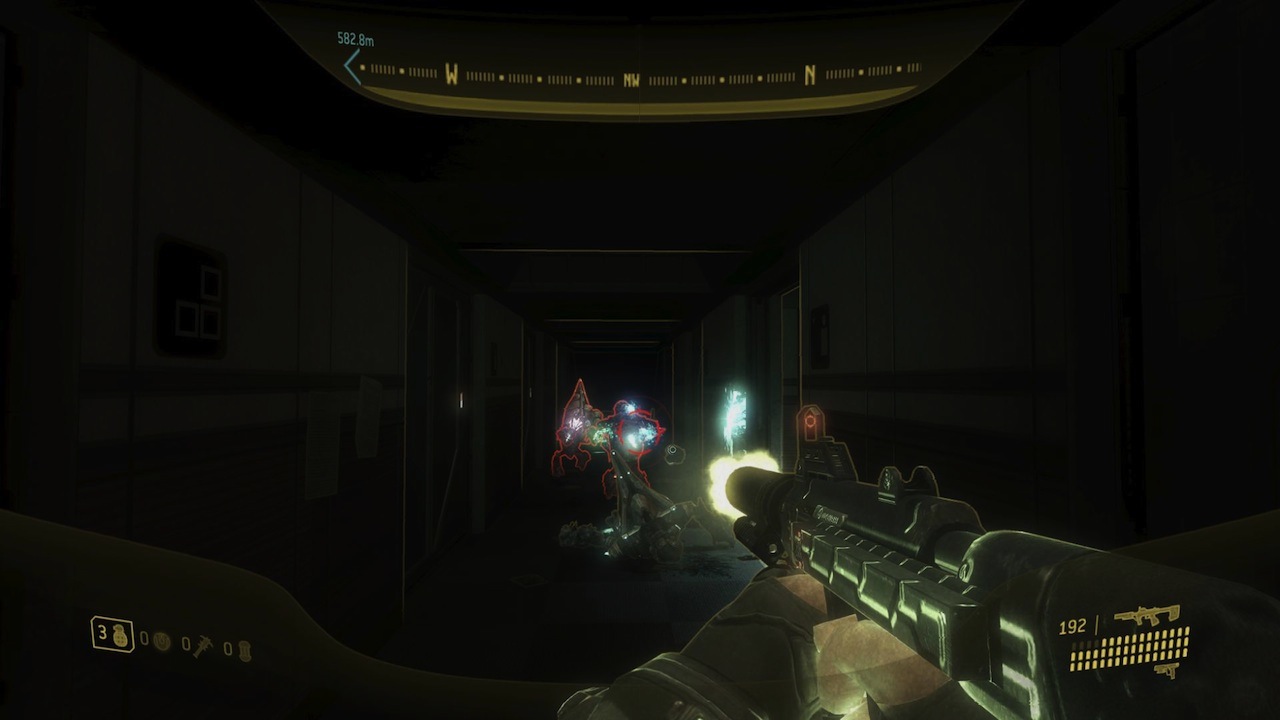
Traveling to the next flashback item, you’ll have a unique opportunity to witness the Covenant’s treatment of the Engineers.

Brute #1: “Hold the creature still!”
Brute #2: “Place the charge, before I lose my grip.”
“It’s armed!”
Brute #1: “And ready to explode if any human gets too close.”

Because of the layout of the city, there are many ways to surprise–or avoid–the wandering Covenant patrols. This group of Brutes is no different, and should be much easier to take care of relative to the same situation without the advantage.

Limiting your weapons fire to the Brutes doesn’t save the Engineer. With a desperate, worthless cry for help, it explodes.
The Covenant aren’t only monsters to humans.
Taking careful routes to avoid the numerous Covenant patrols between you and your next clue, or taking the fight to them, the Rookie manages to get where he needs to be. If you take the most direct route, you’ll notice that you’re making your way through parts of Kizingo Boulevard.

At thirty meters out, you’re in the immediate vicinity. There’s a crashed drone fighter in the middle of the roundabout; a hint at what’s to come. No matter how you entered the area (there are three ways in), more than likely you’ll see a peculiar-looking structure next to the wreckage of a Warthog.

This building houses a weapons cache, a reward for unlocking the “Sadie’s Story” audio logs. There are many of these plotted at various points in similar structures throughout the city. You’ll always find pistol and S-SMG ammo within, but you may also find find rockets, snipers, or even a mongoose–making traveling the city much easier.

An optical drone is some feet away in the middle of the road. This is your next clue.

The day’s events, though only six hours ago, are long gone. The fight for the surface, however, is far from over.
In fact, it’s only just begun.
Uplift Reserve
Thirty minutes after drop, Dutch (voiced by Adam Baldwin), emerges from his HEV on a short beach. A pair of UNSC F99s fly overhead.

Dutch: “Good hunting, boys. I’m keeping my boots on the ground.”

Corporal Taylor H. “Dutch” Miles is the heavy-weapon specialist of our group of ODSTs. The man walks out of his drop pod sporting none other than the Spartan laser, ready to lay waste to any Covenant that cross his path.

Looking towards the sky, the player can see that the effects of the in-atmosphere slipspace jump still linger, now battling with the pollution from the war below. The sky shines a sunny gold that clashes with the brown and black clouds of smoke.
A short path leads you farther inland from the beach. Posters of animals litter the ground, scattered by fallen trees. Sadly, you won’t encounter much in the way of wildlife, but there’s still plenty of activity on the preserve.

Exiting from the narrow pathway puts you at one end of a wide battlefield, far larger than anything you saw in Tayari Plaza. Everything about this moment tells you you’re in for one hell of a level, and vehicles are going to play a large role. Marines fight it out with Brutes near an overturned Warthog. The sounds of Wraith fire, Warthog turrets, and other vehicle weapons fire complete the battleground ambiance. The Marines waste no time calling for your assistance.

Marine: “Trooper, over here! Help us secure this vehicle!”
This situation is not unlike others found throughout the Halo games; way back in “Assault on the Control Room” the Chief also encountered pinned Marines by an overturned vehicle. The player doesn’t have to help out the Marines, however. The battle is very expansive with many ways to approach it. You’re packing a Spartan laser, so going through the encounter entirely on foot, using your heavy weapon to take out the Wraiths and using stickies from dead enemies to take out the Choppers and Ghosts isn’t out of the question. The player can follow the Marine’s advice, but there is an abandoned–and upright–Warthog near the back of the battlefield waiting to be used. There are also numerous Choppers and Ghosts running around offering a chance to be boarded.

Marine: “Thanks for the assist, Trooper! Get this Warthog movin’, our CO needs us to clear this sector.”
Dutch: “Affirmative.”
Whether or not you use the Warthog (and the Marine will continue to suggest you do if you don’t), the Marine will offer advice on how to tackle the current battle.
Marine: “Watch that Chopper! Hit it head on and it’ll tear us to pieces.”
“Keep movin’! Don’t let that Wraith take a shot at us!”
“Swing behind the Wraith; it’s got less armor in back!”

The approach you take will alter your strategy. If you hop in a vehicle, you should take out the Choppers and the Ghosts before moving on to the Wraiths; you’ll have a hard time taking out the heavy armor while Ghosts and Choppers pepper you with fire from all directions.
Should you choose to traverse the battle on foot, you should take out the Wraiths first with your laser, lest you get killed by a Wraith mortar when dealing with the Ghosts and the Choppers. If you’re trying for the Vidmaster Classic, you can also grab a vehicle and try to boost your way through the narrow pass and avoid combat altogether, although it’s difficult to proceed unscathed.
Once you clear the area, you’ll be treated to more combat chatter.

Marine: “Colonel! Sector’s clear and we found some backup.”
Colonel: “Say again, Marine? I got drones overhead and ONI brass yelling in my ear.”
Dutch: “ODST reporting for duty, sir!”
Colonel: “Nice of you to drop in, Trooper. Head to the next section of the park, to my second platoon’s location. They’re taking heavy causalities, need immediate assistance.”
Dutch: “Roger that, I’m Oscar Mike.”
Marine: “Where’s the rest of your team, Trooper?”
Dutch: “Scattered, dead. I don’t know.”
Marine: “That’s too bad. We’re gonna need all the men we can get.”
That dialogue is all the downtime you’re going to get between battles. The next encounter is a relatively simple one compared to the level’s first.

A lone Covenant gravity platform rises above a small hill. It isn’t heavily staffed. A pair of Jackals stand at the front, a trio of Grunts guard on one side. Two Brutes and a fuel-rod Grunt occupy the actual platform. Whatever vehicle you’ve commandeered changes your options. The Ghost isn’t optimal at destroying the platform, so instead you should focus on ramming and firing at the ground troops. The Chopper and the Warthog, on the other hand, destroy the platform with relative ease and make quick work of the sparsely-populated encampment. If you’ve decided to proceed with a Ghost or a Chopper, you can have as much as three Warthogs accompany you through to this encounter.
Of course, if you still have some charge left on your laser, that’ll take care of the platform nice and quick.
Over the hill there’s a small pond with a lone Ghost hovering nearby. If you don’t take care of it, any remaining AI allies will be happy to do the honors instead.

Banshees fly in and try to scatter your group. A Chopper or a Warthog should be able to shoot them out of the sky with ease. You only have to destroy one Banshee to make the rest flee.
The next encampment of Covenant is larger and better equipped to handle anything that comes their way. However you want to tackle this encounter, it is highly inadvisable to fight this group of Covenant from below. The area the Covenant overlook is essentially a giant bowl, and will make short work of anyone who remains stationary for too long. A Chopper and three plasma turrets are not something you want to go up against when you don’t have the high ground.
Instead, charge through the bowl and up the side path in front of the wall. Whatever I’m driving I always charge full speed ahead into the Covenant turret on the far left.

The Chopper is an oddball. If you can get him out of the way before moving up the side ramp, that’s the best case scenario. If you leave him behind as you rush forward, your AI buddies will most likely pick up the slack. Either way, better to take care of him after you’ve disposed of the turrets.
If you’re close enough to the Brute captain, you’ll hear him give orders to a nearby Grunt.

Brute Captain: “Warn the Chieftain! The enemy has breached our lines!”
I’ve never noticed any difference in the following encounters if you take out the Grunt in the Ghost before he speeds away.
Your convoy of AI allies will be at your side into the next encounter. There are four Grunts over a small hill that are mere bumps under your vehicle. At this point the colonel will chime in to update you on the mission at hand.

Colonel: “Trooper, you’re almost at second platoon’s location. Give ‘em a hand and push toward the primary objective!”
Dutch: “What is the objective, Colonel?”
Colonel: “You know the Covenant carrier that slipped away from the city? We need to secure its old LZ. Snatch a Tier One asset.”
What follows is not only my favorite encounter of the entire level, but of the entire game.
The battle is already underway when you arrive. Gunfire, Chopper weapons, Wraith mortars, and Ghosts’ plasma cannons blanket the battlefield. Its up to you and whatever reinforcements you’ve brought to tip the balance into the UNSC’s favor.
What probably catches the player’s eye first is the huge structure in the middle. Here is where most of the Marines are holed up, surrounded by the Covenant. This structure is key to tackling this encounter if you’ve decided to handle the situation on foot; it houses a Spartan laser, stationary turrets, several rockets, three snipers, and some extra ammunition for your M6D and silenced SMG.
For those handling the battle in vehicles, the central building, including the several hills that plot the landscape, provide much needed cover. If you find yourself taking heavy fire from the numerous Choppers and Ghosts, swing around the building or any of the hills. Cat and mouse games with the AI around the building can and do happen.

Marine: “Trooper, this is second platoon! See what you can do about those Wraiths!”
Dutch: “Where’s the Colonel?”
Marine: “He’s near the Covenant LZ! Once we take out this enemy armor, we can roll across the bridge to his location.”
Unlike the building, the Covenant have the nearby hill thoroughly occupied. A Wraith, a squad of Brutes, a Covenant gravity platform, and two stationary turrets make a mockery of the earlier, smaller hill you came across.

Most play-styles will lead to this encounter unfolding into two parts: the building and surrounding vehicles, and then the hill behind it. The Covenant, as usual, sends out its smaller vehicles first. You’re going to have to deal with these guys immediately. Depending on how many AI buddies you’ve brought to the fight, these small portions can give you varying degrees of trouble. Just make sure to watch out for those Wraith shots that will pepper your fights with the small vehicles.
Dealing with the encounter sans vehicles almost always leads the player to the building. From there, the Ghosts, Choppers, and most of the Covenant camp on the big hill are easy pickings for the provided power weaponry.
Either way, you’ll have to move on from the building to the other half of the encounter once you’ve taken care of whatever the Covenant is willing to throw at you. The Wraiths don’t move from their position on top and behind the hill unless you advance to within a certain distance. They aren’t the only enemies you have to deal with. Whatever remains of the Covenant encampment on the hill will provide cover fire for the Wraiths, and a Chopper stays behind to back up the heavy armor. Infantry, most of the time one or two Brute captains and a squad of Grunts, take up forward position to either sides of the advancing Wraiths. Only one Wraith will advance at a time as the passage way is a narrow one.

On my playthrough for this article, one of my AI companions picked up a Marine with a Spartan laser. Not only did the Wraiths had to deal with the combined fire power of three Warthogs and my Ghost, but they also had to deal with a highly mobile–and accurate–Spartan laser. Needless to say they crumbled under the combined weight.
Approaching the Wraiths on foot is not something to be handled lightly. Get too close and you’ll be gunned down by its turret. Be too far away and you’ll be easy picking for the Wraith’s mortar. From the hills, you can safely attack the Wraiths with your heavy armaments without exposing yourself to too much risk. The challenge is getting yourself into such a position while avoiding the Covenant infantry and weapons fire from the Wraiths.
Marine: “Trooper, drive toward the space elevator. It’ll lead you to the bridge.”
With the Wraiths out of the way and the area secured, it’s time to move on to the Covenant’s old LZ. Driving across the bridge, you’ll witness another devastating effect of the Covenant’s invasion of the city.

Marine: “Look, the elevator! INCOMING!”
The New Mombasa Space Elevator collapses. Huge swaths of debris scatter everywhere across the city and the outlying savannah; these pieces will decorate the Chief’s escape from Crow’s Nest in “Tsavo Highway”.
Dutch: “What the hell just happened?”
Marine: “Slipspace rupture! Must have weakened the support rings.”
Colonel: “All units, (coughs) target assets are…on the move. Everyone clear the area…before more debris comes down. (coughs)”
Marine: “Colonel? Sir?! Dammit, he’s gone. Trooper, head up the hill! We gotta find a way out of this park.”
A keen observer will note “Uplift Reserve” follows a certain pattern when it comes to its encounters. The level begins with a big battle. After that you deal with a small Covenant encampment, followed by a larger encounter, then a big battle. The crescendo pattern is about to repeat itself.
Once the dust clears, you’re looking at a Covenant gravity platform and two stationary turrets. One or two Brutes will be near the gravity platform; most of the Covenant in this encounter will be Jackals and Grunts.

The battle is pretty easy to get through in any vehicle and should be just as easy to clear it without a vehicle if you held on to some heavy weapons from the last battle.
The path behind the Covenant base leads to a more interesting fight, not only because of its larger scope, but for the fiction behind it.

In Combat Evolved you assaulted a Covenant ship from the ground via its gravity lift. In Halo 2 Regret’s ship flew through a hole in Earth’s defenses and parked his ship just outside New Mombasa. In the city levels of that game, you never got very close to the ship, but you always saw it in the background with its gravity lift conspicuously operational.
Five years after Halo 2’s release, ODST brings you to the landing zone of Regret’s ship. The base was left behind as Regret was in quite a hurry to leave.

Combat drones fly overhead as you crest the top of the path. A Brute in a Ghost, two Jackals, and a stationary turret are there to greet you.
There are one or two Brutes with Brute Shots standing tall in the center of the base of the gravity platform. If you’re not too careful your vehicle will get knocked over, and there couldn’t be a worse time for that than when you’re engaging the Wraith. If you’re in a highly maneuverable vehicle, you can run circles around the gravity platform without too much trouble. In a Ghost or on foot? Take out that infantry first.
Brutes aren’t the only ones on the platform. Several Grunts are providing support, but once the Brutes fall they’ll scatter and be easy to mow down. If you have a sniper rifle from the battle right before the bridge, that’s a great way to take out any Covenant on the platform. There’s a Spartan laser and some rocket ammunition in this large ditch at the far side of the area; perfect means to take out the Wraith. Pay attention to the Marines a little more closely after the battle concludes, and you’ll encounter this game’s Crazed Marine, previously seen in the levels “343 Guilty Spark” and “Floodgate”.
Crazed Marine: “No, no, no! You’re not listening! It’s a zoo, okay?”
Medic: “Well, technically it’s a corporate-funded wildlife reserve.”
Crazed Marine: “Semantics! This whole place is one…big…cage!”
Medic: “Listen, Marine. You’re wounded; you need to try and relax.”
Crazed Marine: “Except we, we’re the zebras. All fenced in…and ready for the slaughter!”
Medic: “And the Covenant?”
Crazed Marine: “They’re the lions…RAWR!”
Medic: “Careful. I think you just strained a metaphor.”
Crazed Marine: “Oh, oh god! Is that…serious?”
Medic: “Only if you keep it up.”
There’s a Warthog next to these bumbling Marines that you can take advantage of if your current vehicle is in bad shape.
Leaving the area you’ll see one of the support rings from the space elevator overhead. More wreckage dots your route as you make your way to the last encounter of the level. The burning tower that was once the space elevator is quite noticeable in the background. A lone Brute can be seen fleeing towards the next encounter to meet up with reinforcements. Kill him before he has a chance to kill you.
Covenant barricades help protect a group of three or four Grunts at the end of your route. They’re still easy enough to take care of.

This last encounter is probably the most difficult of the entire level. Ninety percent of the time you will get killed if you try to rush in guns blazing, although it’s possible to sneak around the right side and speed to the level’s end. As you can only enter this encounter one way, the Covenant has you boxed in, making it extremely difficulty to take out one group of Covenant without getting killed by the other two.
Covenant barricades help protect two Brutes, each operating a stationary turret, to your left, and a Wraith is on the far left blocking the exit. To make matters worse, a squad of about four or five brutes, including a chieftain with a fuel-rod gun, and a Jackal with a Carbine, crowd around a destroyed gravity platform to your right. These enemies and all the wreckage in the area to give you cover makes the encounter feel much smaller than it is.
Unlike most encounters in vehicle-centric missions, this encounter is easiest to clear on foot. The area is very narrow and offers little-to-no space to maneuver.
The Brutes operating the turrets should be the first to go as they’re the closest. Because of the barricades they’re behind, they’re extremely difficult to attack with any vehicle, so it is recommended that you take ’em out on foot. The barricades should act as a cover from the Brute squad on the far right of the area–but not from the Wraith!–leaving you to be able to fix most of your concentration on them.

Brute Chieftain: “Let no humans escape, to say what they have seen!”
Once the turret Brutes have been disposed, you’re now in a better position to tackle the two bigger threats. The wreckage of a destroyed Wraith is great for cover against the fire from the Wraith and avoiding any weapons fire from the Brute squad. If you’ve managed to keep the sniper from the huge battle before the bridge up to this point, now would be the perfect opportunity to use it. If you’re lucky you can severely weaken the pack of Brutes with the weapons of a Ghost or a Chopper from the entrance, then hop out to clean them up.

With the Brute Chieftain and his pack out of the way, leaving a radioactive, green present, it is time to take care of the Wraith. The Brute Chieftain being gone frees you up for one last vehicle brawl should you choose to take advantage of the situation. Of course it might just be easier to take the Wraith out with the Chieftain’s FRG.
Marine: “Find a hole in the wall, Trooper! Drive right through!”
Dutch does just that. He makes a rather hard landing and bails out of his vehicle before it hits a wall.

Dutch: “Uh, lord? I didn’t train to be a pilot. Tell me I don’t have any more flying to do today.”
A drone crashes into the statue behind Dutch. The optics is thrown from the drone and displaced into the street.

Dutch: “So…was that a yes or a no?”
Dutch’s vehicle–which dynamically changes based on what the player ended the level with–promptly explodes.

Dutch: “Amen.”
Playing through ODST for the first time, players will miss a few things; events clearer after knowing the whole story. The “tier-one asset” the Colonel talks about is Virgil (rather, the Engineer who will merge with Virgil), and the reason it was “on the move” was to get away from the Covenant.
The destruction of the New Mombasa Space Elevator is a moment that’s not easily forgotten. The elevator appears in three games in some form or another, and seeing it collapse hits a narrative mark that are too far between in most Halo games. It’s a tangible effect of the Covenant’s war with humanity. A prelude to the city’s eventual destruction.
“Uplift Reserve” is the first of two missions the player takes control of Dutch, but his actions play directly into the narrative of the next mission.
[…] at the encounters, the easter eggs and the joys of being the Rookie on the streets of New Mombasa. The newest entry covers the outdoor vehicular combat of “Uplift […]
I’ve done this entire level on normal letting the AI drive with my manning the gun, they even drive through the hole in the wall at the very end.